
Your needle freezes mid-stitch. The motor cuts out as you hem toddler pants. That distinctive Singer hum vanishes—leaving you stranded with half-finished fabric. When your Singer sewing machine stops working unexpectedly, panic sets in fast. But here’s the relief: 90% of Singer stoppages require no tools, cost nothing to fix, and take under 90 seconds. This guide cuts through generic advice to deliver exact solutions pulled straight from Singer’s technical documentation. You’ll diagnose whether it’s a $0 rethreading job or a critical issue needing professional help—no guesswork.
Stop scrolling through vague YouTube videos. Grab your machine’s manual (yes, that dusty book in your cabinet), your seam ripper, and let’s get your Singer sewing machine working again today.
Why Your Singer Needle Freezes Mid-Seam
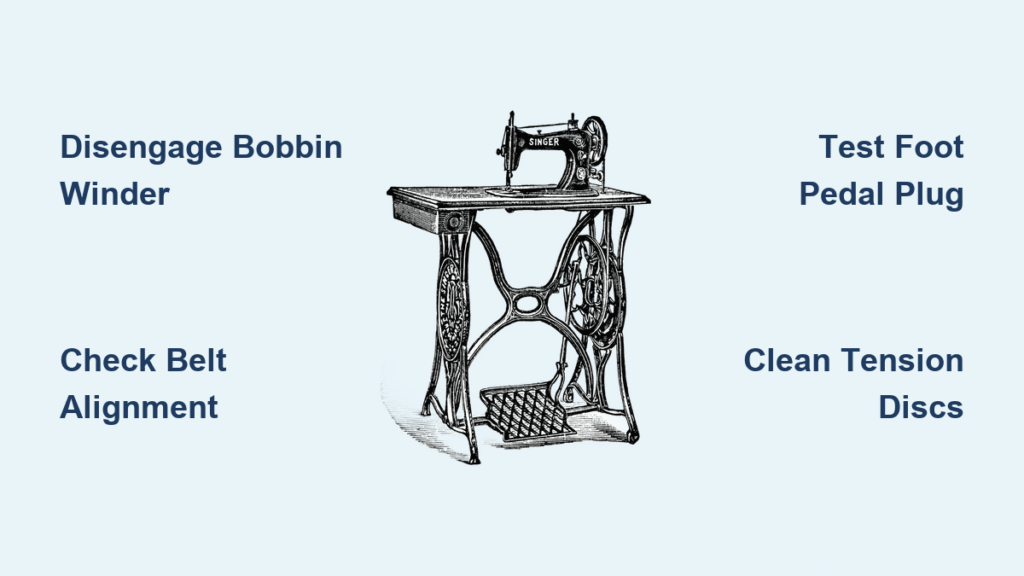
Disengage the Bobbin Winder Immediately
That frozen needle? 9 times out of 10, your bobbin-winder spindle is accidentally slid right. Look at the handwheel end: if the spindle protrudes horizontally (winding position), it physically disconnects the needle mechanism. Push it firmly left until it clicks back into sewing position. Test by turning the handwheel—you should feel smooth resistance, not grinding. If the spindle won’t move, power off and check for thread jamming the winder gears.
Belt Slippage: The Silent Killer

Remove your machine’s side cover (consult your manual for screw locations). If the rubber belt lies loose in the base or dangles off the motor pulley, that’s your culprit. Slip it back over both pulleys—thumb and forefinger only—then hand-turn the wheel. Critical check: Press the belt midway; if it stretches over ½ inch, replace it ($8 online). Never force a stiff wheel—you’ll crack gears. If reseating the belt doesn’t restore motion, skip to internal jam checks below.
Foot Pedal Dead? Diagnose in 60 Seconds
Test the Pedal Plug Like a Pro
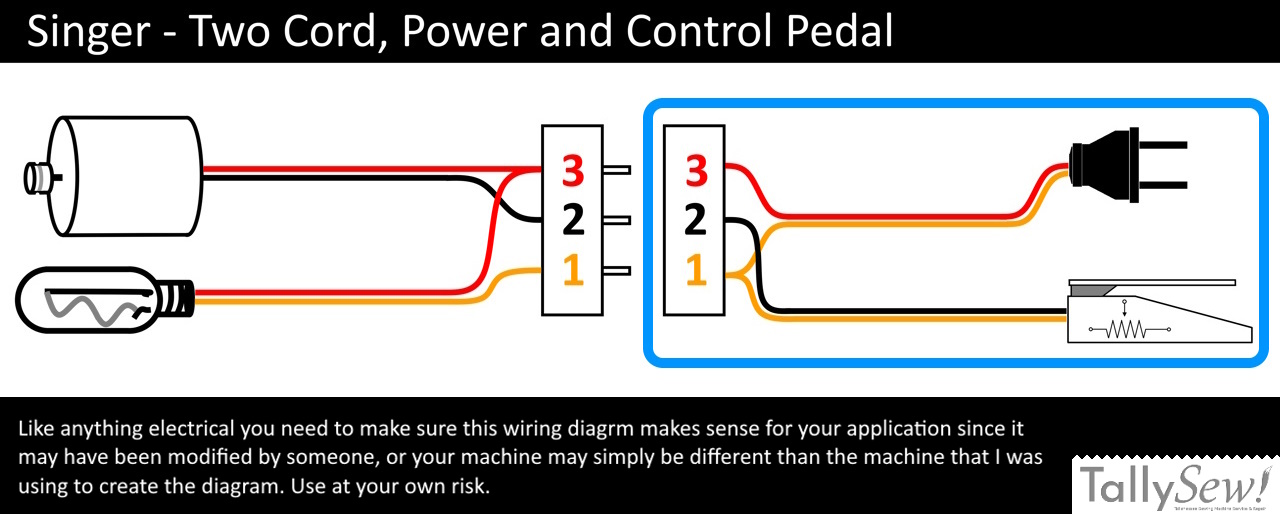
Unplug the foot control and inspect the metal prongs. Bent prongs won’t make contact—gently straighten with needle-nose pliers. Now push the plug hard into the machine until you hear a distinct click. Wiggle it slightly; if the motor sputters, the connection is faulty. Models with dual pedal ports (like Singer Quantum Stylist 9960) let you test in the alternate socket—do this now. Still dead? Move to fuse checks.
The Quiet Alarm Tells All
Press the pedal and listen closely. A faint click or chirp means your internal fuse blew—not the pedal. Follow the fuse replacement steps in Section 1.1 of your manual: unplug, wait 5 minutes, locate the fuse cover near the power cord entry, and swap in an identical amperage fuse. Never use a higher-amp fuse—it risks fire. If the pedal works after fuse replacement, you’ve saved $120 in service fees.
Thread Keeps Breaking? Stop Wasting Time
Re-Thread With Foot UP—Not Down
This is non-negotiable. Raise your presser foot before threading—this opens the tension discs so thread seats correctly. Follow the printed path on your machine’s arm exactly. Miss the take-up lever? That causes 70% of breaks. To confirm: tug the thread after threading; it should snap between the tension discs with audible resistance. If it slides through smoothly, start over.
Match Needle Size to Fabric Now
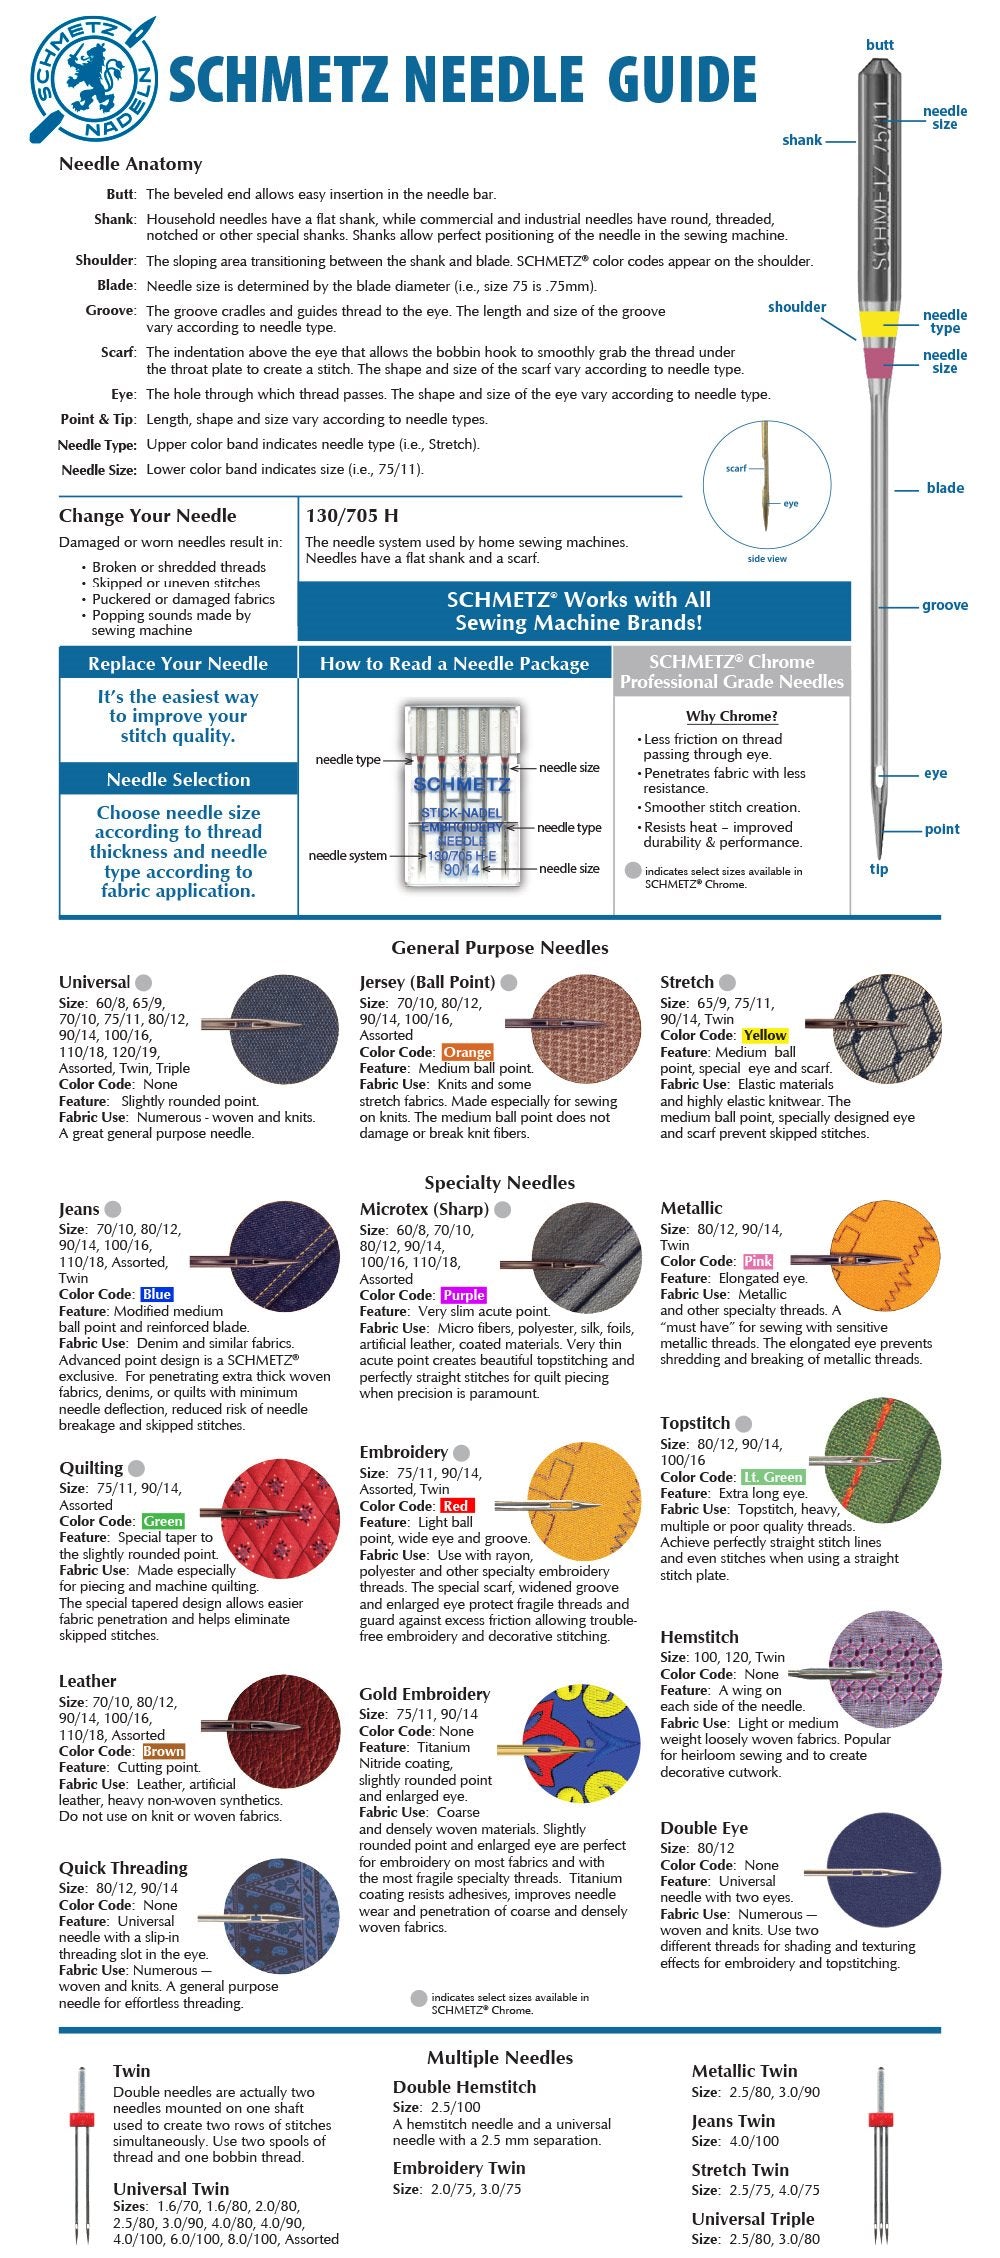
Sewing denim with a size 70/10 needle? That’s why your thread shreds. Swap immediately:
– Silk/chiffon: 60/8–70/10 needle
– Quilting cotton: 80/12–90/14
– Denim/Canvas: 100/16–110/18
Pro tip: Run your fingernail over the needle eye—if it snags, replace it. A microscopic burr invisible to the eye shreds thread.
Clean Tension Discs in 20 Seconds
Remove the faceplate (usually 1–2 screws). Shine a flashlight between the metal tension discs. One strand of lint acts like a razor—flick it out with a soft brush or folded business card edge. Never use metal tools; you’ll scratch discs and ruin tension. Test on scrap fabric—thread should glide smoothly without breaks.
Bobbin Thread Tangles? Solve Birdnesting Fast
Check Bobbin Direction Under Bright Light
Drop your bobbin into the case. Pull the thread tail—does it move counter-clockwise? If it spins clockwise, the hook will shred it instantly. Reinsert until the thread unwinds counter-clockwise (Singer’s universal standard). Visual cue: The bobbin should sit with its finger notch facing left.
Adjust Bobbin Tension in ¼-Turn Increments
Turn the tiny screw on the bobbin case right to tighten, left to loosen—only ¼ turn at a time. Test by sewing two layers of scrap fabric. Perfect tension? Top and bottom threads meet exactly in the middle of the fabric. Warning: Never force the screw—if it resists, stop. Over-tightening strips threads.
Replace Generic Bobbins Today
Scratched or warped bobbins cause 80% of bobbin jams. Hold your bobbin against a ruler—any warp? Toss it. Use only Singer-specific bobbins (model # on throat plate). Metal bobbins work for heavy fabrics; clear plastic for delicate materials. Never interchange brands—size tolerances differ by 0.01mm.
Sudden Loud Click? Stop Sewing Now
Cut Threads and Remove Fabric Sideways
Do not yank fabric backward—this jams gears further. Snip all threads above the needle plate, lift the presser foot, and gently pull fabric out sideways. Power off first. If fabric resists, don’t force it; skip to needle inspection.
Hunt for Needle Fragments with a Flashlight
Shine light under the needle plate. A snapped needle tip wedged in the hook race mimics major failure. Use tweezers to remove fragments—never fingers. Check the bobbin case for nicks; if damaged, replace it ($12). Re-thread top and bottom, then test on scrap.
Prevent Future Stoppages: The 3-Step Routine
Clean Every 3–5 Bobbins (Takes 90 Seconds)
1. Unplug, remove needle/foot/throat plate.
2. Brush lint from feed dogs and hook race—ignore this, and tension fails.
3. Add 2 drops of Singer oil to the race hook (metal ring under bobbin).
4. Sew 10 stitches on scrap to absorb excess oil.
Change Needles Every 6–8 Hours
Keep a labeled organizer: “Ball-point 75/11” for knits, “Denim 100/16” for thick fabrics. A dull needle strains your motor—you’ll hear it labor. Change after sewing over pins or heavy seams.
Use Thread That Won’t Sabotage You
Ditch cheap or decade-old thread. It sheds lint that clogs tension units. Stock fresh polyester or cotton-wrapped polyester. Test tip: Hold thread taut—if it snaps with a clean break, it’s good. Frayed ends mean degraded fibers.
Final Note: Your Singer sewing machine stopped working for one of five reasons: a mis-threaded path, wrong needle, dirty tension unit, engaged bobbin winder, or blown fuse. Work through these steps in order, and you’ll resolve 90% of failures before your coffee gets cold. For persistent grinding noises or internal jams, consult a Singer-authorized technician—forcing repairs risks $200+ in damage. Keep this guide beside your machine; next time it stalls, you’ll fix it in 90 seconds flat.


