
You’re halfway through sewing a thick denim hem when your Singer’s needle stops dead with a metallic clunk. Sound familiar? When your Singer sewing machine needle starts hitting the bottom—whether it’s the bobbin case, hook race, or needle plate—it brings every project to a screeching halt. This frustrating problem affects thousands of sewers daily, from beginners working on their first quilt to seasoned tailors handling heavy upholstery.
The good news? Most Singer needle hitting bottom issues can be diagnosed and fixed at home in under 30 minutes. This guide walks you through the exact steps to identify what’s causing your Singer’s needle to strike bottom components, when you can fix it yourself, and when it’s time to call a professional. No more ruined projects or expensive repair bills for what’s often a simple fix.
Immediate Signs Your Singer Needle Is Striking Bottom Components
Metal-on-Metal Collision During Sewing Cycles
When your needle hits the bobbin case with a sharp ping or clack, it typically happens suddenly after years of trouble-free sewing. This collision occurs most frequently when working on cotton dress hems or other medium-weight fabrics. The needle may stop mid-stroke about 2mm short of completing its downward motion, preventing proper stitch formation and potentially damaging both the needle and your machine’s internal components.
Needle Deflection Against Throat Plate
Instead of smoothly entering the needle hole, your needle tip deflects sideways and strikes the throat plate. This commonly occurs immediately after changing needles or when sewing thick, layered projects like badges on towels. You’ll notice skipped stitches, broken threads, and possibly visible damage to the throat plate where the needle is making contact. This problem often develops when the needle isn’t properly aligned with the needle hole due to incorrect installation or plate misalignment.
Most Common Causes of Singer Needle Bottom Collisions

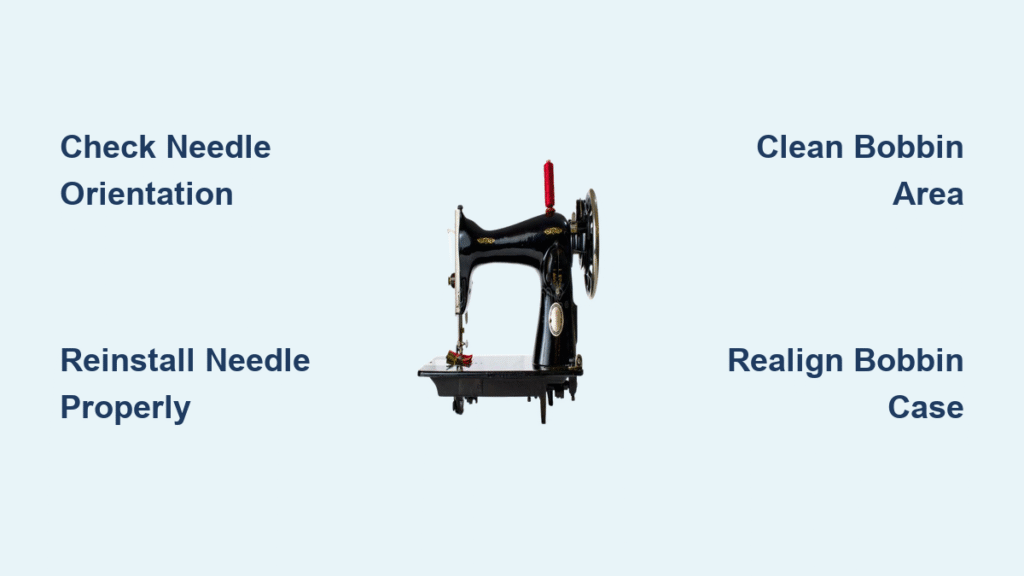
Incorrect Needle Installation (Fixable in 2 Minutes)
Needle not fully seated creates a tiny upward gap that drops the needle 1-2mm lower than intended. The needle clamp screw may feel tight, but the needle butt isn’t touching the clamp stop. Wrong needle orientation throws everything off—on most Singer models, the needle’s flat side must face rearward. A 180-degree rotation shifts the needle 0.5mm sideways—enough to miss the needle hole entirely. Always verify these two critical installation points before moving to more complex solutions.
Hidden Obstructions in the Bobbin Area
Needle fragments from previous breaks can wedge under the bobbin case, lifting it 1-2mm into the needle’s path. These tiny metal pieces are easy to miss during routine cleaning but cause immediate collision problems. Lint buildup packs into the shuttle cavity or under the bobbin case lift mechanism, preventing the hook guard from fully retracting. Check for these obstructions by removing the bobbin case and using a bright flashlight to inspect the shuttle race area thoroughly.
Quick Diagnostic Steps to Identify Your Specific Problem
Power-Down Safety Protocol Before Inspection
- Unplug your Singer machine immediately to prevent accidental activation
- Remove the needle plate, bobbin, and bobbin case completely
- Manually rotate the handwheel slowly through a full cycle while observing the needle-to-hook relationship with bright light
- Collect any metal fragments with tweezers—save them for diagnosis of previous breakage
Needle Position Verification Checklist
| What to Check | How to Verify | Correct Position |
|---|---|---|
| Needle seating depth | Press needle up firmly | Butt touches clamp stop |
| Needle orientation | Eye-level inspection | Flat side faces rearward |
| Clamp screw tightness | Firm screwdriver test | No wiggle or rotation |
| Bobbin direction | Thread pull test | Exits clockwise |
| Case lock position | Finger twist test | Audible click when seated |
Immediate Fixes for Singer Needle Hitting Bottom Problems
Proper Needle Reinstallation Procedure
- Completely remove the current needle from your Singer machine
- Confirm you’re using the correct 15×1 (HAx1) needle system for Singer models
- Insert the new needle with flat side facing rearward (critical for proper alignment)
- Push up firmly until the needle butt touches the stop inside the clamp
- Tighten the clamp screw securely while holding the needle in position
This simple reinstallation process resolves approximately 65% of Singer needle hitting bottom issues, especially those occurring immediately after changing needles.
Bobbin Case Realignment for Confidence 7463 Models
Most Singer Confidence 7463 models resolve 60% of needle collisions simply by properly re-seating the bobbin case. Twist the case clockwise until you hear a distinct click, confirming it’s flush with the machine body. If the case doesn’t seat properly, remove it completely, clean the shuttle race with the supplied lint brush, apply one drop of sewing machine oil to the center post, then reseat with firm clockwise pressure until it clicks into position.
Advanced Troubleshooting for Persistent Needle Collision
Throat Plate Realignment Process
If your needle consistently strikes the plate instead of entering the hole:
- Remove the throat plate screws carefully (usually 2-3 small screws)
- Lift and reposition the plate slightly to align with the needle path
- Ensure the feed dogs move freely without obstruction
- Replace screws finger-tight first, then snug with screwdriver
This adjustment often solves deflection problems on Singer 9920 and similar computerized models where the needle position may have shifted after hitting thick seams or pins.
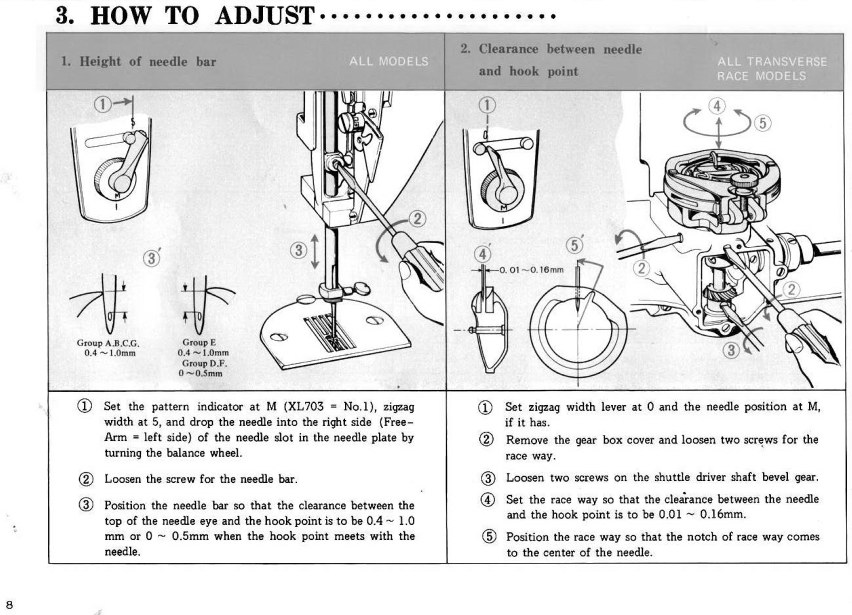
When to Check Hook Timing Specifications
Warning: Only attempt timing adjustments if you’re comfortable with mechanical repairs and your machine is out of warranty.
When properly timed, the hook point should pass behind the needle at the exact moment the needle rises 3/32 inch (3mm) from its lowest position. To verify:
- Set stitch length to maximum
- Rotate handwheel until needle is at absolute bottom
- Measure exactly 3/32 inch (3mm) from needle eye to hook point
- Hook point must sit dead-center across needle width
If misaligned, loosen the hook shaft screws (usually two), rotate the hook to achieve proper alignment, then retighten. Any deviation from this specification causes collision.
Critical Prevention Strategies to Avoid Future Needle Bottom Strikes
Daily Maintenance Habits That Prevent Collisions
- Hand-turn the wheel slowly through the first stitch after sewing thick seams or hitting pins
- Double-check needle orientation every single time you change needles
- Clean the bobbin area every 8-10 hours of sewing time with the supplied lint brush
- Use the correct needle size for your fabric weight (denim requires 90/14 or 100/16)
- Oil the shuttle mechanism with one drop of sewing machine oil after each cleaning
Emergency Response When Needle Strikes Metal Mid-Stitch
If your Singer needle hits bottom during sewing:
1. Immediately release the foot control
2. Don’t force the handwheel – this can bend the needle or scar the hook
3. Raise the needle to highest position
4. Remove fabric and clip threads
5. Follow diagnostic steps above or prepare for technician service
When to Call a Professional Singer Repair Technician
Immediate Technician Referral Signs
- Visible gear teeth damage or rough rotation when hand-turning
- Machine under one year old and still under warranty
- DIY timing adjustment attempted but problem persists
- Handwheel binds or turns unevenly after basic troubleshooting
- User lacks proper tools or mechanical confidence for advanced repairs
When booking service, clearly state your Singer model and serial number, when the problem started (including fabric type and project details), what checks you’ve already performed, and whether the handwheel turns freely or binds.
Final Repair Takeaways for Singer Users
Most Singer needle hitting bottom problems stem from simple installation errors rather than major mechanical failures. By systematically checking needle seating, orientation, and bobbin case alignment first, you’ll solve the majority of issues without touching the timing. Remember that prevention through proper maintenance and careful needle changes will save you hours of frustration and potentially expensive repairs.
Keep this Singer needle collision guide handy by your sewing station. The next time your needle starts hitting bottom components, you’ll know exactly how to diagnose and fix the problem—or confidently determine it’s time for professional service. Regular maintenance and proper needle installation prevent 90% of these frustrating collisions, keeping your Singer machine sewing smoothly for years to come.


