
Your Kenmore sewing machine will not reverse when you need to secure seams, leaving you frustrated with loose thread tails and unraveling projects. This sudden failure strikes most owners by surprise—often after storing the machine for a few weeks or when tackling your most important sewing task. The good news is that 80% of reverse function failures stem from simple mechanical issues you can resolve at home with basic tools and under 30 minutes of effort. Whether you own a vintage 158-series machine or a modern 385 model, this guide shows you exactly how to diagnose and fix your Kenmore sewing machine will not reverse problem without costly professional service.
Most Kenmore reverse failures occur due to dried lubricant binding the mechanism or thread jams from regular use. Unlike complex electronic issues, these common problems respond well to systematic cleaning and proper lubrication. By following these proven steps, you’ll restore your machine’s reverse function and prevent future breakdowns, keeping your sewing projects secure and professional-looking.
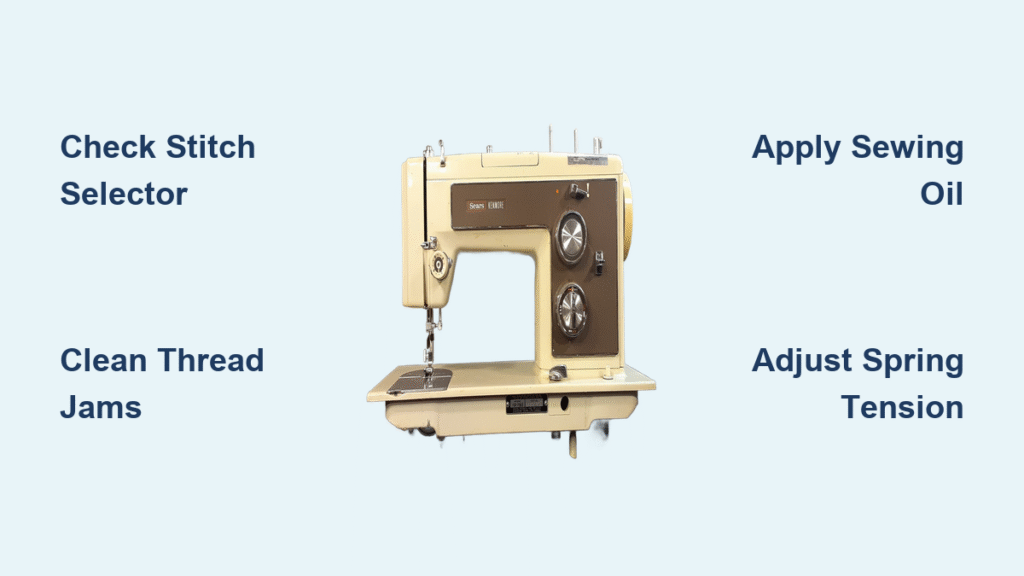
Identify Your Kenmore Reverse Failure Type
Complete Reverse Function Loss
Your Kenmore sewing machine will not reverse at all while stitching forward perfectly. When you press the reverse lever or button, nothing happens—the feed dogs continue moving fabric in the same direction. This points to a completely seized reverse mechanism, typically from dried oil and lint buildup forming a cement-like substance around the shaft and collar. Vintage 158-series models suffer this most after periods of storage, as their mechanical linkages depend on consistent lubrication.
Reverse-Only Operation Mode
Your machine runs exclusively backward and refuses to stitch forward normally. This less common failure indicates the reverse mechanism is permanently engaged, often due to broken springs or jammed gears. Older Sensor Sew models with geared drive motors frequently develop this issue when the pawl mechanism fails to disengage. If your Kenmore suddenly started sewing only in reverse, inspect the spring tension around the reverse button shaft immediately before attempting any cleaning.
Intermittent Reverse Response
Your machine occasionally reverses but requires multiple lever presses or holding the button continuously. This frustrating pattern signals partial mechanism seizure or hidden thread entanglement. Modern 385-series models with plastic cam mechanisms commonly develop this issue when thread fragments work their way into the linkage. If you notice the reverse function working better after warming up the machine, dried lubricant is likely the culprit rather than mechanical damage.
Diagnose Kenmore Reverse Problems in 10 Minutes
Quick External Checks Before Disassembly
Always unplug your machine before any inspection—never test mechanisms while powered. First, verify your stitch selector isn’t accidentally set to decorative or stretch stitch mode, which disables reverse function on many Kenmore models. Gently test your reverse lever movement; if it feels stiff or frozen, dried lubricant is almost certainly the issue. Shine a flashlight around the lever base for visible thread accumulation, especially on 385-series push-button models where threads easily wrap around the mechanism.
Manual Function Test Procedure
Turn the handwheel slowly while pressing the reverse lever. Watch the feed dogs carefully through the needle plate opening:
– No movement in either direction: Complete mechanism seizure requiring deep cleaning
– Slight twitch but no reverse: Partial seizure that responds well to lubrication
– Moves but doesn’t reverse fabric: Disconnected internal linkage needing realignment
This simple test reveals whether you’re dealing with a lubrication issue or mechanical damage. If the feed dogs show any movement during this test, your Kenmore sewing machine will not reverse problem likely has a straightforward home fix.
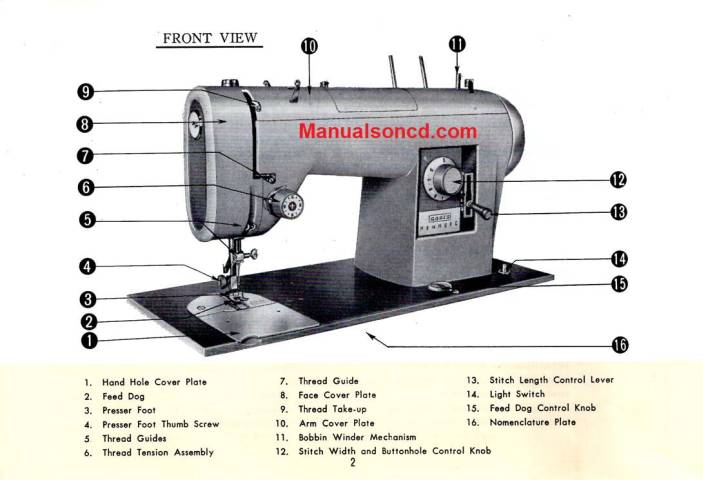
Bottom Plate Inspection Protocol
Remove all bottom plate screws with the appropriate screwdriver, noting their positions—some models use different length screws. Look for the thin metal rod connecting the reverse lever to the feed dog mechanism. Operate the lever while watching this rod; if it doesn’t move, the problem is external. If the rod moves but feed dogs don’t reverse, the issue lies deeper in the gear assembly. Check for thread nests around the plastic cam on the cam rod—a common failure point in 385.1168280 and similar models.
Fix Your Kenmore Reverse Mechanism in 4 Steps
Lubrication Method for Seized Mechanisms
Apply one tiny drop of sewing machine oil (never 3-in-1 or WD-40) directly to the shaft where the reverse lever connects to the machine body. Wait 24 hours to allow the oil to penetrate dried residue, then test the lever. For stubborn cases, repeat with a second drop after 48 hours. Never force a frozen lever—this can break delicate plastic components. If oil alone doesn’t work, use a Q-tip dipped in Dawn dish soap to clean old grease from visible linkage points before reapplying proper lubricant.
Thread Jam Removal Technique
Locate visible thread wrapped around the reverse mechanism using a flashlight and magnifying glass. Use tweezers to carefully extract tangled threads, working in the direction they’re wound to avoid breaking them. Check behind the feed dog linkage for hidden thread pieces that may be jamming the mechanism. After complete thread removal, clean the area with a soft brush and apply one drop of oil to the linkage points. Test the reverse function before reassembling your machine—many Kenmore 385.17324 models regain full function after this simple procedure.
Spring Tension Adjustment Fix
Find the small spring near the reverse button shaft—often hidden under the front cover on newer models. Gently stretch this spring to restore tension if the reverse lever feels loose or unresponsive. Test the lever response after each small adjustment; overstretching will damage the spring. If the spring is broken or severely stretched, order an exact replacement part using your model number before proceeding. Proper spring tension ensures the reverse mechanism fully disengages after each use, preventing future “Kenmore sewing machine will not reverse” issues.
When to Seek Professional Kenmore Repair

Critical Failures Requiring Expert Service
If your machine makes grinding noises during reverse attempts, broken gear teeth are likely the culprit—this requires professional disassembly and replacement parts. Computerized Kenmore models with electronic control boards may need circuit testing that exceeds home repair capabilities. Machines with disconnected or missing internal components (common in vintage 158-series after improper DIY attempts) often need specialized knowledge to rebuild correctly. Sentimental or valuable machines deserve professional care to maintain their worth and functionality.
Cost-Benefit Analysis for Repair
Basic professional service (cleaning, oiling, minor adjustments) typically costs $75-125—compare this to your machine’s value before proceeding. Gear replacement adds $50-150 depending on parts availability, which decreases significantly for models over 20 years old. Electronic control repairs range from $150-300 and may not be cost-effective for older machines. For vintage Kenmore 158 models with historical value, professional service preserves functionality while maintaining collector appeal.
Prevent Future Kenmore Reverse Failures
Monthly Maintenance Routine
Run your machine for 5-10 minutes every 2-3 weeks during storage periods to keep mechanisms lubricated. After each major project, clean lint from the feed dog area using a small brush—this prevents thread jams that cause reverse failures. Apply one drop of sewing machine oil to the reverse linkage points monthly, focusing on the shaft where the lever connects. Always exercise the reverse function during warm-up to ensure smooth operation when needed.
Proper Storage Practices
Store your Kenmore in a climate-controlled environment away from humidity and temperature extremes that accelerate lubricant breakdown. Cover the machine with a breathable fabric cover to prevent dust accumulation in the mechanisms. Before long-term storage, run the machine briefly and apply oil to all moving parts, then remove the needle and presser foot to reduce stress on components. When retrieving from storage, always clean and re-lubricate before use—this prevents the “Kenmore sewing machine will not reverse” issue after storage.
Essential Tools for Kenmore Reverse Repairs

Basic Repair Kit Components
Keep sewing machine oil (specifically formulated for sewing machines) in your kit—never substitute with household oils that gum up mechanisms. Include precision flathead and Phillips screwdrivers that match your machine’s screws to avoid stripping heads. Use fine-point tweezers for thread removal from tight spaces around the reverse mechanism. A can of compressed air removes lint from hard-to-reach areas without disassembling the entire machine. Soft-bristled brushes clean gear teeth without damaging delicate components.
Quick Troubleshooting Reference Guide
Complete Reverse Failure:
1. Verify stitch selector isn’t in decorative mode
2. Clean visible thread from reverse mechanism
3. Apply one drop of oil to lever connection point
4. Test after 24 hours before disassembly
Reverse Stuck On:
1. Check spring tension around reverse button shaft
2. Inspect for broken return spring
3. Look for jammed gears causing permanent engagement
4. Consider professional service if grinding noises present
Intermittent Reverse:
1. Deep clean plastic cam mechanism
2. Check for partial thread jams in linkage
3. Adjust spring tension incrementally
4. Replace worn collars if movement remains inconsistent
Most Kenmore sewing machine will not reverse issues resolve with proper cleaning and lubrication—start with the simplest solutions before attempting complex disassembly. If your vintage model shows signs of gear damage or your computerized machine displays error codes, professional service becomes the wisest choice. Implementing a regular maintenance schedule every 6-12 months prevents 90% of reverse mechanism failures, ensuring your Kenmore continues securing seams perfectly for decades. Remember that consistent, light maintenance beats infrequent major repairs—your sewing machine will reward this care with reliable performance in both forward and reverse directions.


