
Your Kenmore sewing machine sits idle, fabric waiting as the handwheel refuses to budge. That familiar rhythmic motion replaced by stubborn resistance that halts your project mid-stitch. Whether you’re facing a completely frozen flywheel or one that drags like it’s moving through glue, this guide delivers proven solutions straight from 28-year SEARS technicians—without risking costly damage. Most Kenmore sewing machine handwheel won’t turn issues stem from dried oil varnish, lint buildup, or clutch failures—problems 80% of owners can fix at home with the right approach.
Don’t panic if forcing the wheel makes it worse; brute strength often bends shafts or cracks castings. Instead, follow this step-by-step troubleshooting sequence to diagnose and resolve your handwheel lockup safely. You’ll learn why lubrication alone fails 20% of the time, when heat and penetrants become necessary, and the exact clutch disassembly sequence for models like the 117.959. By the end, you’ll know whether your machine needs a simple oil bath or professional intervention.
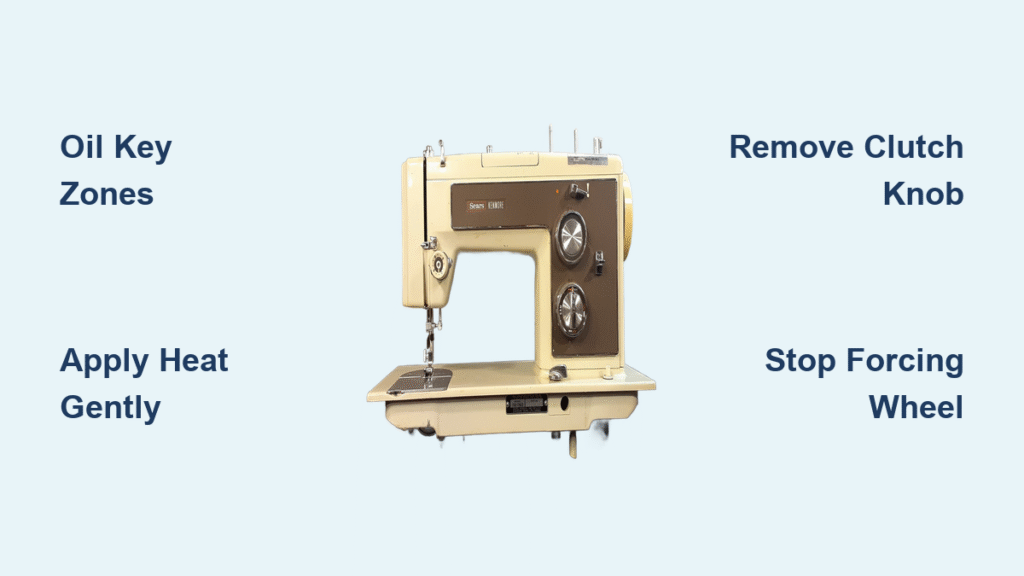
Stop Forcing It: Critical Safety Steps Before Repair
Never use pliers, hammers, or excessive force on your Kenmore sewing machine handwheel won’t turn issue. Documented cases show bent shafts from “beating on it” that turn $20 fixes into $200 rebuilds. Similarly, avoid WD-40 or Liquid Wrench on painted surfaces—they permanently damage finishes. Before touching the wheel:
- Unplug the machine and remove the needle to prevent accidental sewing motion
- Work on a padded surface to protect the machine body from impacts
- Gather only approved supplies: High-grade sewing machine oil (Zoom-Spout or Lily White), isopropyl alcohol, and a hair dryer
- Spot-test any penetrant on inconspicuous areas first
Ignoring these steps risks irreversible damage. As one SEARS technician warns: “The number of machines I’ve seen become non-repairable due to owner tinkering is staggering. Aside from lubrication, there isn’t much else you should attempt.”
Pinpoint Your Handwheel Lockup Cause
Kenmore handwheels seize for four distinct reasons—each demanding different fixes:
Dried Oil and Lint: The Silent Killer
This gummy varnish forms when old oil oxidizes, binding the handwheel bore to the main shaft. Symptoms appear gradually: first slight resistance, then complete lockup. Check for crusty buildup around the shaft seam—this causes 60% of handwheel failures.
Frozen Clutch Assembly: The Bobbin-Winding Nightmare
When the internal washer sticks to the shaft, your clutch knob won’t release. You’ll notice it only moves the needle bar during bobbin winding. Common in Kenmore 117.959 models, this requires specific disassembly techniques.
Jammed Internal Linkages: The Hidden Culprit
Misaligned needle bars, take-up levers, or feed dogs create mechanical stops that mimic handwheel resistance. If the wheel turns freely with the needle plate removed, this is your issue.
Bent Shaft or Cracked Handwheel: The Last Resort
Visible cracks, deformation, or sideways shaft movement indicate serious damage—usually from prior forced attempts. Stop immediately; DIY fixes risk total failure.
Fast Lubrication Fix: Works for 80% of Kenmore Handwheels
Start here before escalating—this gentle method resolves most Kenmore sewing machine handwheel won’t turn cases without disassembly:
- Power down completely and remove the needle to eliminate sewing motion risks
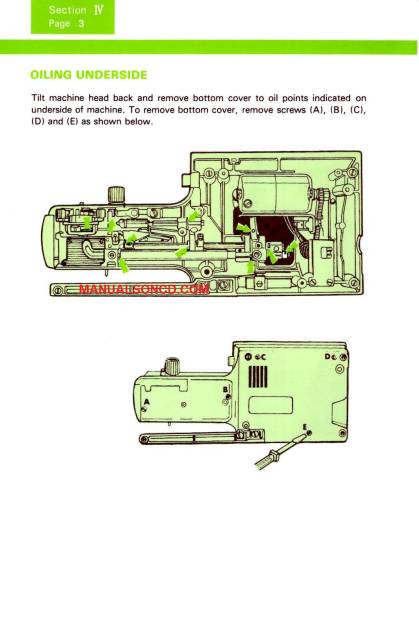
- Apply oil at three critical zones:
– Top oil holes (2-3 small openings near the handwheel)
– Shuttle race beneath the bobbin case
– The visible seam where handwheel meets the shaft - Wait 8-12 hours—let oil wick into binding areas (don’t skip this step!)
- Test clockwise rotation with light finger pressure only
- Repeat if needed—severe cases require 2-3 oil applications over 48 hours
Pro tip: For machines stored in attics or garages, place in a warm (90-110°F) room overnight. Gentle heat accelerates oil penetration through dried varnish. If stiffness remains after two oil cycles, advance to heat and penetrants.
Heat and Penetrant Rescue for Stubborn Lockups

When basic oiling fails, escalate with controlled heat and specialized penetrants—never apply to painted surfaces:
Step-by-step heat/penetrant method:
– Remove bobbin case and needle plate for direct shaft access
– Warm the shaft area with a hair dryer for 5-10 minutes (no hotter than 110°F)
– Apply Kroil or Tri-Flow sparingly at the wheel/shaft interface
– Let soak overnight, then reapply fresh sewing machine oil
– Gentle tapping technique: Position machine wheel-side up, support casting with foam, and tap the shaft end with a rubber mallet while rotating the wheel
Stop immediately if you notice:
– Cracking sounds from the casting
– Gritty or uneven wheel movement
– Any visible shaft wobble
This method revived a 1970s Kenmore 117.959 for user Sewnoma after oil alone failed—proving patience beats force.
Disassemble Stuck Clutch: Model 117.959 Proven Sequence
For clutch-specific lockups (where turning the knob only moves the needle bar), follow this exact disassembly:
Remove the Clutch Knob Safely
- Remove the set-screw completely (don’t just loosen) from the knob center
- Hold the handwheel stationary with your non-dominant hand
- Turn the clutch knob counter-clockwise (toward you) to unthread it
- If stuck: Apply heat for 10 minutes, soak overnight with Kroil, then use leather-padded channel-lock pliers for gentle back-and-forth rocking
Clean and Reassemble
- Slide the handwheel straight off the shaft once the knob is removed
- Wipe shaft and bore with isopropyl alcohol—remove every trace of old oil varnish
- Re-oil lightly with fresh sewing machine oil before reassembly
- Adjust clutch tension by tightening the knob until it releases smoothly during bobbin winding
One technician notes: “Never force the clutch knob—rocking motion breaks the bond without damaging threads.”
Prevent Future Handwheel Lockups Forever
Oil Like a Pro
- Oil every 8-10 sewing hours (or at each bobbin change) at three key zones
- Use ONLY sewing machine oil—3-in-1 or household oils attract lint and gum up gears
- Never skip the shuttle race—this area dries out fastest
Storage and Maintenance Rules
- Cover your machine when not in use to block lint and moisture
- Store in climate-controlled spaces—avoid attics, garages, or basements
- Run the machine monthly for 5 minutes to circulate oil
- Schedule annual professional service for deep cleaning of internal components
Quick pre-project test: Manually rotate the handwheel one full turn. Any resistance means it’s time to oil.
When to Call SEARS: 4 Red Flags You Must Heed
Stop DIY efforts immediately if you see:
– Visible cracks in the handwheel or clutch knob
– Shaft bending or galling (shiny metal streaks indicating metal-on-metal damage)
– Electronic control boards—heat from disassembly risks frying circuitry
– Zero movement after 48 hours of oiling, heating, and gentle tapping
“SEARS service remains the gold standard for Kenmore machines,” states a veteran technician. Their access to genuine parts and model-specific knowledge prevents turning a $5 fix into a $300 repair.
Emergency Work-Arounds for Project Deadlines
Only attempt these if professional help isn’t immediately available:
For Clutch Lockup Only
- Remove clutch knob and handwheel
- Clean clutch washer with alcohol
- Reassemble with slightly reduced tension
- Test bobbin winding at half speed
Never Attempt for Shaft Binding
Forcing rotation when the shaft is bound will misalign internal linkages. No safe work-around exists—unplug and seek professional help.
Quick Diagnostic Flow for Immediate Results
Follow this sequence for fastest resolution:
1. Stiff but moves? → Oil → Wait 12 hours → Test
2. Completely locked? → Oil + heat → Wait → Gentle taps → Test
3. Clutch won’t release? → Remove set-screw → Penetrant + heat → Padded pliers → Clean → Reassemble
4. No improvement after 48 hours? → Professional service
Remember: Patience and proper lubrication cure most Kenmore sewing machine handwheel won’t turn issues. As that 28-year technician insists, “Aside from lubrication, complex internal problems require professional attention.” Forcing solutions risks turning a simple fix into an expensive rebuild—so respect the machine, follow these steps, and get back to sewing safely.


