
Your Singer sewing machine grinds to a halt mid-stitch, needle frozen in fabric—that sinking feeling when a jammed Singer sewing machine derails your project. Whether you’re repairing a child’s costume or quilting a memory quilt, these sudden stoppages waste precious time and test your patience. The critical truth? Over 80% of Singer jams stem from preventable thread tangles and lint buildup, not mechanical failure. This guide delivers a proven 7-step system to diagnose and clear your jammed Singer sewing machine in under 30 minutes using household tools. You’ll master hidden thread detection, model-specific fixes, and professional maintenance tricks to keep your machine running smoothly.
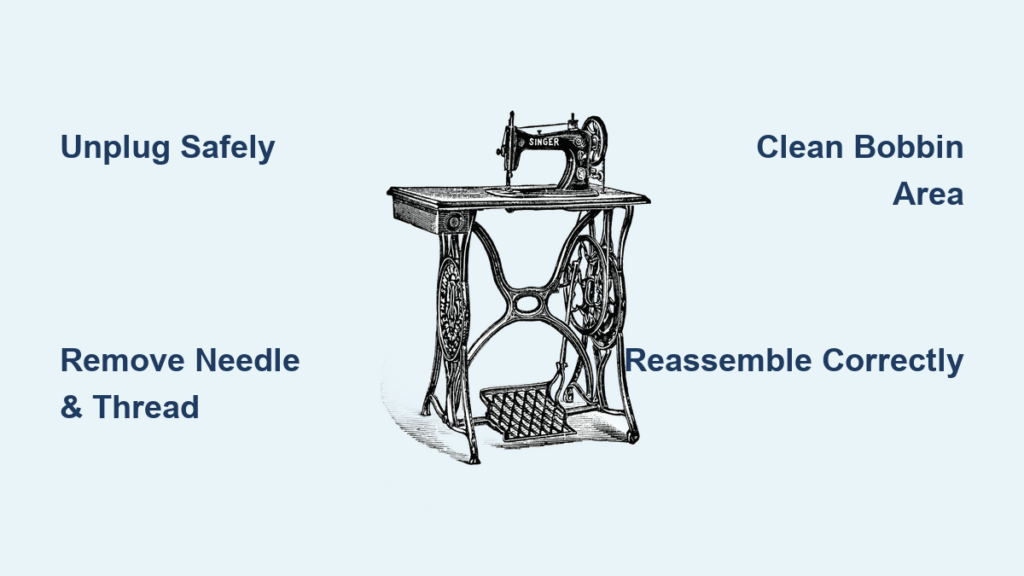
Power Down Safely Before Touching Components
Never attempt repairs while your machine is plugged in—electrical hazards and accidental needle strikes cause serious injuries. Immediately unplug your Singer from the wall outlet before touching any internal parts. Lower the needle to its lowest position using the handwheel, then rotate it backward (toward you) to fully retract the needle from the fabric. This backward motion disengages the needle from snagged threads and often resolves minor jams without disassembly. If the handwheel moves freely during this step, you’ve avoided a major seizure. If it resists, proceed to full disassembly but never force rotation—this can bend gears or break internal components.
Remove All Thread and Needle Completely
Extract and Inspect the Needle
Loosen the needle-clamp screw with your Singer’s included screwdriver, then slide the needle straight out. Hold it against a white background to check for invisible bends—microscopic curvature (even 1mm) catches fabric and causes jams. Discard any needle showing dullness, burrs, or deformation. Never reuse a jammed needle; it’s compromised structurally.
Clear Upper Thread Path Methodically
With the presser foot raised (this opens tension discs), cut the thread at the spool. Pull the entire upper thread path backward through guides: start at the spool pin, then thread guides, tension discs, take-up lever, and finally the needle eye. This reverse-direction removal prevents leaving microscopic thread fragments in tension discs—a hidden cause of recurring jams. If thread resists at any point, snip it there and extract both ends separately.
Deep-Clean Bobbin Area Thoroughly

Open and Target Critical Zones
Flip open the bobbin cover beneath the needle plate. Remove the bobbin and inspect for tangled thread balls—these are the #1 cause of a jammed Singer sewing machine. Use fine-point tweezers to extract knots without stretching the bobbin case’s delicate tension spring. Focus cleaning on three high-risk areas:
– Bobbin case interior (especially the tension spring slot where lint accumulates)
– Hook race (the circular track where the shuttle rotates)
– Feed dogs (teeth beneath the needle plate that move fabric)
Check Bobbin Rotation and Re-seat Correctly
When properly seated, pulling the bobbin thread should make it spin counter-clockwise. If it rotates clockwise or drags, reposition it until the thread exits through the tension slot and lays smoothly toward the rear. For front-load models (like Singer Heavy Duty 4423), ensure the bobbin case clicks securely into the shuttle race.
Clean Needle Plate and Feed Dogs Precisely
Remove the needle plate by unscrewing its fasteners (consult your manual for screw locations). Use a stiff nylon lint brush to dislodge compressed lint from every feed dog tooth—buildup here causes inconsistent fabric feeding that mimics jamming. Never oil feed dogs unless your manual specifies it; Singer machines require dry surfaces here for proper grip. Wipe debris with a microfiber cloth before reinstalling the plate. Ensure screws are tightened evenly to prevent plate wobble during operation.
Reassemble with Precision Steps
Install Fresh Needle Correctly
Insert a new needle with the flat side facing rearward (standard for most Singers). Push it fully upward until it bottoms out against the stopper, then tighten the clamp screw firmly. A 1mm gap here causes needle deflection and immediate re-jamming. For denim or canvas, use size 90/14 or 100/16; for silks, choose 60/8.
Re-thread with Presser Foot Up
Raise the presser foot to disengage tension discs. Follow printed thread path arrows exactly, ensuring thread clicks audibly into the take-up lever and between tension discs. Pull 4-6 inches of thread tail toward the machine’s rear. This tail length prevents thread snags during the first stitches.
Reinstall Bobbin and Test Rotation
Confirm counter-clockwise rotation when pulling the thread tail. Lower the presser foot, hold both thread tails gently, and turn the handwheel one full cycle toward you. The bobbin thread should surface through the needle plate without grinding—a clear sign your jammed Singer sewing machine is now clear.
Fix Persistent Jams with Targeted Solutions
Handwheel Won’t Move After Cleaning
If rotation remains stiff after thorough cleaning, apply one drop of sewing-machine oil to the hook race rim and gear pivots. Rotate manually for 30 seconds to distribute oil. If still locked, seek professional service—never force it. For Singer 48/7 vintage models, oil the marked “oil-point plate” but avoid internal gear disassembly.
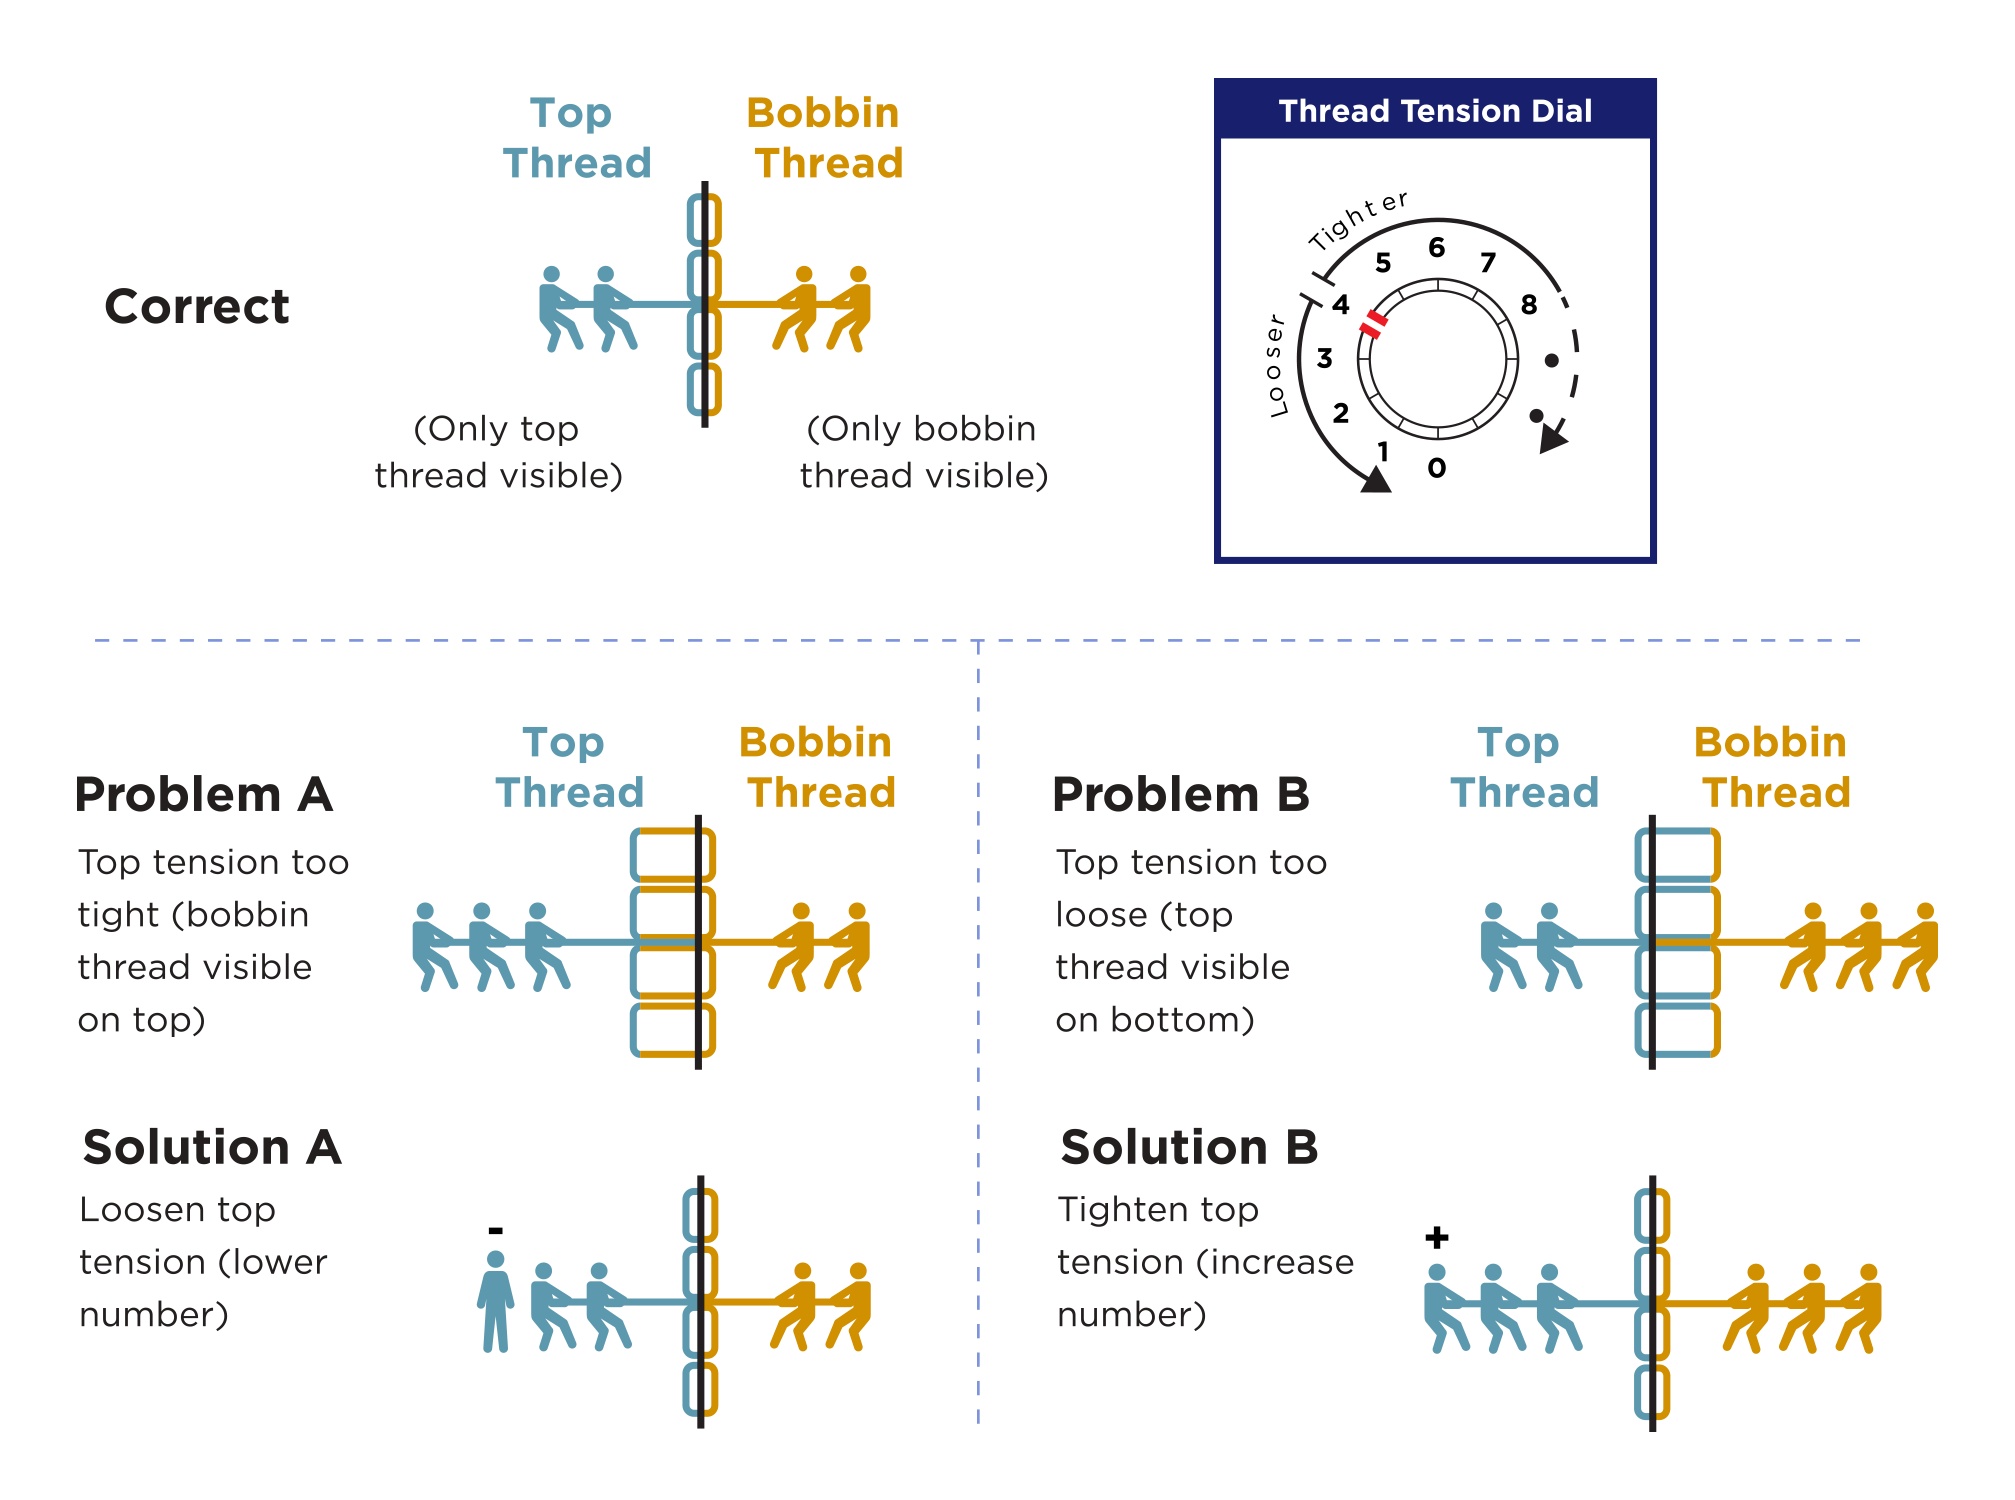
Thread Balls Forming Under Plate
Increase upper tension in half-number increments (e.g., from 3 to 3.5). Test bobbin tension by holding its thread tail—bobbin should drop 1-2 inches with a gentle bounce. Adjust the bobbin case tension screw in 1/8-turn increments if needed. Switch to fresh all-purpose polyester thread; old or quilting thread shreds easily.
Model-Specific Jam Fixes

Singer Heavy Duty (44xx/66xx Series)
Set tension to 2-3 for cotton, 4-5 for canvas. Use size 16 or 18 needles for heavy fabrics to prevent needle deflection jams. If jams persist, check for lint in the feed dog access hole near the needle clamp.
Vintage Singer 48/7 Models
If the handwheel barely moves, oil the “oil” plate, hook race, and gear pivots with 1-2 drops of lightweight machine oil. Run the machine slowly by hand for 2 minutes to work in the oil. Never disassemble internal gears—these all-metal machines require specialized servicing.
Oil and Maintain to Prevent Future Jams
Strategic Oiling Procedure
With the needle plate removed, place one drop of sewing-machine oil on:
– Hook race rim
– Bobbin case edge where it contacts the hook
– Any marked “OIL” ports (e.g., Singer 48/7)
Rotate the handwheel slowly for 30 seconds, then wipe excess oil with a lint-free cloth. Over-oiling attracts lint—one drop per point is sufficient.
Maintenance Frequency Guide
- Light home use (≤5 hours/week): Oil every 10-12 sewing hours
- Heavy/dusty environments: Oil every 5-8 hours
- Quick clean: Remove bobbin-area lint every bobbin change
Perform this monthly oiling even if unused—stagnant oil thickens and gums components.
Final Testing Protocol
- Insert a new needle and medium-weight polyester thread
- Set straight stitch (2.5mm length, 0mm width)
- Sew 6 inches on two layers of quilting cotton at medium speed
- Inspect for:
– Balanced tension (identical stitch appearance top/bottom)
– Zero skipped stitches or thread nests
– Smooth handwheel rotation
If issues persist, revisit bobbin reseating—90% of “fixed” jams recur from improper bobbin installation.
When to Call a Professional
Seek service if:
– Handwheel remains locked after cleaning and oiling
– Grinding/clicking noises persist during rotation
– Electronic models display error codes
– Visible cracks in bobbin case or hook mechanism
– Your machine is under warranty (self-repair voids coverage)
Prevention Checklist for Jam-Free Sewing
- Always use project-specific needles (replace every 8-10 hours)
- Discard thread older than 3 years or showing fuzz
- Cover your Singer when not in use to block dust
- Store bobbins empty to prevent thread memory kinks
- Clean bobbin area every time you change bobbins
- Perform quick oiling monthly on frequently used machines
Your Singer sewing machine should now glide through projects without hesitation. Remember: consistent maintenance prevents 95% of jams. Keep this guide near your workspace—when you hear that first unusual clunk, act immediately with these steps to save hours of frustration. A well-maintained Singer becomes a lifetime companion, turning your creative visions into reality, stitch by smooth stitch.


