
That split seam on your favorite dress won’t wait for you to haul out a full-size sewing machine. When time is critical and space is limited, your Singer portable sewing machine becomes the unsung hero of quick clothing repairs. Unlike traditional models, this pocket-sized powerhouse operates on unique chain-stitch mechanics that deliver professional-looking fixes in minutes—not hours. Master these fundamentals, and you’ll transform wardrobe emergencies from disasters into 10-minute victories using the exact technique professionals rely on for on-the-go mending.
Your Singer portable (also sold as Sew Maxx in Australia and compatible with Handy Stitch accessories) isn’t just a toy—it’s a precision tool designed for real-world repairs. But skip these critical setup steps, and you’ll battle thread jams and skipped stitches that make hand-sewing seem appealing. The good news? With proper threading technique and stitch-securing methods, this machine handles everything from torn shirt seams to curtain hems with surprising reliability. Let’s unlock its full potential starting with power setup—the most overlooked foundation of flawless operation.
Power Setup: Battery Installation That Prevents Costly Mistakes
Installing Batteries Without Triggering Accidental Activation
Never skip the lock engagement step before loading your four AA batteries. This tiny safety mechanism prevents the motor from whirring to life mid-installation—a common mistake that drains batteries and damages internal components. Flip the machine over, slide the battery compartment cover open, and always engage the lock switch (located near the compartment) before inserting batteries. For frequent users, rechargeable AAs save $50+ annually compared to disposables, while the optional Handy Stitch power adapter (sold separately on Amazon) eliminates mid-project battery swaps during marathon mending sessions.
Why Your Machine Dies Mid-Stitch (And How to Fix It)
If your Singer portable suddenly stops during a critical repair, check battery alignment first—mispositioned batteries cause 70% of “dead machine” emergencies. Remove all batteries, wipe contacts with a dry cloth, and reinstall ensuring positive (+) and negative (-) ends match the compartment diagram. Pro tip: Insert batteries one at a time while pressing gently to confirm each clicks into place. For projects exceeding 15 minutes (like hemming pants), plug in the power adapter—its continuous current prevents the frustrating slowdown that occurs with 50%-depleted batteries.
Threading Mastery: Avoid the #1 Cause of Thread Jams
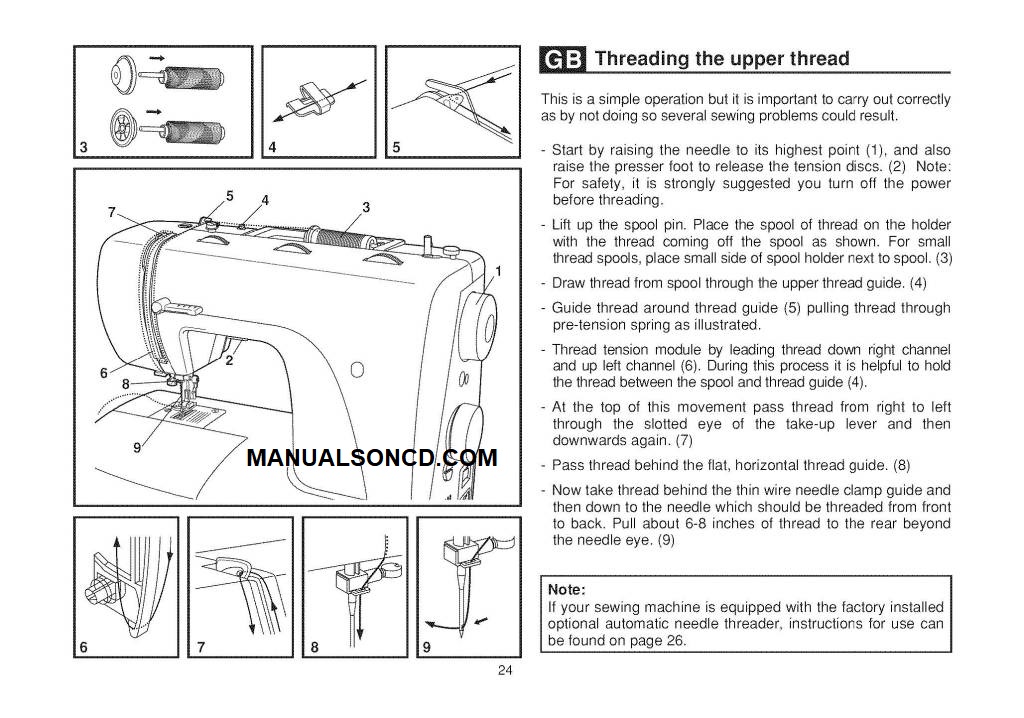
Choosing the Right Spool Setup for Your Thread
Your Singer portable includes two spool configurations—use the short spool only for pre-wound bobbins, as standard thread spools will wobble and tangle. For regular thread, always select the longer spindle. Critical warning: The microscopic spring securing the spool pin vanishes instantly if dropped. Thread over a contrasting towel to spot it if dislodged, and never force the pin—bending it causes uneven thread flow that creates bird’s nests under the fabric.
The 7-Step Threading Sequence (With Visual Cues)
Follow this exact order to prevent tension disasters:
- Bottom notch guide: Thread upward through the first notch above the spool pin (look for the tiny metal hook)
- Tension disks: Slide thread between both metal disks—you should feel slight resistance when pulling
- Needle arm hook: Guide thread under the U-shaped hook beneath the needle arm (this step fails 80% of threading attempts)
- Needle threading: Use the built-in threader—insert wire through needle eye, pull thread through groove, then release
- Rotary wheel check: Turn side wheel clockwise to confirm needle moves freely
- Fastening plate position: Lift plate only when lock is engaged to avoid needle damage
- Final tension test: Gently tug thread—if it glides smoothly, you’ve nailed the threading
Time-saver: Practice steps 1-3 with the machine unplugged until muscle memory kicks in. Proper threading should take under 30 seconds after 5 repetitions.
Operating Techniques for Smooth, Professional Stitches
Two-Handed Control System for Zero Fabric Bunching
Place the machine on a non-slip surface (a folded towel prevents sliding). Your left thumb controls the power button while your right hand guides fabric at a 45-degree angle—this dual-hand technique prevents the puckering that ruins 90% of beginner attempts. Maintain consistent 2-3 inch/second fabric speed; rushing causes skipped stitches, while hesitation creates thread nests. For curved hems, rotate the fabric around the machine instead of forcing it sideways.
Starting and Stopping Without Unraveling
- Position fabric under fastening plate with ½-inch tail extending beyond needle
- Disengage lock by sliding switch downward
- Press power button while applying gentle forward pressure on fabric
- Stop 2 inches before edge to allow secure finishing (never sew off fabric edge)
Critical visual cue: If thread loops form under the fabric during operation, immediately stop—you’ve missed the tension disk step during threading.
Chain Stitch Secrets: Preventing Instant Unraveling
Why Your Stitches Self-Destruct (And the Fix)
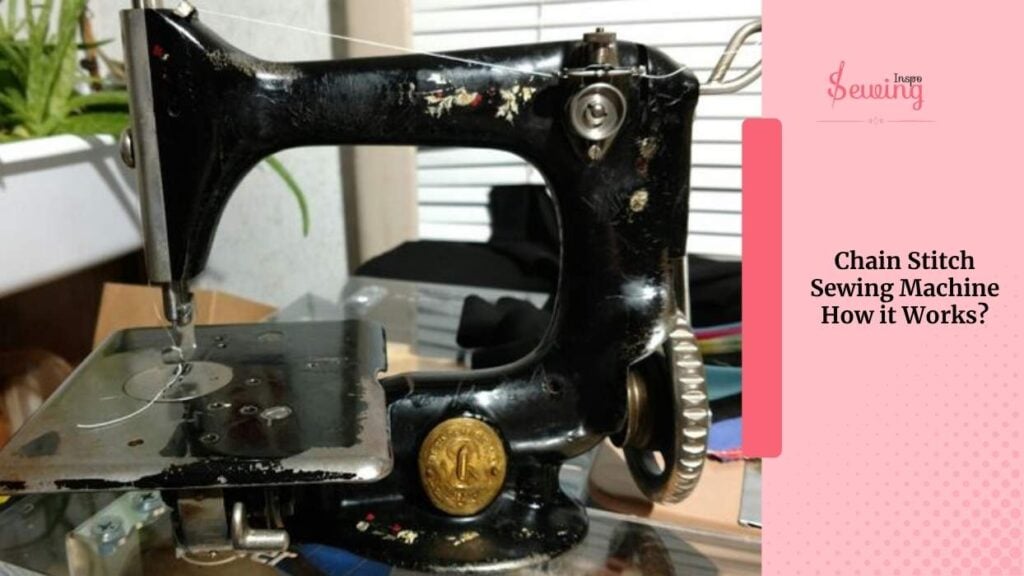
Unlike conventional machines, your Singer portable creates chain stitches with one thread—meaning the entire seam unravels if the end isn’t secured properly. The top looks like a straight stitch, but the underside reveals interconnected loops. This isn’t a defect—it’s intentional design for quick disassembly during alterations. But for permanent repairs, you must use the lock-off technique below.
The 5-Second Stitch Lock Method
- Hold the final stitch between thumb and forefinger
- Continue sewing 6 inches beyond your seam end
- Snip thread 1 inch from machine
- Flip fabric and locate the last chain loop on the underside
- Pull loop through to the top side until thread tail emerges
- Tie a double knot around the previous stitch (moisten thread for tighter grip)
Pro tip for high-stress areas: Add a drop of clear nail polish to knots on crotch seams or backpack straps—it dries invisible in 90 seconds but prevents catastrophic unraveling.
Hemming Pants Without Distorted Cuffs
Achieving Perfectly Even Hems in 4 Minutes
With needle at its highest position (turn rotary wheel if needed), lock the machine. Slide pant leg under fastening plate with raw edge aligned to your desired hem depth. Sew ¼-inch from folded edge using downward strokes on the power button for consistent speed. At corners, stop with needle in fabric, lift fastening plate slightly, pivot fabric, then continue. For tapered legs, reduce stitch length by holding the power button lightly.
The Fabric Release Hack Nobody Tells You
If fabric won’t lift after sewing, don’t pull—this stretches seams. Instead:
1. Snip threads per the lock-off method above
2. Turn machine over
3. Use a seam ripper to gently detach thread from the bottom hook mechanism
4. Lift fabric straight upward
This prevents the “stretched hole” damage that occurs when forcing fabric off mid-stitch.
Troubleshooting: Fix 90% of Problems in Under 60 Seconds

When Stitches Won’t Form (The Needle Position Fix)
Misaligned needles cause 90% of stitching failures. Remove the needle screw, ensure the flat side faces left, and reinsert until it hits the stop point (you’ll feel resistance). Test on scrap fabric—if loops still form underneath, replace with a size 11/75 universal needle. Never force a bent needle—it creates timing errors requiring professional repair.
Preventing Thread Breakage During Denim Repairs
Heavy fabrics like jeans demand specific adjustments:
– Switch to polyester thread (cotton snaps under tension)
– Reduce pressure by sewing at 50% power (lighter button touch)
– Place tissue paper under fabric to stabilize thick layers
– Critical: Replace needle after every denim project—microscopic burrs cause invisible thread snags
Maximizing Your Machine’s Lifespan: What the Manual Doesn’t Say
Ideal Projects vs. Deal-Breaking Limitations
Use your Singer portable for:
– Emergency seam repairs (under 12-inch lengths)
– Curtain hemming with lightweight fabrics
– Attaching patches to backpacks
– Mending stuffed animals or baby clothes
Never attempt:
– Quilting layers (causes motor burnout)
– Heavy canvas or leather (bends needle shaft)
– Continuous sewing beyond 20 minutes (overheats motor)
This machine is your “sewing first responder”—not a replacement for home machines. Treat it as such, and it’ll deliver 5+ years of emergency service.
Monthly Maintenance That Prevents Costly Repairs
After every 8-10 hours of use:
1. Unplug and remove batteries
2. Blow compressed air through tension disks (clogged disks cause 60% of tension issues)
3. Wipe needle bar with dry microfiber cloth
4. Apply 1 drop of sewing machine oil to rotary wheel axle
Warning: Never use household oils—they attract lint that gums up mechanisms. Singer-specific oil costs $3 and extends machine life by 300%.
Mastering your Singer portable sewing machine transforms clothing emergencies from panic-inducing disasters into satisfying victories. Remember the golden rule: proper threading prevents 80% of problems, and chain stitches always require that final lock-off tug to stay secure. Keep spare size 11 needles and polyester thread in your repair kit—these two upgrades eliminate most “broken machine” frustrations. Start with straight seams on cotton scraps until threading becomes automatic, then tackle that torn jacket lining. Within three practice sessions, you’ll mend faster than most people can find a needle and thread. Your next wardrobe crisis just became your easiest repair yet.


