
You’ve just unboxed your first Singer industrial sewing machine, and the sight of that massive table-mounted motor feels overwhelming. The servo motor sits silently beneath the table like a sleeping beast, and you wonder if one wrong move will send fabric flying or break the needle. Take a breath. Unlike home machines, these powerhouses are designed for precision and consistency, not chaos. By the end of this guide, you’ll thread, operate, and maintain your Singer industrial with the confidence of a seasoned pro.
Positioning Your Singer Industrial Machine for Optimal Operation
Your Singer industrial sewing machine arrives as a complete system with three components: the head, motor, and table. This setup differs fundamentally from home machines where the motor is built into the head. The motor mounts underneath the table, allowing for easy replacement if needed—a practical design feature that extends your machine’s lifespan.
When unboxing, verify all three components are present unless the seller specifically noted “head only” or “motor not included.” Most dealers ship machines pre-threaded after “sewing them off” to confirm operation. Leave this initial threading intact until you need to change colors or materials.
Pro tip: Position the foot pedal where your heel can comfortably drop to activate back-stitch and thread trimmer functions. This placement becomes natural muscle memory within minutes of operation.
Threading Your Singer Industrial Machine Like a Professional
Never pull thread out through the needle—this creates tangles and potential damage. Instead, use the professional method:
-
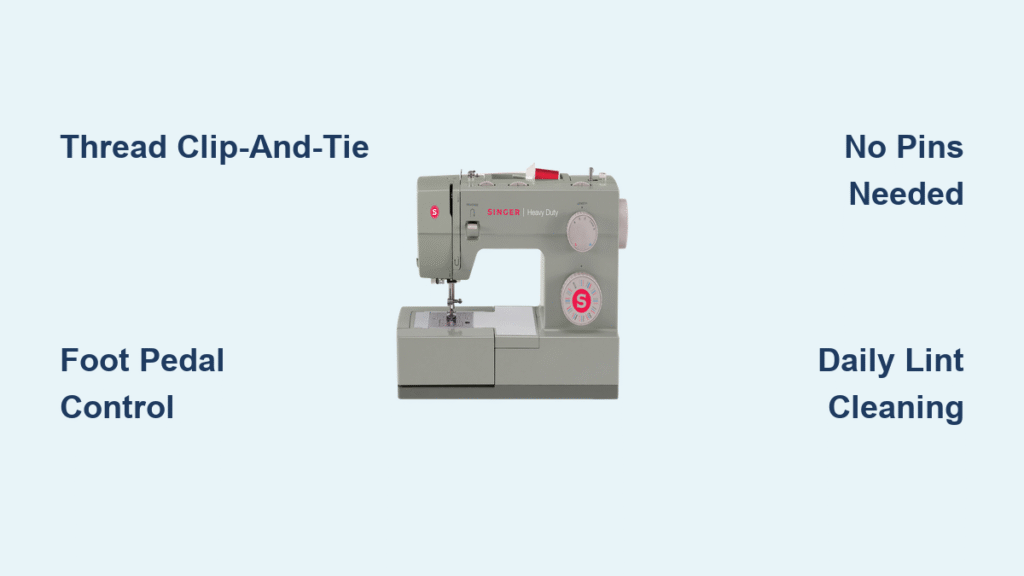
Clip and tie: Cut the old thread at the spindle, leaving 6-8 inches. Tie new thread to old using a basic knot (simple overhand works perfectly).
-
Pull through: Remove thread from the needle eye. Lift the presser foot and pull the knotted thread through the entire threading path from bottom to top.
-
Clip and tie: When the knot passes through, snip it off and re-thread the needle left-to-right.
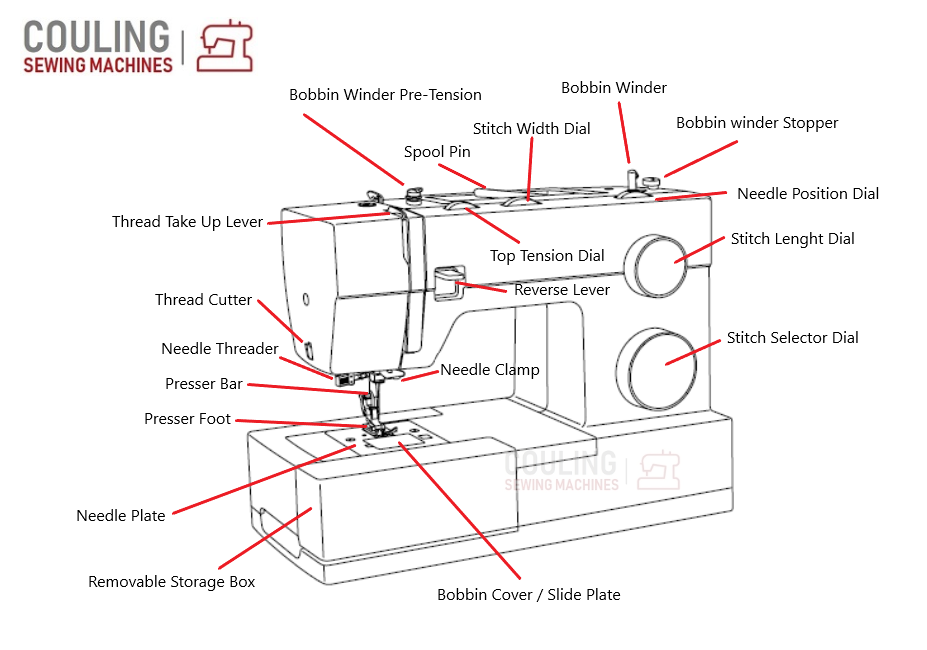
For bobbin threading, wind your bobbin exactly like a home machine. Before inserting, ensure the thread tail and bobbin direction form a “9” shape—this prevents tangles and maintains consistent tension. This visual trick makes correct insertion foolproof.
Why Your Singer Industrial Won’t Tangle When Threading Correctly
The most common threading error is pulling thread through the needle instead of using the clip-and-tie method. This forces thread through narrow channels in the wrong direction, creating snags. Following the professional threading sequence ensures smooth operation from your first stitch.
Mastering the Three-Position Foot Pedal Control
Servo motors on Singer industrial machines use three distinct foot positions that feel intuitive once learned:
- Toe pressure: Lightly press the pedal’s front edge to raise the presser foot
- Full foot: Apply steady pressure with your entire foot for normal sewing
- Heel drop: Press down firmly with your heel (like “digging in your heels”) to back-stitch and auto-trim threads
The servo responds instantly to pressure changes, giving you precise speed control from 1 stitch per minute to maximum speed. Unlike clutch motors, there’s no learning curve—you’ll sew perfectly straight lines on your first attempt.
Critical note: Singer industrial machines with servo motors don’t have knee or hand lifts for the presser foot. Your hands remain free to guide fabric while operating all functions through the pedal.
Selecting Appropriate Fabrics for Your Singer Industrial
![]()
Contrary to popular belief, not all Singer industrial machines handle heavy canvas or denim. Many lockstitch models, especially “dressmaker” versions, excel with lighter materials like dress fabrics, quilting cottons, and silks. Sewing heavier weights on these models throws off timing and creates skipped stitches.
If your Singer features needle feed (dual feeding from dogs and needle), it handles slippery fabrics like satin or napped materials like velvet exceptionally well. The needle itself helps pull fabric through, preventing shifting and puckering.
Thread selection matters: Use quality polyester thread for most projects. Industrial machines aren’t forgiving of cheap thread that sheds fibers or has inconsistent thickness.
Operating Your Singer Machine Without Pins
Ditch the pins entirely. Singer industrial machines use powerful presser foot pressure to feed layers accurately. Pins actually create problems by:
- Preventing optimal fabric feeding
- Introducing inaccuracies where none existed
- Creating uneven pressure points
Instead, guide fabric layers separately until they reach the needle. The best results come from keeping layers as separate as possible until just before they go under the needle. This technique produces more consistent seams than pinning.
Managing Multiple Fabric Layers Effectively
- Light layers: Let the feed dogs do the work—guide gently without pulling
- Heavy layers: Use both hands to support weight, keeping fabric level with the table surface
- Curves: Reduce speed and use your fingertips to steer, maintaining even pressure
Troubleshooting Common Singer Industrial Issues
Machine won’t start: Check power connection and ensure the servo motor display shows ready status
Skipped stitches: Usually indicates wrong needle size for fabric or dull needle—replace immediately
Thread bunching: Re-thread both top and bobbin threads, checking for proper tension
Fabric not feeding: Clean lint from feed dogs and check presser foot pressure
Noise during operation: Servo motors run silently—any grinding indicates immediate need for professional service
Critical warning: Unlike home machines, Singer industrial machines have virtually zero “explosion factor.” The worst outcome from mistakes is typically re-threading. These machines are built for 8-hour production days and handle user errors with remarkable resilience.
Essential Maintenance Schedule for Longevity
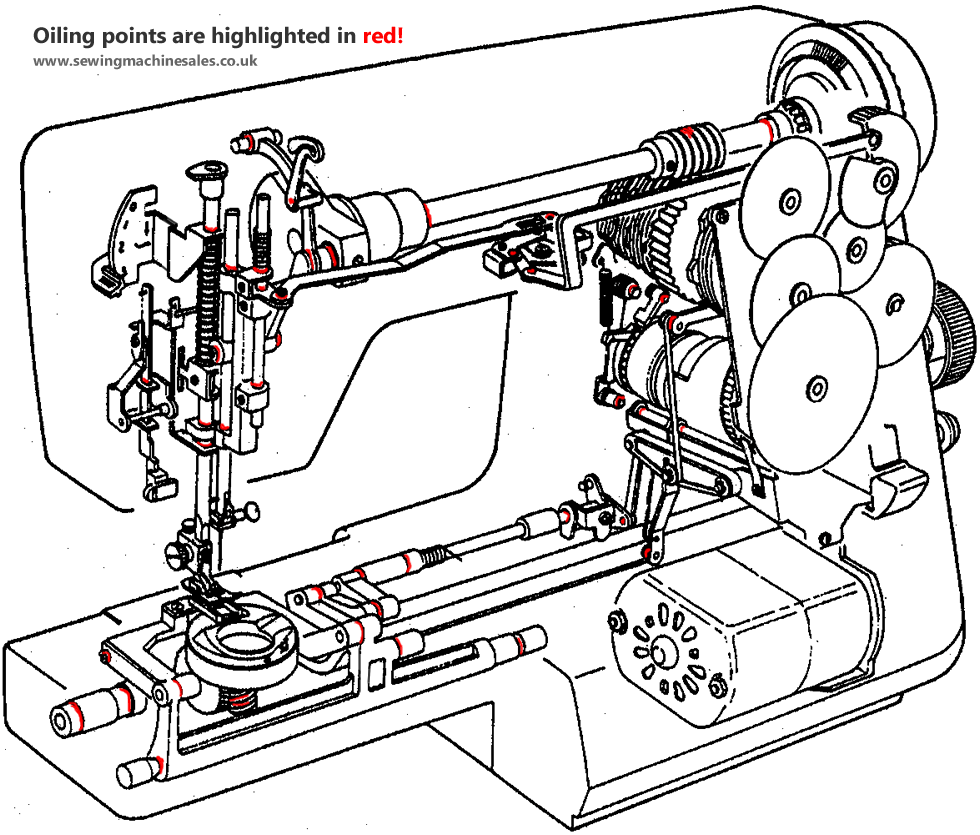
Daily: Brush lint from feed dogs and bobbin area. Oil designated points (marked in your manual) with 2-3 drops of sewing machine oil.
Weekly: Check belt tension and clean the entire table surface. Wipe down the servo motor housing with a dry cloth.
Monthly: Change needles every 8-10 hours of sewing time or when switching between significantly different fabric weights.
Annually: Professional service keeps timing perfect and prevents costly repairs. Industrial machines rarely break but benefit from precision adjustments.
Upgrading Your Singer Industrial Setup
Consider these additions as skills develop:
- Automatic thread trimmer: Worth every penny for efficiency
- Different presser feet: Walking foot for quilting, Teflon foot for sticky fabrics
- Speed reducer: For extremely delicate work or free-motion techniques
Most Singer industrial parts interchange with other major brands, keeping upgrade costs reasonable. A $7 presser foot is considered expensive in industrial sewing circles.
Singer Industrial vs. Home Machine Key Differences
The most significant difference isn’t power but specialization. Industrial machines are built for specific tasks rather than general use. Your Singer industrial’s separate motor mounts beneath the table, unlike home machines where the motor is built in. This design allows easy motor swaps and contributes to the machine’s legendary durability.
Another critical difference is the feed mechanism. While home machines rely solely on feed dogs, many Singer industrial models feature needle feed systems that pull fabric from both above and below, providing superior control with challenging materials.
Final Mastery Tips for Singer Industrial Operation
Your Singer industrial rewards precision over speed. Start projects slowly, focusing on straight seams and consistent stitching. The servo motor gives you infinite control—use it to build muscle memory before attempting complex techniques.
Remember: these machines are designed for 8-hour production days. They won’t explode if you make mistakes (the worst outcome is re-threading). With practice, you’ll wonder how you ever managed with a home machine’s limitations.
Ready to sew? Start with simple straight seams on scrap fabric, then graduate to your first project. Within a week, you’ll operate your Singer industrial with the confidence of someone who’s sewn professionally for years. The transition from intimidation to mastery happens faster than you think—your Singer industrial machine is waiting to become your most reliable sewing partner.


