
That dusty Singer treadle machine in your attic isn’t just a relic—it’s a fully functional sewing tool waiting to be revived. Learning how to use antique Singer sewing machine models from the early 20th century connects you to generations of crafters while delivering reliable performance without electricity. Whether you’ve inherited a family heirloom or rescued one from a garage sale, these iron workhorses from 1908-1945 can still create beautiful stitches with proper care and technique.
Most antique Singer sewing machines share common operating principles regardless of specific model. This guide cuts through the confusion to show you exactly how to identify your machine, prepare it for use, master the treadle motion, and maintain your vintage treasure for years of sewing enjoyment. Forget complicated manuals—let’s get your antique Singer humming again.
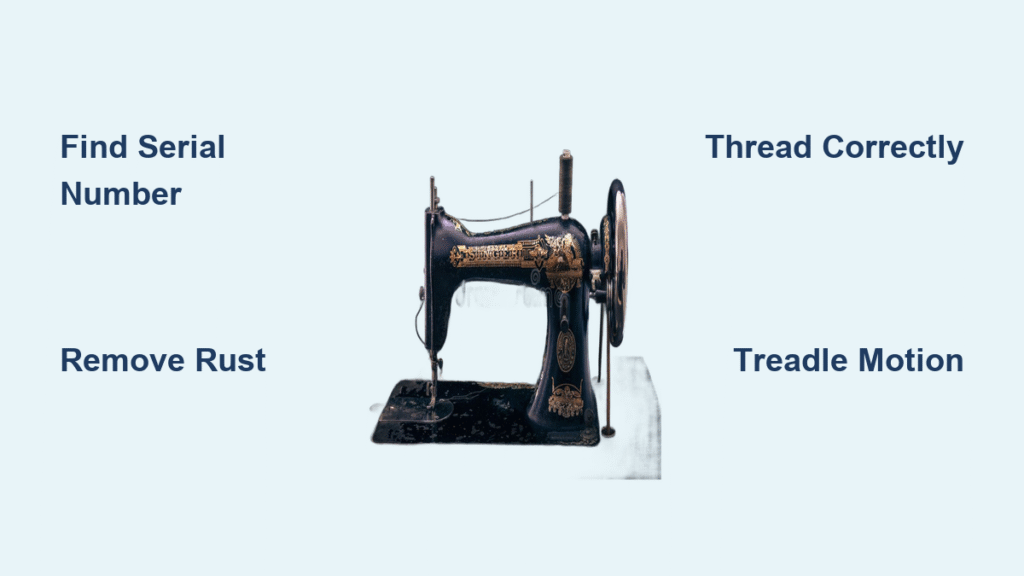
Locate and Decode Your Singer Serial Number
Find the Hidden Identification Mark
Your Singer’s serial number holds the key to its history and proper operation. Check the machine bed near the needle plate for stamped numbers—often obscured by decades of dust and grime. Use a soft cloth to gently clean this area without scratching the metal surface. For treadle models, this identification mark appears on the flat metal surface just behind where the needle moves up and down.
Determine Your Machine’s Age and Value
Serial numbers starting with “C” indicate Wittenberg production between 1908-1945, the most common era for antique Singer sewing machines. Early treadle machines feature wooden tops that lock over the machine head, while later designs let the head drop into the table. Don’t be fooled by cosmetic damage—chips in the machine bed and missing drawer evidence typically indicate age rather than decreased functionality. Remember that most machines from this period were mass-produced, so even a pristine example has modest monetary value but immense practical and historical worth.
Remove Rust and Clean Critical Components
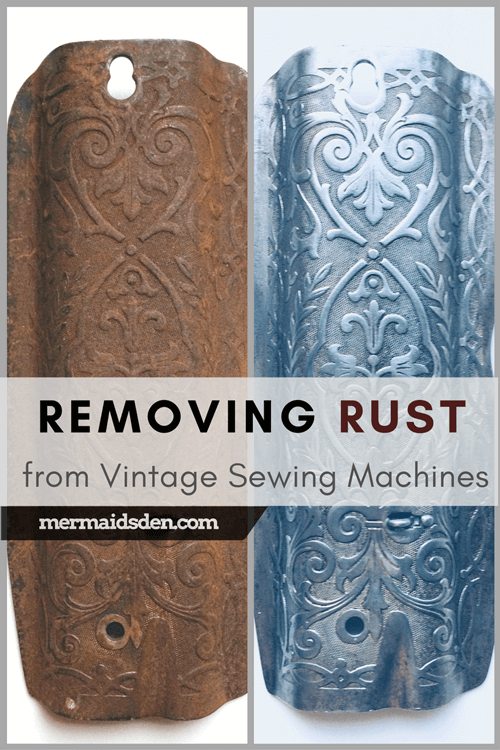
Execute Proper Rust Removal
Before attempting to use your antique Singer, address any rust development that occurred during storage. Use fine steel wool or specialized rust remover on all metal surfaces, focusing on the needle bar, bobbin area, and tension discs. Work gently to avoid damaging the original finish while ensuring moving parts operate freely. For severe rust, consider consulting a vintage sewing machine specialist rather than risking damage through aggressive cleaning.
Clean Decades of Built-Up Debris
Thoroughly clean accumulated dust and thread lint from every mechanical component using soft brushes and compressed air. Pay special attention to:
– The bobbin race area beneath the needle plate
– The feed dog mechanism that moves fabric
– Tension discs where thread passes through
– All visible gears and moving joints
Critical warning: Never use household oils like 3-in-1 oil on your antique Singer. These contain additives that gum up vintage mechanisms. Only use proper sewing machine oil designed for antique machines.
Replace Essential Missing Components

Source Period-Appropriate Replacement Parts
Most antique Singer sewing machines require some parts replacement before becoming operational. Common missing components include:
– Bobbin winder assemblies with their mounting hardware
– Needle plates showing the feed dog teeth
– Tension mechanisms that control stitch quality
– Bobbin cases that hold the lower thread
Pro tip: When sourcing parts online, measure existing components carefully. Vintage parts dealers often specify compatibility by serial number ranges. Ask sellers for clear photos showing condition—many “working” parts actually need restoration before functioning properly.
Prioritize Function Over Perfection
Focus on replacing parts essential for basic operation rather than seeking museum-quality restoration. A functional machine with some cosmetic wear delivers more value than a pristine display piece that can’t sew. Start with the bobbin winder, needle plate, and tension mechanism—these enable the fundamental sewing action. Address cosmetic issues like paint chips only after you’ve confirmed the machine operates correctly.
Master Treadle Operation Without Electricity
Set Up Proper Belt Tension
Position your treadle table on level ground to prevent wobbling during operation. The leather or rubber belt connecting the treadle to the machine head needs proper tension—slight give but no slipping when you begin treadling. Adjust by moving the treadle assembly slightly forward or backward until you achieve smooth power transfer. A belt that’s too tight strains the mechanism, while one that’s too loose causes inconsistent stitching.
Develop the Correct Foot Motion
Begin with your feet resting lightly on the treadle plate. Push down and forward with your right foot while simultaneously pulling back with your left—creating a smooth rocking motion. Listen for the consistent whirring sound that indicates proper speed. Practice this motion without thread until it feels natural, then gradually introduce fabric. Always rotate the handwheel away from you to start stitching; pulling toward you reverses the mechanism and risks thread jams.
Thread Your Antique Singer Correctly
Wind and Install the Bobbin Properly
Engage the bobbin winder by pushing the small lever near the handwheel toward the winder assembly. Place your thread spool on the upright pin, guide the thread through the tension disc, and wind evenly onto the bobbin. Stop when full—overwinding causes tangles. Open the slide plate beneath the needle, insert the bobbin with thread unwinding counterclockwise, and pull the thread through the case’s tension spring until you feel slight resistance.
Follow the Exact Top Thread Path
Thread the upper mechanism in this precise sequence:
1. Guide thread from spool to first thread guide
2. Pass thread down through tension discs (numbers facing you)
3. Bring thread up through take-up lever
4. Thread needle eye from front to back
Critical mistake to avoid: Skipping any thread guide creates uneven tension and poor stitches. The path must follow the machine’s designed route exactly—no shortcuts.
Troubleshoot Common Stitching Problems
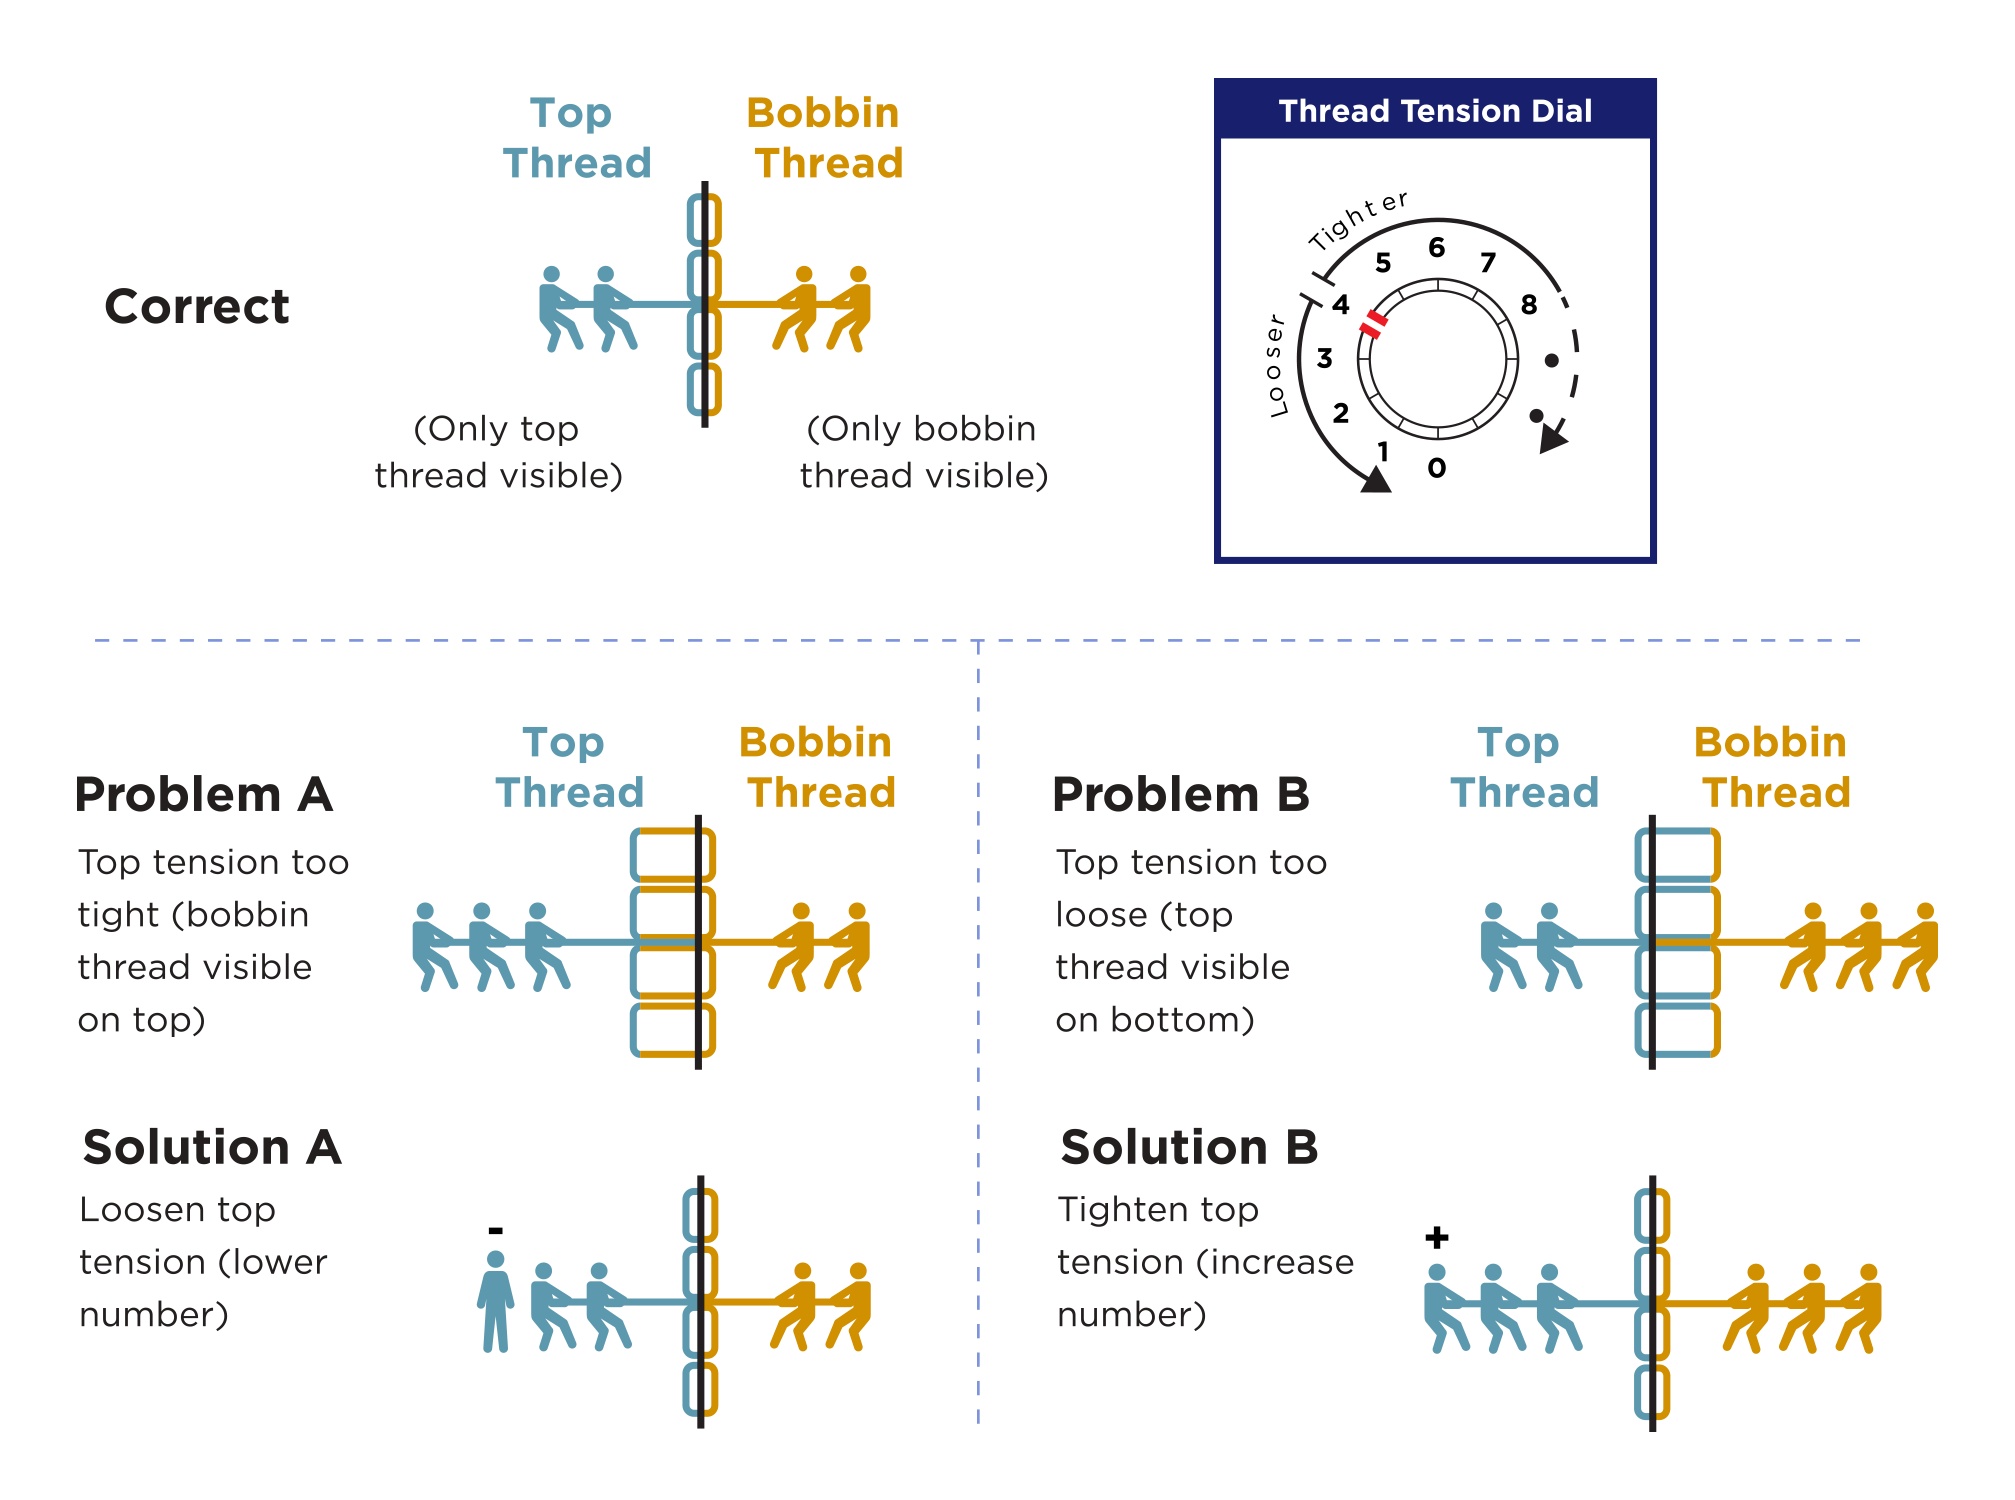
Fix Thread Bunching Under Fabric
When thread gathers beneath your fabric, the top tension is too loose. Gradually tighten the tension screw (usually numbered 1-9) while testing on scrap fabric. The correct tension occurs when both threads meet in the middle of the fabric layers. For vintage machines, tension settings between 3-5 typically work for medium-weight cotton.
Address Fabric Feeding Issues
If your antique Singer won’t pull fabric through properly:
– Check presser foot position – must be lowered firmly
– Verify feed dog height – should just peek above needle plate
– Adjust presser foot pressure – turn screw above foot clockwise for heavier fabrics
– Examine needle condition – bent or damaged needles cause feeding problems
Pro tip: Hold both thread tails for the first 3-4 stitches to prevent thread tangling as you begin sewing.
Implement Essential Maintenance Routine
Clean After Every Sewing Session
Remove the needle plate after each use to access the bobbin area. Use a small brush to remove lint and thread fragments from around the feed dogs and bobbin race. Wipe down all surfaces with a soft cloth to prevent oil and dust accumulation. This simple routine prevents 90% of operational problems in antique sewing machines.
Oil Key Moving Points Monthly
Apply one drop of sewing machine oil to:
– Handwheel bearing at machine base
– Needle bar connection points
– Bobbin case race area
– Any visible pivot points in the mechanism
Wipe away excess oil to prevent attracting dust. For machines stored in humid environments, add silica gel packets to storage areas to prevent rust recurrence.
Understand Realistic Value and Purpose
Focus on Practical Use Over Collectibility
Most antique Singer sewing machines from 1908-1945 have modest monetary value due to mass production. A fully functional machine might fetch $100-$300 depending on condition and rarity, but common models rarely exceed this range. Don’t invest hundreds in restoration expecting financial returns—instead, value your machine for its practical sewing ability and historical connection.
Document Your Machine’s Restoration Journey
Create a simple log noting:
– Serial number and verified production date
– Restoration completion date
– Parts replaced or repaired
– Family history if known
This documentation adds personal meaning that transcends market pricing. Your restored Singer becomes more than a tool—it’s a tangible connection to generations of makers who created everything from everyday clothing to special occasion garments on identical machines.
Mastering how to use antique Singer sewing machine models rewards you with reliable sewing capability and a connection to textile history that modern machines can’t replicate. The rhythmic treadle motion becomes meditative, linking you to countless crafters who relied on these same iron workhorses. Start with simple mending projects to build confidence, then progress to more complex sewing as you develop your skills. With proper care, your restored Singer will deliver decades more service—proving that some innovations truly stand the test of time. Keep your machine clean, properly oiled, and stored in a climate-controlled environment, and you’ll preserve both a functional tool and a piece of sewing heritage for future generations.


