
Your Juki sewing machine races ahead like a thoroughbred when you need a gentle trot. Whether you’re working with delicate chiffon or teaching a child to sew, that runaway speed can turn a simple project into a tangled disaster. The frustration is real—your hands can’t keep up with the machine’s pace, stitches become uneven, and fabric gets puckered before you can react.
The good news is every Juki model, from industrial powerhouses to domestic workhorses, offers multiple ways to regain control. Whether you’re using a DDL-8700 industrial machine or a HZL-F600 home model, you can transform that speed demon into a precision instrument that responds to your touch, not your machine’s default setting.
Why Your Juki Sewing Machine Races Out of Control
Industrial Juki models ship with production-focused settings that prioritize speed over control. Clutch motors operate at fixed high RPM with binary on/off functionality, while domestic models often default to maximum speed settings that overwhelm beginners. The factory calibration assumes experienced sewists with steady feet—not the reality for most home users.
Three critical factors cause runaway Juki machines:
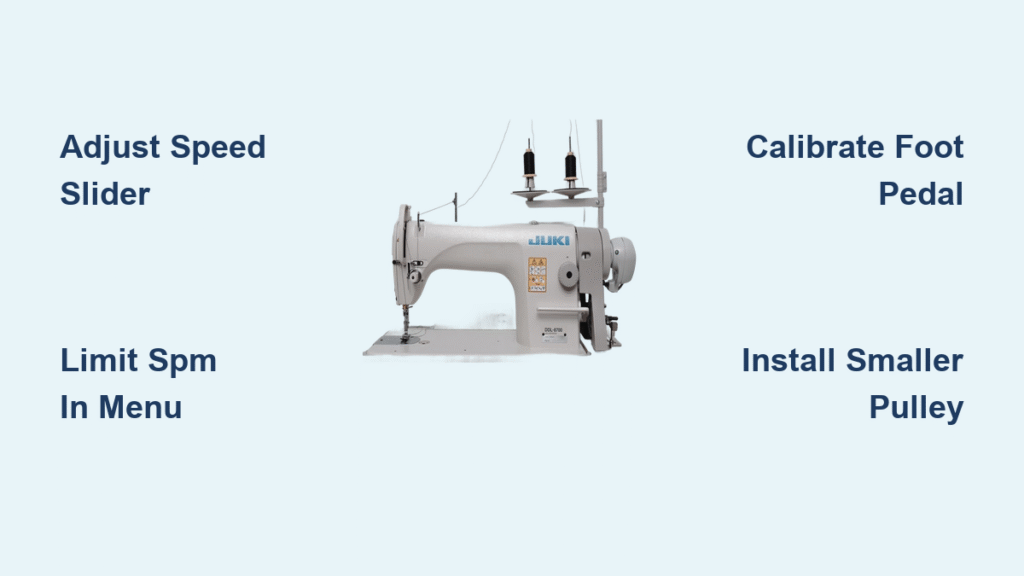
– Industrial clutch motors lack variable speed capability without modification
– Domestic models hide speed limiters in nested menu systems
– Foot pedals arrive factory-calibrated for professional sewists
Understanding your specific Juki model’s speed personality is essential before attempting any slowdown techniques.
Industrial Juki Speed Taming Techniques

Servo Motor Conversion for Complete Control
The most effective solution for industrial Juki models replaces your clutch motor with a servo system. Modern servo conversions transform your machine into a precision tool with infinite speed control from crawling pace to full production speed.
Key benefits of servo conversion:
– Sew as slow as one stitch per second for perfect embroidery details
– Maintain full power and torque at any speed
– Reduce energy consumption by up to 70% during slow sewing
– Eliminate the burning smell from clutch motors during delicate work
Installation requires basic mechanical skills:
1. Remove existing clutch motor and belt system
2. Mount servo motor using the machine’s existing mounting points
3. Install new belt and adjust tension to manufacturer specifications
4. Program speed parameters through the control box interface
Clutch Motor Speed Reduction Hacks
When conversion isn’t feasible, clutch motors still offer adjustment potential. The secret lies in manipulating the mechanical components that control speed engagement.
Immediate relief methods:
– Adjust clutch engagement screw: Turn counterclockwise 1/4 turn to reduce starting speed
– Install smaller motor pulley: Replace 2″ pulley with 1.5″ for 25% speed reduction
– Slightly loosen belt tension: Creates slippage that reduces maximum speed
Critical warning signs of over-adjustment:
– Machine stalling when starting to sew
– Belt slippage during heavy fabric sewing
– Overheating after 30 minutes of low-speed operation
Domestic Juki Speed Limiting Methods
Computerized Model Speed Settings
HZL and DX series machines hide sophisticated speed controls behind layers of menus. Most users never discover these features because manufacturers bury them deep in settings.
Access speed limiter in three steps:
1. Press MENU → Machine Settings → Speed Control
2. Set maximum SPM (stitches per minute) from factory default of 1500 to your preferred limit
3. Save settings to a custom profile for instant recall during specific projects
Pro tip: Create specialized profiles—800 SPM for quilting, 400 SPM for leather, and 200 SPM for teaching beginners.
Mechanical Model Speed Slider Adjustment
TL series machines feature a physical speed control slider that provides instant tactile feedback. This slider, usually located right of the needle area, becomes your primary speed management tool.
Effective adjustment routine:
1. Locate the speed slider on your machine’s face
2. Set to 50% (usually position 5 on a 1-10 scale) for general sewing
3. Reduce to 25% (position 2-3) for detailed work on delicate fabrics
4. Gradually increase as your comfort level improves
Foot Pedal Calibration for Precision Control

Electronic Pedal Sensitivity Adjustment
Your foot pedal is the primary speed interface, yet most sewists never adjust its response curve. Servo motor-equipped machines offer electronic calibration through parameter settings.
Optimize pedal response:
– Access P3 parameter for pedal sensitivity (typically 100% factory setting)
– Reduce to 60-70% for smoother low-speed control
– Adjust P4 parameter to eliminate jumpy starts at low pressure
Mechanical pedal fixes for older models:
– Clean contact points with electrical contact cleaner
– Adjust spring tension for lighter touch requirements
– Replace worn potentiometer in pedals showing inconsistent response
Strategic Pedal Positioning
Physical pedal placement dramatically affects your ability to control speed. Many sewists unknowingly sabotage their efforts with poor pedal positioning.
Optimal setup protocol:
– Place pedal directly under your sewing chair for natural foot position
– Use a non-slip pedal pad to prevent creeping during operation
– Angle pedal 15 degrees toward your heel for better pressure control
– Position so your foot rests naturally without ankle strain
Troubleshooting Common Slow Speed Problems
Machine Stalling at Reduced Speeds
Low-speed stalling typically indicates insufficient torque at reduced RPM. This commonly affects clutch motor conversions where the motor cannot maintain power at crawling speeds.
Quick diagnostic steps:
– Test with lightweight cotton fabric first
– Check belt tension for proper alignment
– Monitor motor temperature during 5-minute test session
– Listen for unusual grinding or bearing stress noises
Effective solutions:
– Install servo motor with higher torque rating
– Add reduction gear system for mechanical advantage
– Reduce maximum speed setting incrementally rather than minimum
Speed Control System Maintenance
Monthly maintenance prevents speed control degradation:
– Clean foot pedal contacts with electrical contact cleaner
– Verify proper belt tension using manufacturer specifications
– Lubricate hook race mechanism with one drop of sewing machine oil
– Calibrate electronic settings quarterly for consistent performance
Warning signs requiring immediate attention:
– Inconsistent speed response during sewing
– Overheating after 15 minutes of continuous operation
– Unusual humming or grinding noises from motor
– Visible belt wear or damage during operation
Budget-Friendly Speed Solutions
Cost-Effective Speed Reduction Options
Starting at just $25, significant speed improvements are possible without major investment. The key is matching solutions to your specific Juki model and sewing needs.
Under $50 solutions:
– Install smaller motor pulley ($15-25) for mechanical speed reduction
– Add external rheostat controller ($20-35) for precise adjustment
– Replace worn foot pedal ($30-45) for consistent response
$50-150 improvements:
– Electronic foot pedal upgrade ($75-125) with programmable curves
– Professional clutch adjustment ($50-100) for optimal performance
– Basic servo motor parameter tuning ($75-100) for smoother operation
DIY vs Professional Installation Guidance
Simple adjustments anyone can handle:
– Repositioning speed slider on mechanical models
– Navigating menu systems for computerized speed limits
– Basic foot pedal cleaning with contact cleaner
– Pulley replacement with proper tools and measurements
Professional recommended:
– Full servo motor conversion (electrical safety concerns)
– Complex controller programming beyond basic parameters
– Clutch mechanism rebuilding requiring specialized tools
– Three-phase motor VFD adjustments
Speed Validation Testing Methods
Accurate Speed Measurement Techniques
Verify your adjustments with these reliable measurement methods:
– Stitch counting: Sew for exactly 10 seconds, count stitches, multiply by 6 for SPM
– Smartphone apps: Measure motor frequency for precise RPM calculation
– Digital tachometers: $20-40 tools provide professional-grade accuracy
Quality Assurance Protocol
Test your speed adjustments across multiple fabric types:
1. Sew test pieces at multiple speeds (200, 400, 600 SPM)
2. Check both straight and zigzag stitch formation
3. Verify consistent tension on top and bottom threads
4. Adjust tension settings as needed for new speed parameters
5. Document optimal settings for future reference projects
Your Juki now responds to your touch, not its factory defaults. Whether you’ve implemented simple menu adjustments or completed a full servo conversion, these techniques give you complete command over sewing speed. Start with the easiest method for your specific model—often the speed slider on mechanical machines or menu navigation on computerized models.
Remember that perfect speed control is deeply personal. What works for intricate embroidery might feel sluggish for garment construction. Save multiple speed profiles, practice consistently at reduced speeds, and let your creative vision—not your machine’s default settings—dictate your pace. With these techniques, your Juki becomes the precision tool it was always meant to be.


