
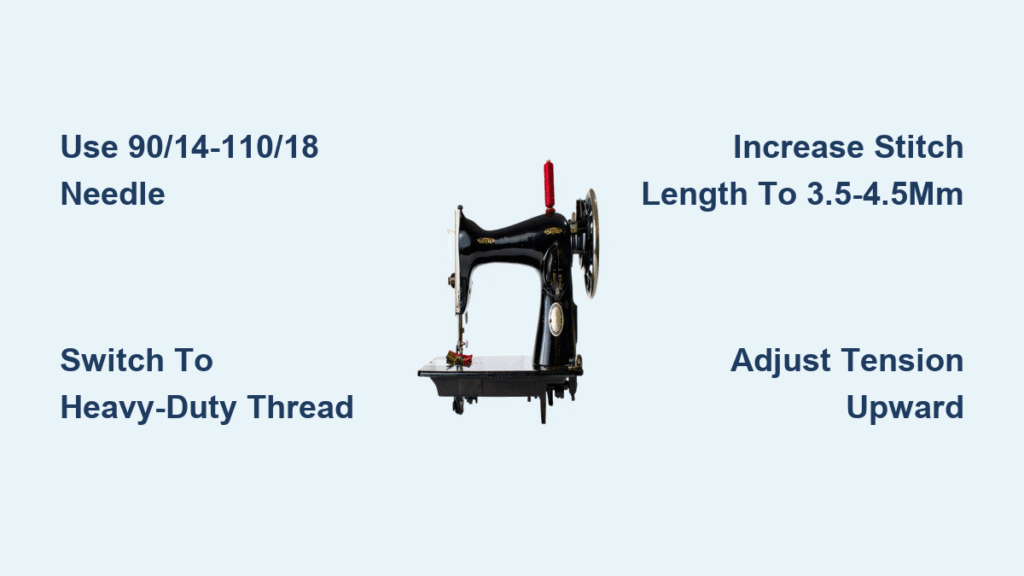
Your Singer sewing machine suddenly struggles when you switch from quilting cotton to denim or canvas. Needles snap mid-seam, stitches skip over thick seams, and the motor strains like it’s lifting weights. This isn’t a machine flaw—it’s a setup issue. Thousands of home sewists abandon bulky projects after their Singer chokes on leather or multi-layer bags, but you don’t have to. With precise needle selection, pressure adjustments, and smart seam prep, your domestic Singer can conquer upholstery fabric, 4-layer denim, and even thin leather. This guide reveals exactly how to modify your machine for thick fabrics using tools you likely already own—no industrial upgrade needed.
Pick the Exact Singer Needle That Prevents Breakage
Using the wrong needle is the #1 cause of Singer failures on thick fabrics. Standard 80/12 needles bend like spaghetti when hitting denim seams, while oversized 120/19 needles tear holes in canvas. Your Singer needs military-grade precision here.
Why 90/14 to 110/18 Sizes Save Your Machine
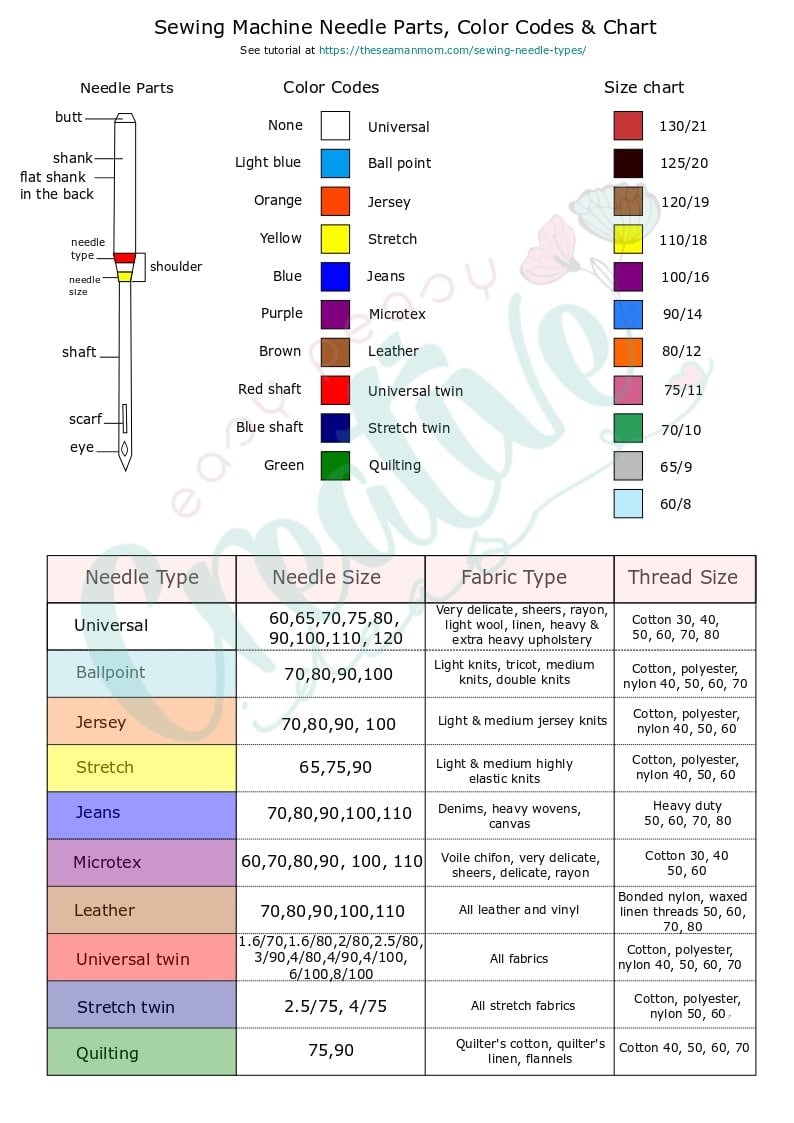
For medium-heavy fabrics like twill or light denim, a 90/14 denim needle punches through without shredding fibers. Move to 100/16 when sewing canvas or 3-layer denim seams. For true heavyweights—upholstery fabric, leather, or 4+ layer stacks—grab a 110/18 leather needle. Its sharp, wedge-point tip slices cleanly through dense materials instead of deflecting sideways. Always test on scrap fabric matching your project’s layer count. If the needle visibly bends during sewing, you’re one stitch away from disaster.
Denim vs. Leather Needles: Critical Differences
Denim needles (often blue-tipped) have a reinforced shaft to handle cotton’s abrasiveness but lack the extreme point sharpness needed for leather. Leather needles (usually brown-tipped) feature a chisel point that cuts rather than pushes through materials. For canvas or vinyl, denim needles work best. For genuine leather or suede, leather needles prevent skipped stitches. Never reuse needles on thick fabrics—they develop microscopic burrs after 10-15 minutes of heavy sewing that cause thread breaks.
Use Heavy-Duty Thread That Survives Tension

Regular all-purpose thread snaps instantly under the stress of thick fabric sewing. Your Singer’s tension disks shred weak cotton threads when pulling through dense layers, causing constant breaks and birdnesting.
Polyester vs. Nylon: Matching Thread to Fabric Stress
Heavy-duty polyester thread (like Gutermann Mara 100) is the universal solution for 90% of thick fabrics. Its high tensile strength handles upholstery cotton, canvas, and denim without stretching or breaking. For leather or vinyl, switch to bonded nylon thread—it resists abrasion from the material’s rough surface. Never use cotton thread; its low strength guarantees mid-seam failures. Always match thread weight to your needle: 40-weight thread for 90/14 needles, 30-weight for 100/16+.
Adjust Singer Stitch Length for Bulky Seams
Standard 2.5mm stitches choke your Singer when sewing thick fabrics. The short stitch length forces the needle to pierce dense layers too frequently, causing skipped stitches and motor strain.
Why 3.5-4.5mm Prevents Puckering on Top-Stitching
Lengthen stitches to 3mm for regular seams in denim or canvas. This reduces needle stress and prevents fabric puckering. For top-stitching on bags or jackets, jump to 3.5-4.5mm—longer stitches accommodate thickness without distorting the fabric. Test on scrap: if the bobbin thread shows on top, your stitches are too short. Never use zigzag stitches on thick seams; the side-to-side motion increases needle deflection risk.
Dial In Tension for Clean Stitches Through Multiple Layers
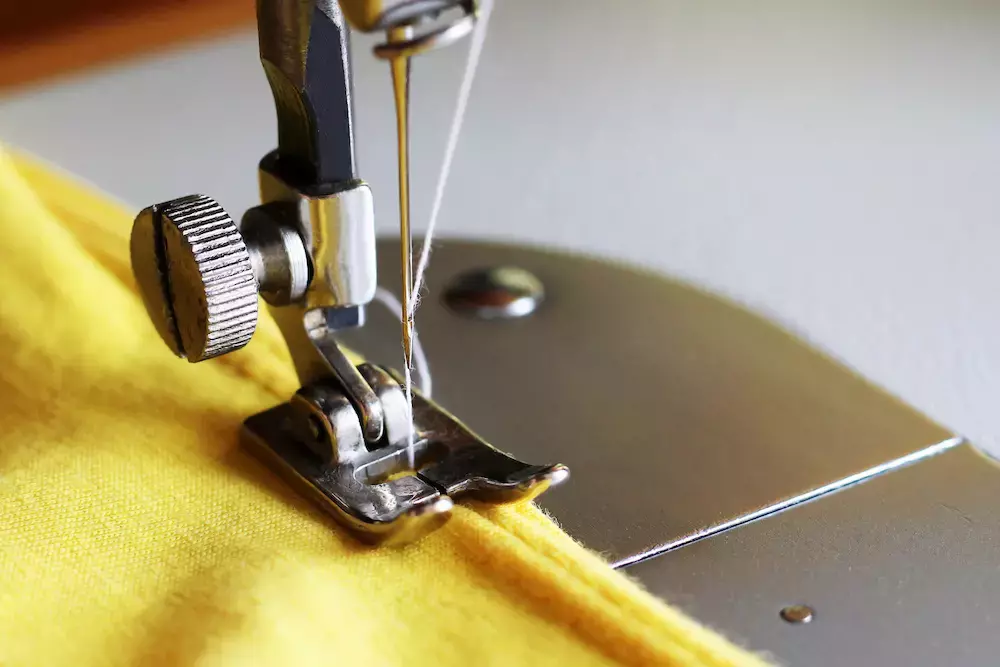
Incorrect tension causes the most frustrating thick-fabric failures: bobbin thread showing on top or loops under the fabric. Your Singer’s default settings assume lightweight materials.
How to Increase Top Tension Without Bobbin Thread Showing
Turn the top tension dial clockwise in quarter-click increments. After each adjustment, sew a 2-inch test seam on layered scrap fabric. Perfect tension occurs when both threads meet in the middle of the fabric layers. If bobbin thread shows on top, increase tension. If top thread loops underneath, decrease slightly. Thick fabrics usually need 1-2 full numbers higher than normal settings. Always retest after changing needles or thread.
Level Presser Feet Over Thick Seams Like a Pro
When your Singer’s presser foot tilts over a bulky seam, the needle deflects sideways, causing skipped stitches. Standard feet can’t maintain consistent pressure—this is where specialized techniques save the day.
Cardboard Hump Jumper Trick for Any Singer Model
No special foot? Use stiff cardboard as a portable ramp. When approaching a seam:
1. Stop with needle down in fabric
2. Raise presser foot
3. Slide cardboard behind the foot so its rear sits level
4. Sew 2-3 stitches over the seam
5. Slide cardboard in front of the foot
6. Continue sewing, removing cardboard before the needle hits it
A credit card or cereal box works perfectly. This trick prevents 90% of seam-related skipped stitches on domestic Singers.
Thick Fabric Foot: Never Stop at Seams Again
The sprung suspension foot (Singer part #8288Q) is a game-changer. Its internal spring acts like a car shock absorber, automatically leveling over seams up to 1/4″ thick. Install it with the needle up, snapping the wire spring against the machine’s ankle. Unlike J-feet, you never stop sewing—just glide over humps while maintaining perfect stitch length. Essential for bag makers tackling side seams.
Feed Layers Evenly with Specialty Presser Feet
Thick fabrics cause layer shifting—top fabric feeds slower than bottom layers, creating puckered seams. Standard presser feet can’t grip dense materials evenly.
Walking Foot Fixes Shifting Quilts and Bags
The walking foot (Singer #17) has its own feed dogs that grip the top fabric layer, moving it in sync with the machine’s lower feed dogs. This prevents shifting on multi-layer projects like tote bags or quilted jackets. Install it by raising the presser foot lever, sliding the walking foot’s fork over the presser bar, and lowering the lever. Test on scrap: layers should feed together without rippling.
Reduce Bulk Before You Sew
No Singer—domestic or industrial—sews well through unmanaged bulk. Thick seams strain motors and cause skipped stitches even with perfect settings.
Hammer Thick Seams Flatter Without Damage
Place bulky seams (like bag corners) on a cutting mat. Cover with a scrap fabric and pound for 1-2 minutes with a rubber mallet. The impact compresses fibers without damaging the surface. Test first on scrap: some delicate leathers may mark. For canvas or denim, this reduces seam thickness by 30%, letting your Singer sew through with less strain.
Use Clips Instead of Pins for Safety
Pins cause catastrophic needle breaks when hitting metal. Switch to Wonder Clips—they hold 4+ layers of denim securely without needle collision risks. Place clips perpendicular to the seam line, 1-2 inches apart. Remove them just before the presser foot reaches each clip.
Start Thick Seams Without Jamming
Beginning seams on thick fabric often jams Singer machines. The feed dogs can’t grip multiple layers at the edge, causing the needle to bounce off.
Fabric Ramp Trick for Smooth First Stitches
Fold scrap fabric matching your project thickness into a wedge. Place it under the rear of the presser foot when starting a seam. As you sew, the wedge gradually feeds the thick layers onto the feed dogs. Remove it once the machine grips the fabric (about 1 inch in). This prevents the “bounce-off” effect that snaps needles at seam starts.
Hand Crank Through Extreme Thickness
When sewing 8+ layers of leather or dense canvas, your Singer’s motor may stall. The pedal forces rushed stitches that the machine can’t complete.
When to Use the Hand Wheel on 8+ Layers
Disengage the foot pedal and turn the hand wheel slowly toward you. Guide the fabric with your left hand while applying gentle downward pressure on the presser foot with your right index finger. This gives the machine time to form each stitch without straining the motor. Essential for attaching thick bag handles or leather straps.
Know When Your Singer Hits Its Limit
Even perfectly set up, domestic Singers have limits. Ignoring warning signs leads to costly repairs.
Fixing Needle Deflection and Motor Stalling
If needles consistently bend despite correct size, or the motor clicks loudly, reduce layers:
– Grade seam allowances (trim one layer narrower)
– Cut straps half-width (like suede handles in the Colleen Tote example)
– Serge edges before folding to minimize layers
For permanent solutions on extreme projects (like motorcycle seats), use hand-stitching for critical seams. Your Singer isn’t failing—you’re just pushing beyond its engineering limits.
Singer Thick Fabric Setup Checklist
Before starting any thick fabric project:
1. Needle: 90/14–110/18 denim/leather (new)
2. Thread: Heavy-duty polyester (40wt for 90/14, 30wt for 100/16+)
3. Stitch length: 3.0mm (seams), 4.0mm (top-stitching)
4. Tension: Increase top tension 1-2 numbers
5. Foot pressure: Reduce 1-2 notches (test first)
6. Presser foot:
– General seams → Thick Fabric Foot
– Edge top-stitching → Bilevel Foot
– Sticky fabrics → Teflon Foot
– Layer shifting → Walking Foot
7. Prep: Hammer seams, use clips, trim allowances
8. Start seam: Fabric ramp under foot rear
Your Singer wasn’t designed for denim and leather out of the box—but with these precise adjustments, it becomes a capable heavy-fabric workhorse. The key isn’t brute force; it’s respecting the machine’s engineering while optimizing every variable. Start with medium-heavy fabrics like canvas to build confidence, then tackle leather. Within weeks, you’ll sew thick fabrics as smoothly as quilting cotton—with zero broken needles. For immediate success, always test settings on layered scrap first; it takes 60 seconds that saves hours of frustration. Now grab that denim jacket pattern or leather tote project gathering dust—you’ve got this.


