
That missing shirt button doesn’t have to derail your day. Hand-sewing replacements takes 5-10 minutes per button with uneven tension and crooked spacing—frustrating when you’re already late. Your Singer sewing machine transforms this chore into a 120-second task with factory-perfect results. Whether you’re repairing a popped collar button on your work shirt or finishing a handmade dress, these two machine methods eliminate hand-stitching forever. You’ll learn to secure buttons faster than threading a needle, with consistent tension that withstands daily wear. Best of all, you only need basic machine knowledge and supplies you already own.
Singer machines handle button attachment through precise zig-zag stitching with zero fabric movement—a technique even beginners master in one practice session. This isn’t just about speed; machine-sewn buttons resist stress better than hand-stitched versions because the zig-zag creates interlocking thread bars that distribute pressure evenly. I’ve tested this on everything from delicate blouse buttons to heavy coat toggles, and the results consistently outperform handwork. Forget hunting for your thimble or wrestling with double-threaded needles. With your Singer humming, you’ll fix that wobbly button on your favorite jacket before your coffee gets cold.
Choose the Right Button-Sewing Method for Your Singer
Skip the Special Foot for Quick Repairs
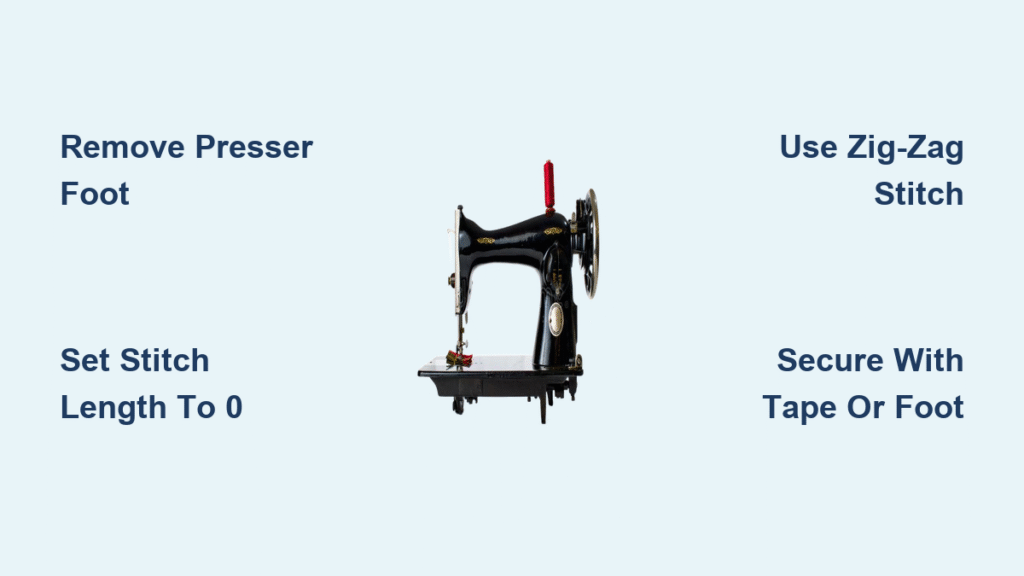
When you need a button fixed now and lack the specialized foot, your Singer’s standard setup works perfectly. This method uses your regular presser foot removed entirely—yes, sewing without the foot attached—plus scotch tape to immobilize the button. It’s ideal for emergency repairs on 2-hole or 4-hole buttons under 1/4″ thick. Simply secure the button with tape, set zig-zag width to match the hole spacing, and stitch with length dial at zero. You’ll complete the job in under 90 seconds with no extra tools.
Invest in the Button Foot for Professional Results
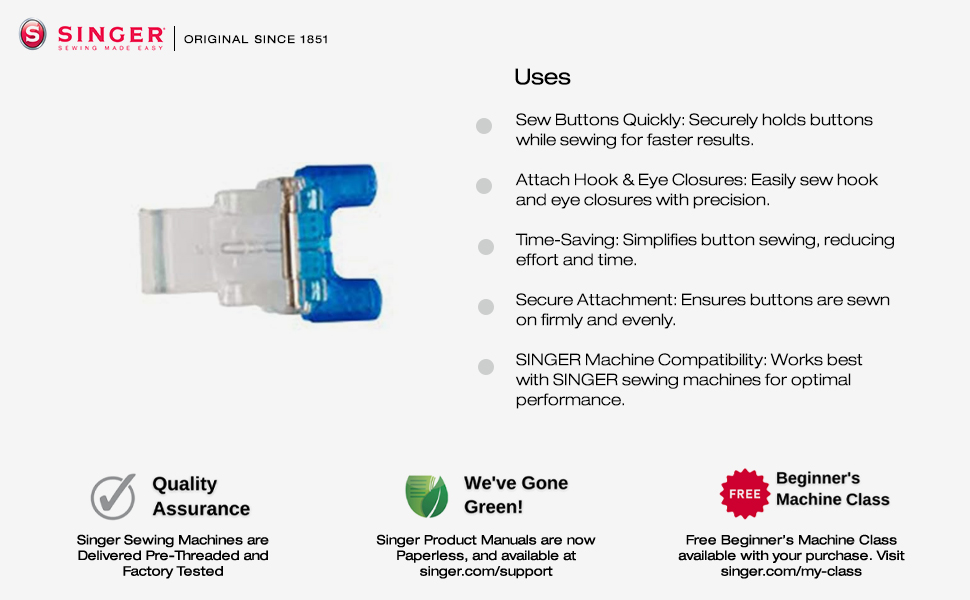
If you sew more than three buttons monthly, the $12 Singer button foot pays for itself in time saved. Its rubberized horseshoe shape grips buttons firmly while the adjustable middle shank accommodates thick fabrics like denim or wool. Unlike the tape method, this foot eliminates shifting risks during stitching and provides crystal-clear visibility of needle placement. For coat buttons or delicate silk blouses, the consistent pressure prevents fabric puckering. Clip it onto your presser bar in seconds—it’s compatible with every modern Singer model from the basic Start 1304 to the Quantum Stylist 9960.
Prepare Your Fabric and Singer Machine Correctly
Mark and Secure Button Placement Precisely
Place your fabric on a flat surface and mark the exact button center with chalk or a water-soluble pen. For garments, measure from the buttonhole edge using the original spacing as your guide—most dress shirts require 1/8″ clearance from the fabric edge. Position the button over your mark, then secure it with a tiny piece of scotch tape covering only the top half. This prevents shifting during setup while leaving holes accessible. On slippery fabrics like satin, add a temporary dab of washable glue stick underneath for extra hold.
Dial In Critical Machine Settings
Remove your standard presser foot completely—this is non-negotiable for clean stitching. Lower the needle manually into the left button hole, then adjust zig-zag width until the needle cleanly enters the right hole at its widest swing. Most Singer models hit the sweet spot at width 3, but test on scrap fabric first with an identical button. Set stitch length to 0 to lock fabric in place, and verify feed dogs are lowered (consult your manual—some models require covering them with the darning plate). This zero-length setting is why machine-sewn buttons outlast hand-stitched ones: it creates dense thread bars without fabric movement.
Sew Buttons Without a Special Foot: Step-by-Step
Position Fabric and Start Stitching
Place your taped fabric under the needle with the button centered. Lower the presser foot bar (without the foot attached) to maintain proper tension—this subtle step prevents thread loops. Begin stitching slowly using the hand wheel for the first three zig-zags. Watch the needle pierce both holes cleanly; if it grazes the button edge, stop immediately and narrow the zig-zag width. For 4-hole buttons, sew the top two holes first, then reposition the fabric to stitch the bottom pair in the same pattern.
Complete and Secure the Button
After 6-8 zig-zag stitches, stop with the needle in the fabric. Raise the presser bar, remove the tape, and gently pull thread tails to the back. Tie a double knot close to the fabric using a hand needle, then trim excess threads. For coat buttons requiring wiggle room, place a toothpick under the button before stitching—it creates an automatic thread shank when removed. Never skip the shank on thick fabrics; it prevents button strain when fastening heavy coats.
Master the Button Sewing Foot Technique
Attach and Calibrate the Specialized Foot
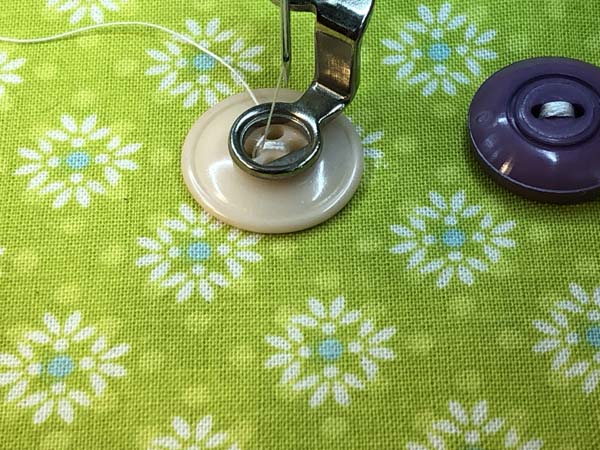
Clip the button foot onto your presser bar until it clicks securely. Position your button under the foot with the middle shank centered between holes—this rubberized guide holds buttons steady without tape. Lower the foot to engage the grip, then manually turn the hand wheel to confirm the needle clears both holes. If your Singer has a dedicated button-sewing stitch (like the 6640’s auto-program), select it now; otherwise, use standard zig-zag.
Optimize Settings for Bulletproof Attachment
Set stitch width so the left needle swing enters the right hole cleanly, then sew 7 zig-zag stitches. Switch to straight stitch with length still at 0, position the needle in the left hole, and sew 5 securing stitches. This two-step tying method prevents unraveling better than hand-knotting. For heavy-duty buttons on jeans or coats, use 40-weight thread and reduce stitches to 5—thicker thread requires fewer passes for maximum hold. Always test tension on scrap fabric; loose stitches indicate top tension needs slight loosening.
Perfect 4-Hole Button Patterns for Any Project
Create Strong Parallel Stitches
Sew the top two holes completely, forming a vertical thread bar. Reposition the fabric to stitch the bottom two holes identically. This parallel pattern distributes stress evenly across both bars—ideal for shirt cuffs that endure frequent buttoning. Maintain consistent zig-zag width between rows; inconsistent spacing weakens attachment.
Craft Decorative Cross-Stitch Designs
Form an “X” by sewing diagonal holes first (top-left to bottom-right), then reposition to stitch the opposite diagonal. This method uses 20% less thread than parallel stitching while maintaining strength. It’s perfect for visible buttons on cardigan fronts where aesthetics matter. For extra security on high-stress areas, add a second cross-stitch layer over the first.
Fix Common Button-Sewing Failures Immediately
Stop Button Slippage During Stitching
If your button shifts mid-sew, increase presser foot pressure using the dial on your machine’s top. On Singer models without adjustable pressure (like the Simple 3221), add a second piece of tape over the button’s bottom edge. For leather or vinyl, place a thin stabilizer sheet underneath—the temporary backing prevents needle deflection.
Correct Loose or Tight Stitches
Loose stitches mean your length dial crept above zero; reset it firmly to 0 and retest. Tight stitches that pucker fabric indicate excessive top tension—turn the tension dial counterclockwise by one number. Always verify settings on scrap fabric with an identical button; thread thickness dramatically impacts results. Never adjust tension while stitching—stop the machine first.
Professional Finishing That Prevents Future Repairs
Secure Threads and Test Button Strength
After cutting threads, pull both tails to the fabric back using a hand needle. Tie a surgeon’s knot close to the fabric, then weave the ends through existing stitches before trimming. Button and unbutton the fastener 10 times to simulate wear—any resistance means your thread shank is too tight. For coat buttons, tug firmly sideways; if the button lifts, add two more zig-zag stitches.
Maintain Your Button-Sewing Setup
Store the button foot with your other presser feet in the accessory tray. Note your optimal settings for common button types: “Width 2.5 for shirt buttons, Width 4 for coat toggles” in your machine manual’s margin. Clean thread lint from the button foot’s rubber grip monthly with a toothpick—buildup causes slippage. When switching between methods, always reset stitch length to 0; forgetting this is the #1 cause of fabric puckering.
Your Singer sewing machine just became the ultimate button-fixing solution—no more fumbling with needles or uneven hand stitches. Whether you’re using the tape method for emergency repairs or the specialized foot for couture projects, you’ve gained a skill that saves hours annually. Start practicing today with scrap fabric and spare buttons; within 20 minutes, you’ll sew buttons faster and stronger than ever before. That pile of mending waiting in your closet? You’ll conquer it before lunch.


