
Your Kenmore sewing machine suddenly seized mid-project, leaving tangled thread and a half-finished garment. Before you consider replacing this reliable workhorse, learning how to open a Kenmore sewing machine properly could reveal simple fixes like lint buildup or insufficient lubrication. These vintage machines often outperform modern models when maintained correctly, but improper disassembly turns them into expensive paperweights.
This guide provides model-specific instructions for safely accessing internal components of Kenmore models 158.16030 and 158.19412. You’ll discover where to find hidden screws, how to document each step for successful reassembly, and critical warning signs that indicate when professional help becomes necessary. Whether you’re troubleshooting a stuck pulley or cleaning decades of lint accumulation, these proven techniques help you maintain your Kenmore without causing irreversible damage.
Critical Safety Steps Before Opening Your Kenmore
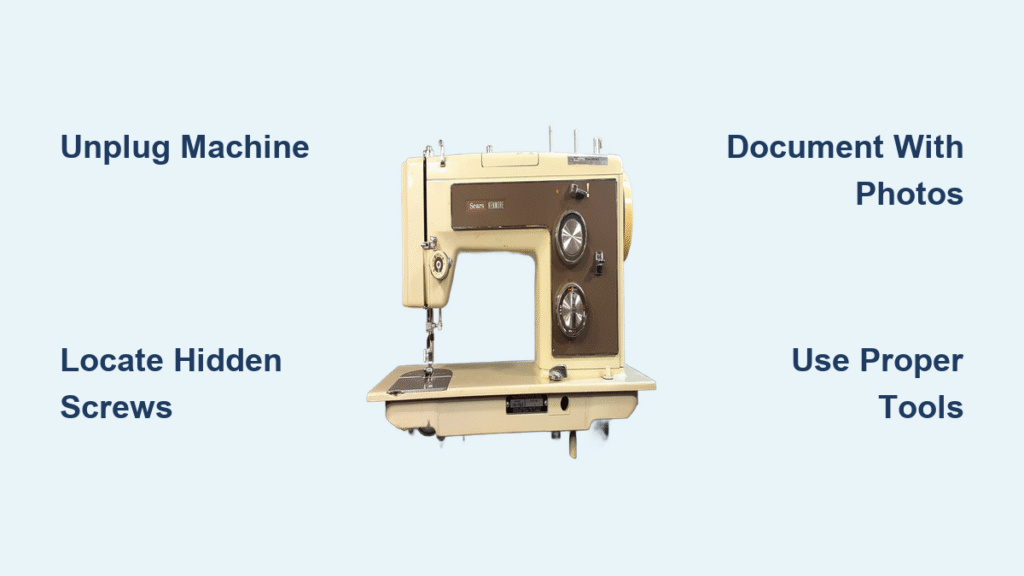
Power down completely by unplugging your machine and removing the needle—this prevents accidental needle strikes when working inside the mechanism. Vintage Kenmore machines (especially those 35+ years old) contain precision assemblies that can be permanently damaged by forcing stuck components or using incorrect tools. Never attempt disassembly while the machine remains plugged in, as even residual power can cause unexpected movement.
Prepare your workspace with bright lighting and small containers labeled for screws from different sections. Take photos at every stage using your phone—these become your roadmap for reassembly when you’re staring at a pile of mysterious parts three hours later. Organize components by where they came from, as Kenmore often uses different screw sizes throughout the machine.
Know your limits: Professional technicians warn that these vintage machines often become “boat anchors” after amateur repair attempts go wrong. If you encounter unexpected resistance, specialized tools, or complex timing mechanisms, stop immediately. Machines over 35 years old frequently represent higher quality craftsmanship than new models and deserve expert attention when serious issues arise.
Model 158.16030 Complete Top Cover Removal Process
Locating Hidden Screws on Kenmore 158.16030
Find the securing screws at the rear or sides of the top housing—these typically sit flush with the surface and may require a flashlight to spot clearly beneath decades of lint buildup. Turn each screw counterclockwise using the correct size screwdriver (usually Phillips head), placing screws immediately in your labeled container. Missing even one screw can prevent proper reassembly and cause operational issues.
Once all top screws are removed, lift the cover straight up—it may require gentle wiggling if years of lint have created slight sticking. Set the cover aside on a clean towel to prevent scratches. Avoid prying or forcing the cover, as plastic components in vintage machines become brittle with age.
Right Side Panel Access Without Damaging Vintage Components
Examine the right end panel edges for visible screws running along the perimeter. These screws often hide beneath layers of lint, so use a soft brush to clear debris before attempting removal. Remove all screws completely before attempting to separate the panel from the main chassis—missing even one can cause damage during removal.
The panel should separate with gentle pressure—never force it if resistance occurs, as this indicates missed screws or hidden clips. Once removed, you’ll expose critical components including the clutch assembly, drive belt connections, and the large upper pulley mechanism. Note any unusual wear patterns on these components before proceeding.
Internal Component Breakdown After Panel Removal
Remove the needle plate by unscrewing the two screws located on the machine bed—these typically sit at the front and back of the plate. Store these separately, as they’re often different sizes from other machine screws. These screws may be stubborn due to threadlocker applied at the factory.
Lift out the bobbin case straight upward once the needle plate clears. This plastic or metal component holds your bobbin and may reveal significant lint accumulation beneath—note any thread tangles or debris for later cleaning. Examine the bobbin case for nicks or damage that could affect stitch quality.
Slide out the throat plate after bobbin case removal. This larger metal piece covers the feed dogs and shuttle hook area. Document the exact position of any visible timing marks or alignment indicators before proceeding. These markings are crucial for proper reassembly and machine timing.
Tension Assembly Disassembly for Kenmore Model 158.19412

Front Cover Access to Tension Components
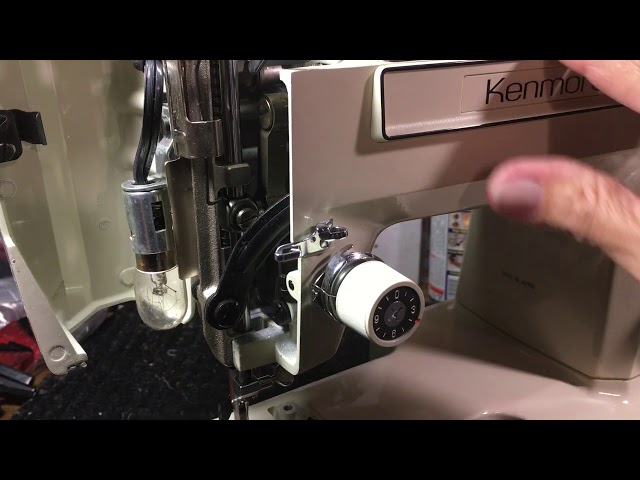
Open the front cover on the machine’s nose section—this small door typically hinges upward or slides to the side. Behind it, you’ll find the tension assembly hidden from normal view. Use a flashlight to illuminate the area, as decades of use may have darkened internal components.
Locate the small set screw using a flashlight—this tiny screw controls the entire tension assembly. Turn counterclockwise just enough to loosen (usually 1-2 full turns), avoiding complete removal which risks dropping the screw into the mechanism. Vintage Kenmore tension assemblies often have delicate spring components that require careful handling.
Complete Tension Breakdown Sequence Step-by-Step
Remove the center screw from the tension dial using a small Phillips head. This screw secures the numbered plastic insert—note its exact depth before removal as this affects final tension settings. Many users make the mistake of not documenting this depth, leading to improper tension after reassembly.
Extract components in order:
– Plastic numbered insert (note orientation)
– Washer with tab (oblong hole allows two positions—document which side faces outward)
– All tension control parts up to the beehive spring retainer nut
– Slotted nut (crown faces the machine body)
– Beehive spring
– Thread guide plate spring (requires gentle stretching over the post)
Identifying Critical Tension Components Before Removal
Handle the tension release pin carefully—this small part has a deformed end that must face outward during reassembly. Tip the assembly upside-down to let the pin slide out naturally without forcing. This pin is easily lost and difficult to replace in vintage machines.
Remove the tension assembly post after loosening the small set screw in the body cup. The post contains a small spring that can launch across the room—work over a towel to catch escaping parts. These tiny components are often unavailable as replacement parts for vintage Kenmore models.
Effective Cleaning Techniques During Kenmore Machine Access
Removing Decades of Lint Buildup Safely
Use compressed air or a soft brush to remove lint from:
– Bobbin case cavity
– Feed dog teeth and surrounding area
– Needle bar vicinity
– Internal gear surfaces (avoid direct oil contact)
Wipe surfaces with a dry cloth—moisture near electrical connections causes corrosion. Never use household cleaners as residues interfere with proper lubrication. Focus on areas where lint accumulates between moving parts, as this is often the cause of seized machines.
Avoiding Moisture Damage to Vintage Electrical Components
When cleaning near electrical components, use only dry methods—no damp cloths or cleaning solutions. Vintage Kenmore machines have insulation that degrades with age, making them more vulnerable to moisture damage. Pay special attention to the motor housing area, where lint accumulation can cause overheating.
Proper Lubrication Points for Kenmore Sewing Machines
Where to Apply Oil on Model 158.16030 After Opening
Apply sewing machine oil sparingly to:
– Bobbin case race (metal ring where bobbin sits)
– Hook assembly pivot points
– Needle bar connections
– Drive wheel contact points
Wipe excess oil immediately—over-lubrication attracts more lint and creates messy operation. Vintage machines require less oil than modern counterparts due to tighter tolerances and different materials.
How Much Oil Is Enough for Vintage Kenmore Machines
Test by hand-cranking the machine after lubrication—smooth operation indicates proper oiling. If resistance remains, add one more drop to problem areas. Vintage Kenmore machines typically need only 2-3 drops of oil in critical areas after thorough cleaning, contrary to the common misconception that they require heavy lubrication.
Reassembly Roadmap for Kenmore 158.16030 & 158.19412
Reverse Order Assembly Using Photo Documentation
Follow your photo documentation exactly in reverse sequence. Each screw should be snug but not over-tightened—these vintage machines use softer metals that strip easily with excessive force. Start with internal components before replacing panels to avoid misalignment issues.
Verify smooth operation by hand-cranking the wheel before replacing covers. Any binding or rough spots indicate misaligned components requiring correction. Listen for unusual noises that might indicate improper reassembly of tension components.
Tension Assembly Specific Reassembly Tips
Ensure the spring hook engages in the post slot correctly—this small detail determines whether your tension dial functions properly. Position the take-up spring at 6 o’clock for proper thread control. Many stitch quality issues after reassembly stem from incorrect tension spring positioning.
Set tension to “4” as a starting point after reassembly, then adjust based on fabric and thread combination. Test on scrap fabric before resuming important projects. Document your successful tension settings for future reference.
Warning Signs to Stop Kenmore Disassembly Immediately
Professional Service Indicators for Vintage Kenmore Machines
Stop disassembly when you encounter:
– Visible clutch assembly timing marks (model 158.16030)
– Specialized press-fit components requiring factory tools
– Electrical components beyond basic cord inspection
– Gear assemblies with complex timing relationships
Seek professional help if your machine is 35+ years old—these often represent higher quality than modern machines and deserve expert attention when serious issues arise. Vintage Kenmore machines have precision engineering that amateur repairs often compromise.
Common Opening Problems That Require Expert Help
Loose upper pulley indicates clutch assembly wear requiring specialized parts. Don’t attempt repairs as incorrect reassembly causes permanent timing damage. This issue typically requires factory-trained technicians with access to vintage parts catalogs.
Jammed bobbin cases from severe thread tangles may require complete shuttle hook removal—a delicate operation best left to professionals familiar with your specific model. Forcing these components often leads to irreparable damage.
Model Identification Essentials Before Opening Your Kenmore
Locate your complete model number on the machine label—typically found on the base or back panel. Document the full number (e.g., 158.16030) as Kenmore made numerous variations with subtle differences. This number is essential for finding model-specific repair guides and parts.
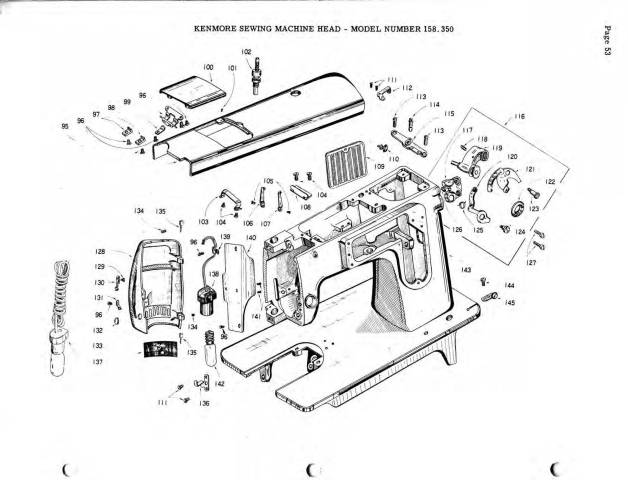
Search online forums using your exact model number—vintage sewing communities often maintain detailed guides and troubleshooting threads for specific machines. Download any available manuals before beginning work, as these provide exploded diagrams crucial for reassembly. Many sewing machine clubs have digitized archives of vintage Kenmore service manuals.
Successfully opening your Kenmore sewing machine reveals decades of accumulated lint, worn components, and the simple maintenance that keeps these vintage machines running smoothly. While basic cleaning and lubrication extend their life significantly, knowing when to stop prevents costly damage. Document everything, work methodically, and remember that these 30-40 year old machines often outperform modern alternatives when properly maintained. If your Kenmore continues to malfunction after proper cleaning and lubrication, consult a professional technician specializing in vintage sewing machines—your investment in this reliable workhorse deserves expert care.


