
You’re halfway through sewing a delicate silk blouse when your stitches start looping wildly on the underside. Or maybe you’re quilting denim layers and the thread snaps every few inches. Tension issues on Juki sewing machines strike at the worst moments, but here’s the good news: 90% of tension problems can be fixed in under 10 minutes with the right approach. Unlike other brands, Juki’s precision engineering means tension glitches usually stem from simple, correctable factors—not complex mechanical failures.
This definitive guide shows you exactly how to fix tension on Juki sewing machines whether you own a manual TL-2000Qi or digital DX7 for home or studio use. You’ll learn to diagnose problems by sight, make precise adjustments for any fabric, and avoid the #1 mistake 80% of sewers make when troubleshooting tension. No more guessing—just perfect, professional stitches from your first test seam.
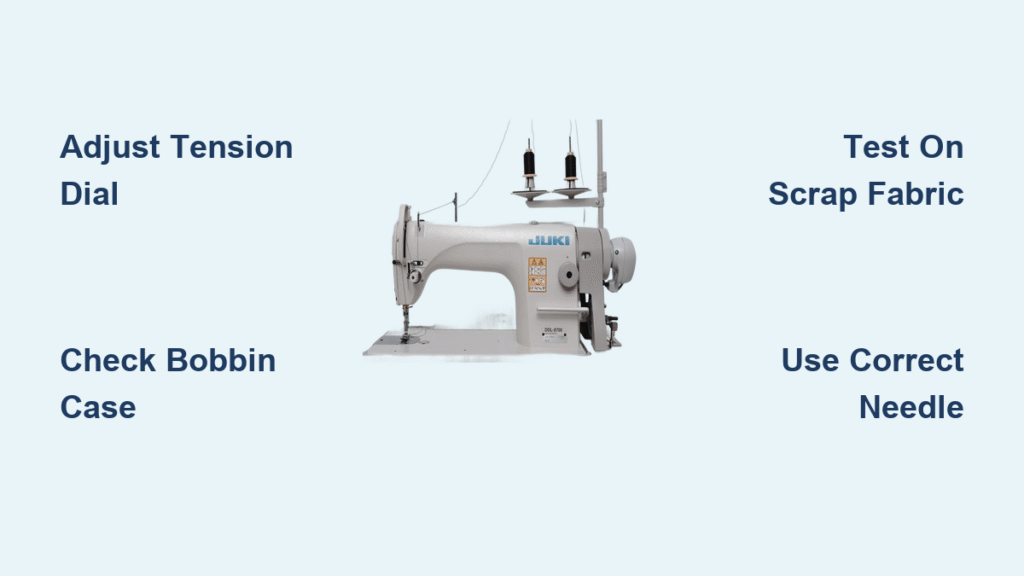
Spot Juki Tension Problems in 30 Seconds
Recognize Critical Visual Clues
Top thread too tight? Check for these instant red flags:
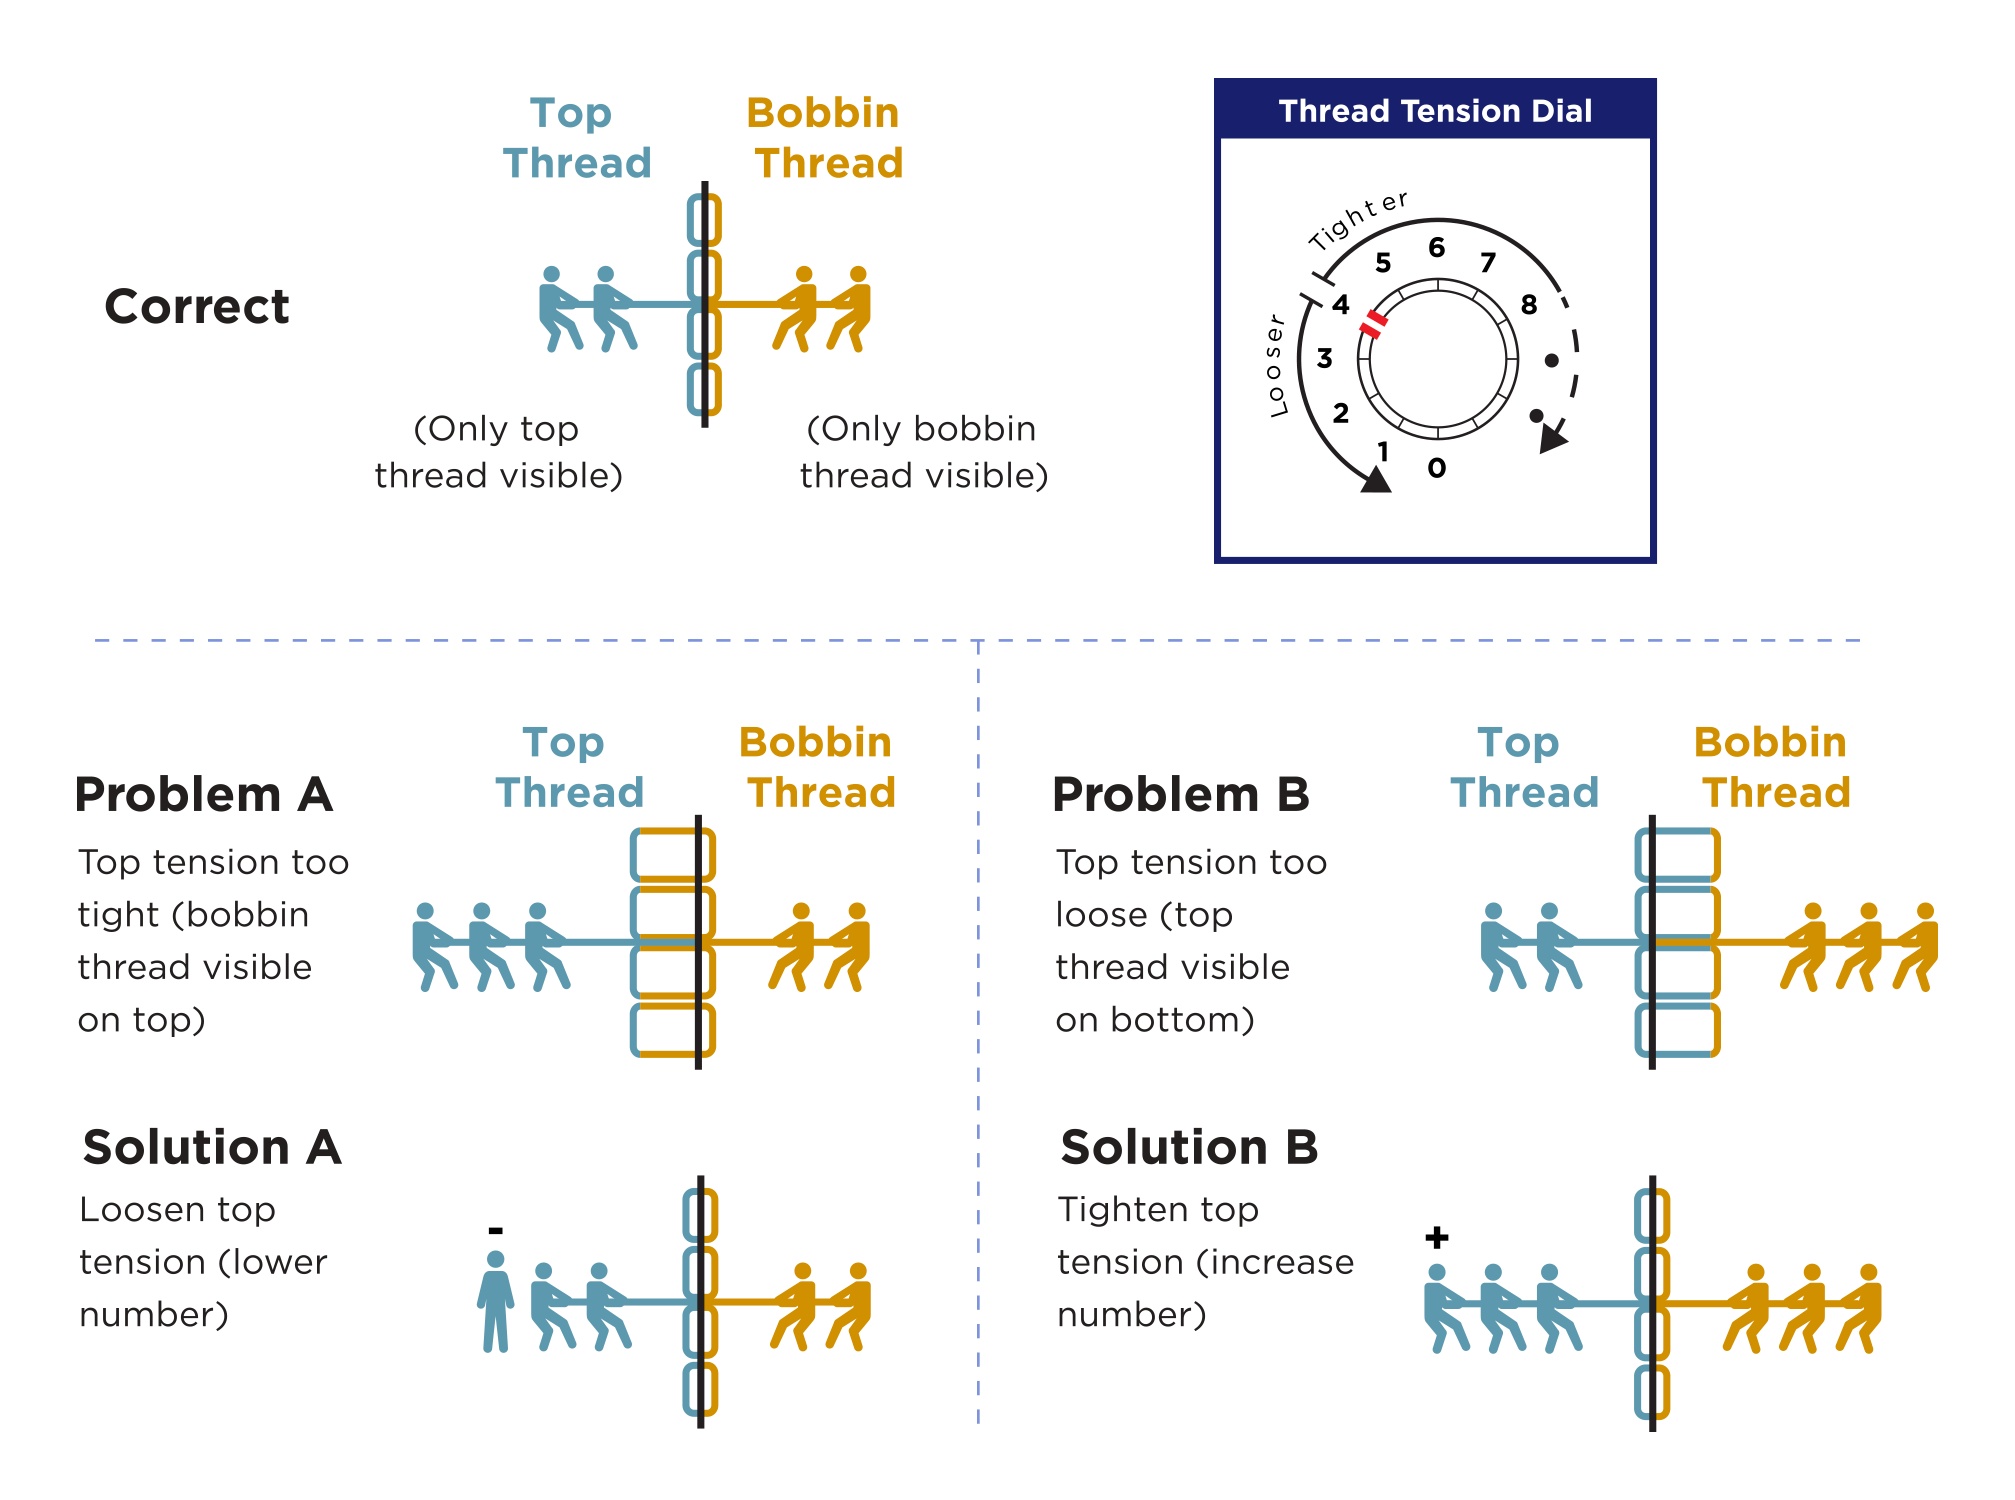
– Bobbin thread visibly pulled to the top surface of your fabric
– “Eyelashes” of bobbin thread around curved seams
– Fabric puckering along straight stitch lines
– Frequent thread snapping during sewing
Top thread too loose? Look for these telltale signs:
– Top thread forming loose loops on the underside
– Visible top thread on the fabric’s reverse side
– Seams that easily pull apart under light tension
Perfect tension shows interlocking threads meeting precisely in the middle of fabric layers with equal visibility on both sides. This balanced stitch should feel smooth to the touch with no puckering or gaps.
Perform the Scrap Fabric Stress Test
Before touching any dials, cut a 6-inch square of your actual project fabric (not muslin!). Sew a 3-inch straight seam at your normal speed, then immediately examine both sides. This critical step prevents ruining your project while revealing true tension behavior. Always test with the exact thread and needle you’re using on your project—substitutions create false diagnostics. If stitches look perfect here but fail on your actual piece, you’re dealing with fabric thickness issues, not tension.
Fix TL Series Manual Tension Like a Pro

Master Dial Adjustments Without Guesswork
Step 1: Locate your tension dial on the front panel. Juki TL series gives tactile feedback—you’ll feel distinct clicks at each setting. Never force the dial past resistance.
Step 2: Make quarter-turn adjustments only. Turn right (“Righty-Tighty”) to increase tension for loose top threads. Turn left (“Lefty-Loosey”) to decrease tension for tight top threads.
Step 3: Sew a new test seam after every adjustment. Many sewers waste time making multiple changes before testing—this guarantees confusion.
Step 4: Fine-tune with eighth-turn movements when close. Juki’s precision means tiny adjustments create big changes.
Pro Tip: Keep a “tension log” notebook noting settings for fabric/thread combos. A size 50 cotton thread on quilting cotton typically needs setting 4 on TL machines—but your specific thread batch may vary.
Correct Bobbin Case Tension Separately
Upper tension adjustments won’t fix bobbin-related issues. Test your bobbin case by holding it suspended by the thread tail. It should descend slowly (about 2 inches) when gently bounced. Falls freely? Bobbin tension is too loose. Doesn’t drop? Too tight.
To adjust: Use a size 00 screwdriver on the bobbin case screw. Turn clockwise 1/8 turn to tighten (for loose bobbin threads). Turn counterclockwise 1/8 turn to loosen (for tight bobbin threads). Test after each micro-adjustment—over-tightening damages threads.
Fix DX Series Digital Tension Instantly
Navigate Touchscreen Settings Correctly
Step 1: Access tension via the “Stitch Settings” menu (DX models vary—consult your manual if unsure). Never adjust tension mid-stitch—turn the machine off first.
Step 2: Start with fabric presets before manual tweaks:
– Lightweight mode: Auto-optimizes for silk/chiffon
– Standard mode: Perfect for quilting cotton
– Heavyweight mode: Calibrated for denim/upholstery
Step 3: Override presets in single-digit increments. Digital systems react faster than manual dials—jumping from setting 3 to 5 often overshoots. Increase by 1, test, then adjust again.
Step 4: Save custom profiles when you nail the perfect setting. Name them by fabric type (e.g., “Linen-Embroidery”) for instant recall.
Warning: Never force physical tension disks on DX models—they’re for factory calibration only. Digital adjustments happen electronically.
Optimize Tension for Tricky Fabrics
Lightweight Fabric Fixes (Silk, Chiffon, Organza)
- Reduce tension to 2-3 (from standard 4)
- Use size 9 needles with fine polyester thread
- Test on folded fabric—single layers behave differently
- Common mistake: Skipping stabilizer, which mimics tension issues
Medium-Weight Fabric Fixes (Cotton, Linen, Rayon)
- Start at factory default (4)—Juki’s sweet spot
- Increase to 5 for heavy threads like embroidery floss
- Decrease to 3.5 for thin batiste or voile
- Always retest when changing thread weights mid-project
Heavyweight Fabric Fixes (Denim, Canvas, Upholstery)
- Increase tension to 5-6 for top thread
- Use size 16 needles with heavy-duty thread
- Check bobbin case tension—thick fabrics often require loosening
- Critical step: Reduce presser foot pressure simultaneously
Eliminate Needle-Related Tension Failures
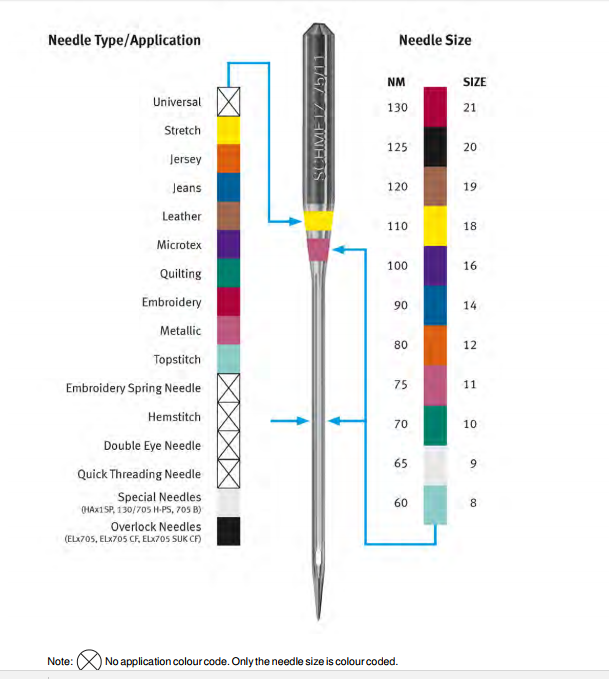
Match Needles to Prevent False Alarms
Using the wrong needle creates tension symptoms that no dial adjustment can fix. Ballpoint needles (size 11/80) prevent skipped stitches on knits. Sharp needles (size 70/10) give clean penetration on wovens. Stretch needles are mandatory for spandex blends.
Replace needles every 6-8 hours of sewing time—or immediately if you hear a “thud” during stitching. A single bent needle causes inconsistent tension across your project. Always test needle changes with the tension dial reset to default.
Pro Tip: Run your fingernail along the needle shaft. If it catches, the needle is damaged and must be replaced—no matter how recently installed.
Solve Advanced Tension Nightmares
Multi-Layer Quilting Fixes
When transitioning from piecing to actual quilting, reduce tension by 0.5 settings to accommodate batting thickness. Use a walking foot to maintain even feed, and test tension on your actual quilt sandwich (top, batting, backing). Skipping this causes top thread loops only in dense areas.
Metallic Thread Rescue
Metallic threads demand reduced tension (2-3) and size 80/12 needles with large eyes. Place thread spool horizontally behind the machine—vertical placement increases tension drag. Run at half your normal speed to prevent shredding.
Free-Motion Embroidery Adjustments
For stippling or monograms, set tension to 3 and use size 90/14 needles. Test on your exact stabilizer setup—cutaway stabilizer requires different tension than tear-away. Loosen top tension further for dense fill stitching versus delicate outlines.
Prevent Tension Issues Before They Start
Weekly Maintenance That Works
- Clean tension disks with a soft brush (never metal tools)
- Remove bobbin case lint after every project
- Oil tension assembly per manual specs (monthly for heavy users)
- Verify thread path before threading—missing a disk causes chaos
When to Call a Technician
Seek professional help if you notice:
– Grinding noises during tension adjustment
– Inconsistent tension across stitch types
– Visible wear on tension disks (shiny patches or grooves)
– Persistent issues after correct threading and testing
Mastering how to fix tension on Juki sewing machines transforms frustrating thread nests into flawless, professional results. Remember the golden rule: Always diagnose with a scrap fabric test before adjusting, and make changes in tiny increments. Juki’s precision engineering means your perfect tension setting is never more than three small tweaks away. Keep your needle fresh, your tension disks clean, and your bobbin case calibrated—then watch your stitches transform from problematic to picture-perfect. For ongoing success, save your top 3 fabric/thread tension profiles in your machine’s memory or notebook, and you’ll spend less time troubleshooting and more time creating.


