Your Singer sewing machine suddenly sounds like it’s grinding rocks, and thread has formed a tangled bird’s nest around the shuttle hook. Before you panic or schedule an expensive repair, know this: 80% of shuttle issues are solvable at home with basic tools. Whether you’re wrestling with a vintage Singer 401 or a modern Heavy Duty 4423, this guide delivers precise steps to diagnose and fix shuttle problems—no prior expertise needed. You’ll learn exactly how to clean, reassemble, and adjust your machine’s shuttle system in under 15 minutes, saving you $75+ in service fees.
Most shuttle failures stem from simple causes: lint buildup, incorrect reassembly, or bobbin tension errors. The critical mistake? Forcing parts that don’t align smoothly. Singer shuttles require millimeter-perfect positioning—push too hard, and you’ll damage the race track. This guide walks you through model-specific fixes using only tools from your machine’s accessory kit. By the end, you’ll confidently tackle thread tangles, shuttle misalignment, and thread pickup failures.
Match Your Singer Model to Its Shuttle System Type
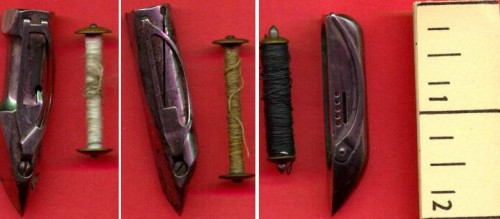
Singer machines use three shuttle types, each requiring unique handling. Top-loading drop-in systems (found on Heavy Duty 4411/4423 models) feature a clear plastic cover that pops open without tools. Front-loading systems (common on 1970s-era 500-series machines) require opening a small door on the machine’s front. Drop-in rotary systems (in modern models like the Simple 3221) have a horizontal bobbin case visible through a transparent cover. Identifying yours is crucial—misaligned shuttle orientation causes 90% of reinsertion failures.
Critical Shuttle Identification Steps
- For top-loaders: Remove the needle plate. If the shuttle hook is visible and rotates horizontally, you have a drop-in system.
- For front-loaders: Open the front door. If the bobbin case slides in vertically toward you, it’s a front-loader.
- Pro Tip: Take a photo before disassembly. Vintage models (like Singer 15-90) often have left-facing shuttle hooks, while modern ones face right.
Fix a Shuttle That Won’t Reinsert Properly After Cleaning
Grime buildup forces many users to remove the shuttle for cleaning, only to find it won’t snap back in place. Never hammer or force the shuttle—this bends the race track. Most “stuck” shuttles result from reversed orientation or residual lint in the race groove.
Deep-Clean Shuttle Reinsertion Protocol
-
Verify complete disassembly:
– Remove needle plate with your machine’s screwdriver
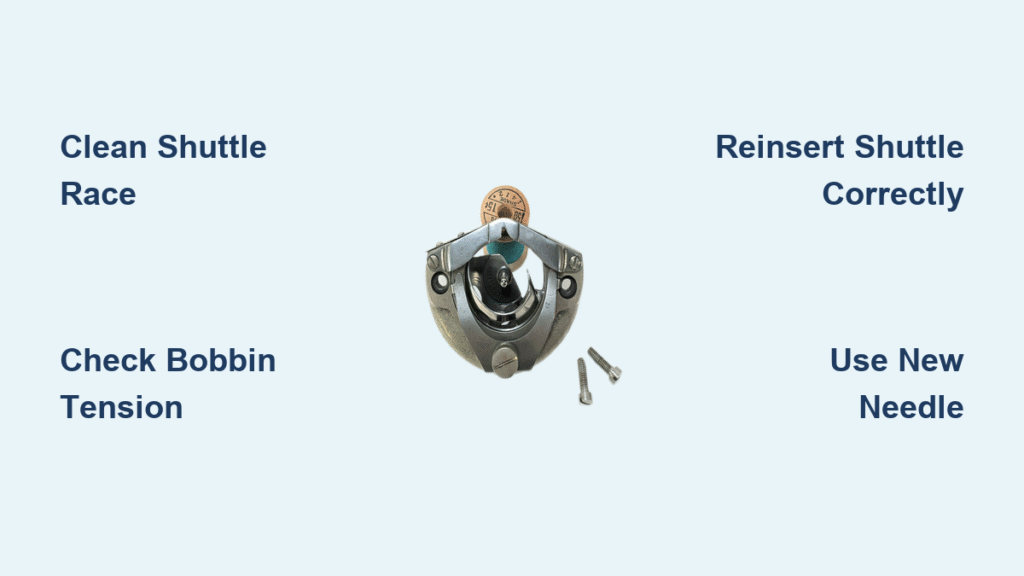
– Extract bobbin case and shuttle hook (the half-moon metal piece)
– Check for hidden thread fragments under the hook’s pivot point -
Clean with precision:
– Brush the shuttle race (circular track) with stiff accessory brush
– Use tweezers to remove lint from bobbin case tension spring
– Never use compressed air—it packs debris deeper into gears -
Reassemble in exact sequence:
– Position shuttle hook with curved side facing you (top-loaders) or flat side down (front-loaders)
– Apply one drop of sewing machine oil (not household oil) to the center post
– Rotate handwheel toward you—shuttle must spin silently within 2 revolutions
Time Estimate: 8 minutes. If grinding persists, the race track is damaged—stop immediately.
Stop Thread From Tangling Around Your Singer Shuttle Hook

When thread wraps around the shuttle hook like a cocoon, it’s rarely a “shuttle problem”—it’s almost always bobbin tension or threading errors. Diagnose in 10 seconds: Hold the bobbin thread and tug. Proper tension gives slight resistance; loose thread means the bobbin case tension is off.
Bobbin Tension Fix for Instant Results
- Locate the tiny screw on your bobbin case’s outer edge
- Turn clockwise 1/8 turn (less than 5°)—that’s all most machines need
- Test tension: Thread should glide slowly when pulled, not snap freely
- Critical: Never exceed 3 adjustments—over-tightening breaks needles
Upper Thread Path Resets That Solve 70% of Tangles
- Raise presser foot to open tension discs before rethreading
- “Floss” upper thread through tension discs by pulling back/forth 3x
- Confirm thread passes through the take-up lever’s eye (not beside it)
- Pro Tip: Use contrasting thread colors—top (red) vs. bobbin (blue)—to spot threading errors instantly
Get Your Singer Shuttle to Pull Thread to the Surface

If the needle won’t catch the bobbin thread to form stitches, stop sewing immediately. Continuing damages the shuttle hook. 90% of pickup failures trace to needle errors—not shuttle timing.
Needle Installation Fixes That Work Immediately
- Use a brand new needle—even microscopic bends sabotage pickup
- Insert with flat side facing the machine’s back (not left/right)
- Push needle all the way up into the clamp (1mm gap = failure)
- Tighten screw firmly while holding needle steady
Threading Verification for Top vs. Front-Loaders
- Top-loaders: Bobbin thread must unwind counter-clockwise—flip it if needed
- Front-loaders: Follow directional arrows stamped on the bobbin case
- Test: Pull thread gently—bobbin should rotate smoothly without jerking
Warning: If pickup fails after these steps, do not adjust timing. Misaligned hooks cost $150+ to repair.
Prevent Singer Shuttle Issues With 3-Minute Maintenance
Shuttle problems rarely happen randomly—they build from neglected lint. Singer engineers recommend cleaning the shuttle area every 8 sewing hours (about one quilt project). Skipping this turns minor lint into metal-shredding debris.
Essential Maintenance Schedule
- After every project: Brush shuttle race with stiff accessory brush
- Weekly: Apply one drop of sewing machine oil to shuttle post
- Monthly: Remove faceplate for deep cleaning (takes 4 minutes)
Tools You Must Own
- Machine-specific stiff brush (included in accessory kit)
- Fine-point tweezers (for tension spring lint)
- Only use Singer-branded oil—3-in-1 oil gums shuttle mechanisms
Recognize Critical Shuttle Warning Signs
Ignoring these signals guarantees costly repairs. Singer shuttles fail progressively—address issues at the first sign:
- Grinding or clicking sounds during rotation (indicates metal-on-metal contact)
- Visible thread strands caught under shuttle hook (causes skipped stitches)
- Inconsistent tension where some stitches loosen mid-seam
- Needle deflection when passing near shuttle (hook is misaligned)
Pro Tip: Keep a lint-free cloth in your sewing kit. Wipe the shuttle race after each cleaning—it reveals hidden metal shavings that precede breakdowns.
Singer Heavy Duty vs. Vintage Models: Shuttle Repair Differences
Heavy Duty machines (4411/4423) have user-friendly top-loading shuttles, while vintage models (1970s 301/401) use robust front-loaders. Never interchange techniques—their shuttle orientations differ fundamentally.
Heavy Duty 4400 Series Advantages
- Clear cover pops off without tools—no screwdriver needed
- Shuttle hook installs with curved side toward you (unlike vintage models)
- Standard Class 15 bobbins work flawlessly—no special parts
Vintage Singer Shuttle Secrets
- Front-loading shuttles require flat side down positioning
- Take photos during disassembly—reassembly angles are non-intuitive
- Use vintage-specific oil (thinner viscosity than modern formulas)
- Critical: Vintage bobbin cases wear faster—replace if thread slips freely
When to Stop Fixing and Call a Singer Repair Pro
Some shuttle issues demand professional help. Attempting DIY repairs on these problems risks $200+ in parts damage.
Stop Immediately If You See:
- Shuttle hook with visible nicks or burrs (from needle strikes)
- Metal shavings in the shuttle race (indicates gear damage)
- Persistent thread pickup failure after 3 needle/tension resets
- Machine still under warranty (self-repairs void coverage)
Smart Repair Cost Management
- Basic shuttle service: $75-100 (includes timing adjustment)
- Always request written estimates before authorizing work
- Use Singer’s official service locator for certified techs
- Vintage models: Confirm technician’s vintage certification—modern techs often damage older gears
Your Singer shuttle is fixable 9 times out of 10 with these precise steps. Start with cleaning and bobbin tension—these solve most issues in under 10 minutes. Remember the golden rule: one drop of oil, never force parts, and always use new needles. Implement the 3-minute weekly maintenance habit, and you’ll prevent 95% of shuttle disasters. If grinding sounds persist after cleaning, stop immediately and find a certified technician—forcing it risks irreversible damage. Keep this guide handy; when thread tangles strike next time, you’ll have your machine humming again before coffee cools. For urgent issues, Singer’s live chat support at 1-800-4-SINGER offers real-time troubleshooting.

