
Your Singer sewing machine needle snaps mid-stitch, derailing your project and leaving you stranded with tangled thread. If you’re searching for how to fix needle in singer sewing machine problems, you’re facing a common but solvable issue. Whether you’re wrestling with constant breakage, mysterious stitching errors, or simply need a replacement, this guide delivers precise, model-specific solutions. You’ll learn to diagnose why needles fail, select perfect replacements, and install them correctly—saving time, money, and your sanity. Most critical fixes take under 10 minutes, but skipping these steps risks costly internal damage. Let’s transform your frustration into flawless stitching.
Diagnose Needle Failures Before They Happen
Spot Critical Warning Signs Immediately
Listen for grinding or clicking sounds—these auditory red flags mean your needle is straining against internal components minutes before snapping. If the needle appears excessively long for your machine, it’s likely scraping the bobbin case during operation, creating unnatural resistance when you turn the handwheel. Notice if breakage consistently occurs at the same point in your stitch cycle; this pattern signals timing misalignment rather than a defective needle. Ignoring these cues risks metal fragments lodging in your Singer’s mechanics, causing cascading failures.
Execute This 30-Second Diagnostic Checklist
First, verify your needle’s age—even unused needles degrade after five years due to microscopic metal fatigue. Next, confirm compatibility: Standard Singer models like the 466 require universal household needles, while Singer chainstitch toy machines (A2207 series) demand specialized Singer 20 needles. Finally, test new needles on scrap fabric matching your project’s weight. If skipped stitches or thread breaks occur during this trial, reinstall the needle immediately—90% of “defective” needles fail due to improper seating.
Choose Perfectly Matched Needles for Your Singer Model
Standard Singer Machines (Model 466 and Similar)
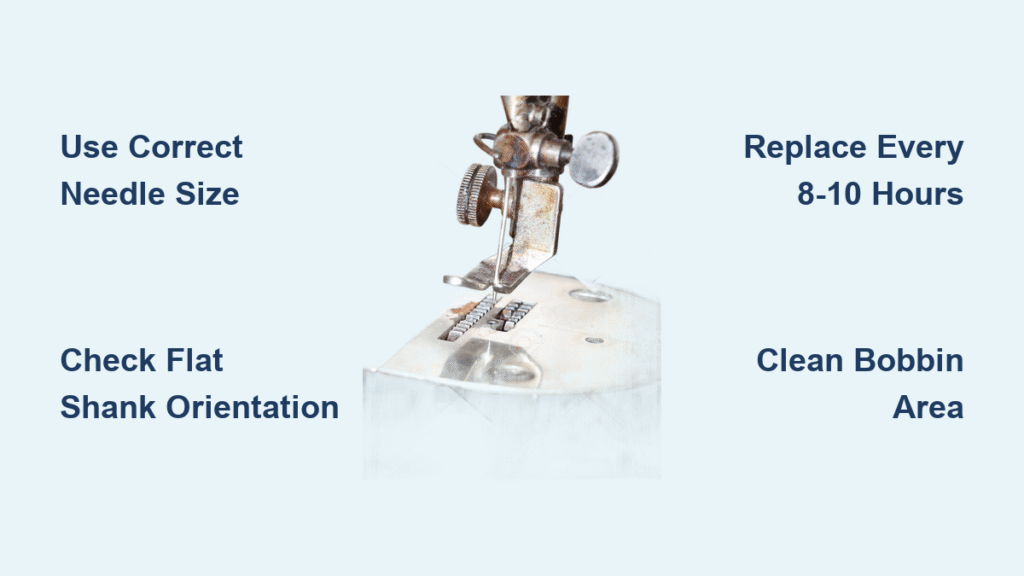
Universal household needles (sizes 80/12 for quilting cotton or 90/14 for canvas) work flawlessly in most Singer machines. Crucially, insert the needle with the flat shank side facing backward—this orientation ensures proper hook engagement. Using size 70/10 for delicate silks prevents snags, while 100/16 handles upholstery fabrics. Never force a needle that doesn’t slide smoothly into the clamp; resistance indicates wrong sizing, risking bent shafts during installation.
Specialized Machine Requirements
Singer chainstitch toy machines require Singer 20 needles exclusively—standard needles are 3mm too long, causing immediate breakage and potential hook damage. These model-specific needles (sold via Amazon or Singer parts retailers) feature shortened shafts designed for compact mechanisms. If you own a vintage toy model, verify needle length against the original manual; substituting standard needles guarantees catastrophic failure.
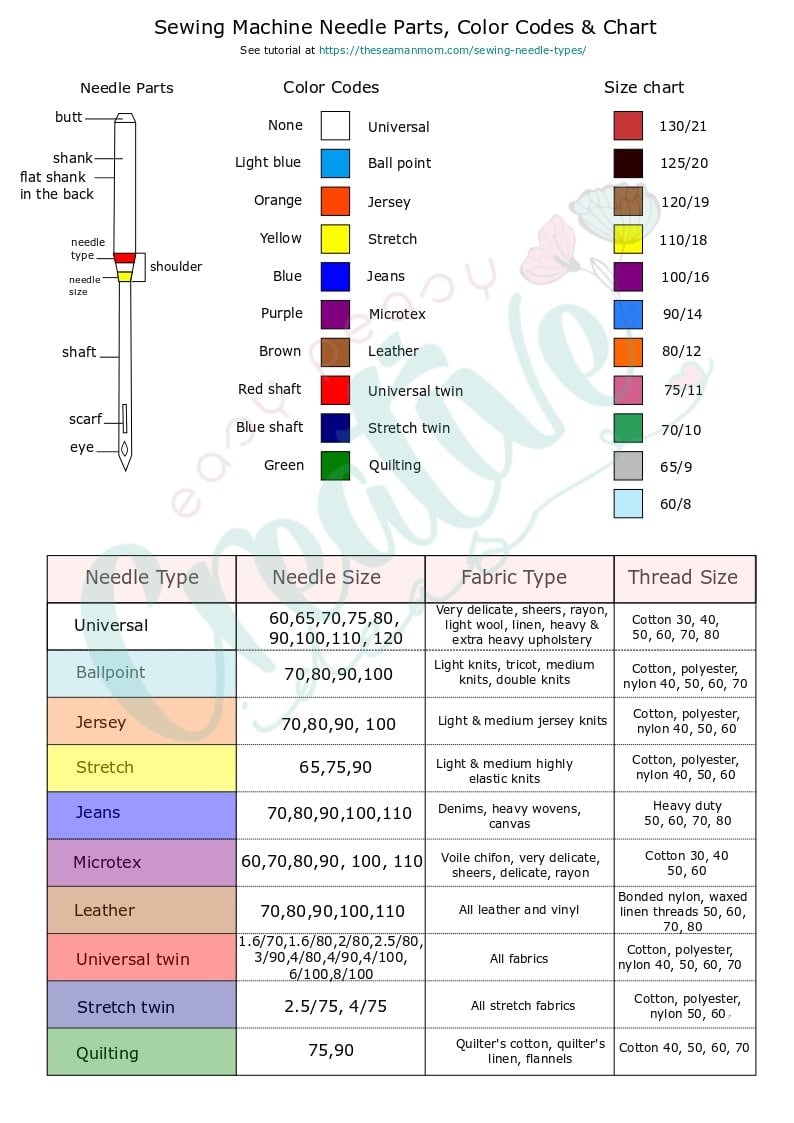
Fabric-Needle Compatibility Cheat Sheet
- Silk/chiffon: 60/8 fine-point needles
- Quilting cotton: 80/12 universal needles
- Denim/velvet: 90/14 heavy-duty needles
- Jersey knits: 75/11 ballpoint needles
- Leather/suede: 100/16 cutting-point needles
Mismatched needles cause 70% of breakage issues—using a 70/10 on denim strains the shaft until it snaps, while a thick 100/16 rips delicate lace.
Replace Needles Safely in 4 Critical Steps
Pre-Replacement Safety Protocol
Unplug your Singer and rotate the handwheel toward you until the needle reaches its highest position. This creates clearance for safe access. Gather a precision screwdriver (or the tool included with your machine) to avoid stripping the clamp screw. Never skip unplugging—residual electrical charge can trigger accidental needle movement during replacement.
Remove Broken Needles Without Damage
Loosen the needle clamp screw counterclockwise just enough to release the needle. Pull the shaft straight downward—yanking sideways can bend the needle bar. If fragments fall inside the machine, shine a flashlight into the bobbin area and retrieve every piece with a magnet; leftover metal shavings will shred future needles. Skip this step, and you’ll face recurring breakage within minutes of restarting.
Install New Needles for Flawless Stitching
Insert the needle fully upward until it stops, with the flat shank side facing the machine’s rear. Tighten the clamp screw firmly while holding the needle steady—over-tightening cracks the shaft, while under-tightening causes slippage mid-stitch. Verify alignment by eyeing the needle from front and side angles; any visible tilt means reinstallation is mandatory. A perfectly seated needle glides silently through fabric without wobbling.
Validate Installation in 60 Seconds
Thread your machine and sew a 2-inch test seam on scrap fabric matching your project. Smooth, even stitches confirm success. If threads loop underneath or stitches skip, immediately stop and recheck:
– Flat shank orientation (facing backward)
– Full upward insertion into the clamp
– Presser foot lowered (raised feet allow fabric to drag needles sideways)
Never proceed to your main project without this verification—faulty installation ruins fabric and damages timing.
Stop Chronic Breakage With Precision Fixes

Solve Recurring Breakage in 3 Checks
First, inspect the needle clamp for wear marks or cracks—if the screw won’t grip securely, replace the clamp immediately. Second, confirm your bobbin case clicks fully into place; a misaligned case deflects needles into metal components. Third, eliminate obstructions: Remove all thread fragments and lint from the needle path using a small brush. Most “unfixable” breakage stems from overlooked debris—a 2-minute clean resolves 80% of persistent cases.
Know When to Call a Professional
If your needle consistently strikes the bobbin case despite correct installation, your Singer’s timing is misaligned—this requires factory-calibrated adjustment. Similarly, if three consecutive needles snap during initial testing, internal damage (like a bent needle bar) exists. Attempting DIY repairs here risks $200+ in parts damage. Stop sewing immediately and consult an authorized Singer technician.
Maintain Needle Longevity With Proven Habits
Follow This Replacement Timeline Religiously
Replace needles every 8-10 hours of active sewing—visible wear isn’t always obvious. Swap immediately if you notice:
– Skipped stitches on even-weight fabrics
– Frequent thread breaks at the needle eye
– A “dull” appearance under magnification
Discard unused needles older than three years; metal fatigue causes invisible weak points. Vintage Singer owners should double-check needle condition before each project due to increased timing sensitivity.
Pre-Sewing Checklist for Zero Failures
Before every session, verify:
– [ ] Correct needle type (Singer 20 for toy models, universal for others)
– [ ] Size matched to fabric weight (e.g., 80/12 for cotton)
– [ ] Flat shank facing backward with full clamp insertion
– [ ] Presser foot lowered and thread path clear of obstructions
– [ ] Test stitches on scrap fabric showing even tension
Skipping any step invites mid-project disasters—this 30-second ritual prevents 95% of needle emergencies.
Vintage Singer-Specific Needle Solutions
Model 466 and Classic Machines
While these use standard needles, worn clamps often fail to grip shafts securely. If breakage persists after correct installation, replace the clamp—it’s a $12 part requiring only a screwdriver. These models also develop timing drift over decades; if needles hit the bobbin case after clamp replacement, seek professional calibration. Never force a needle that resists insertion—vintage mechanisms demand precise alignment.
Combat Age-Related Wear Proactively
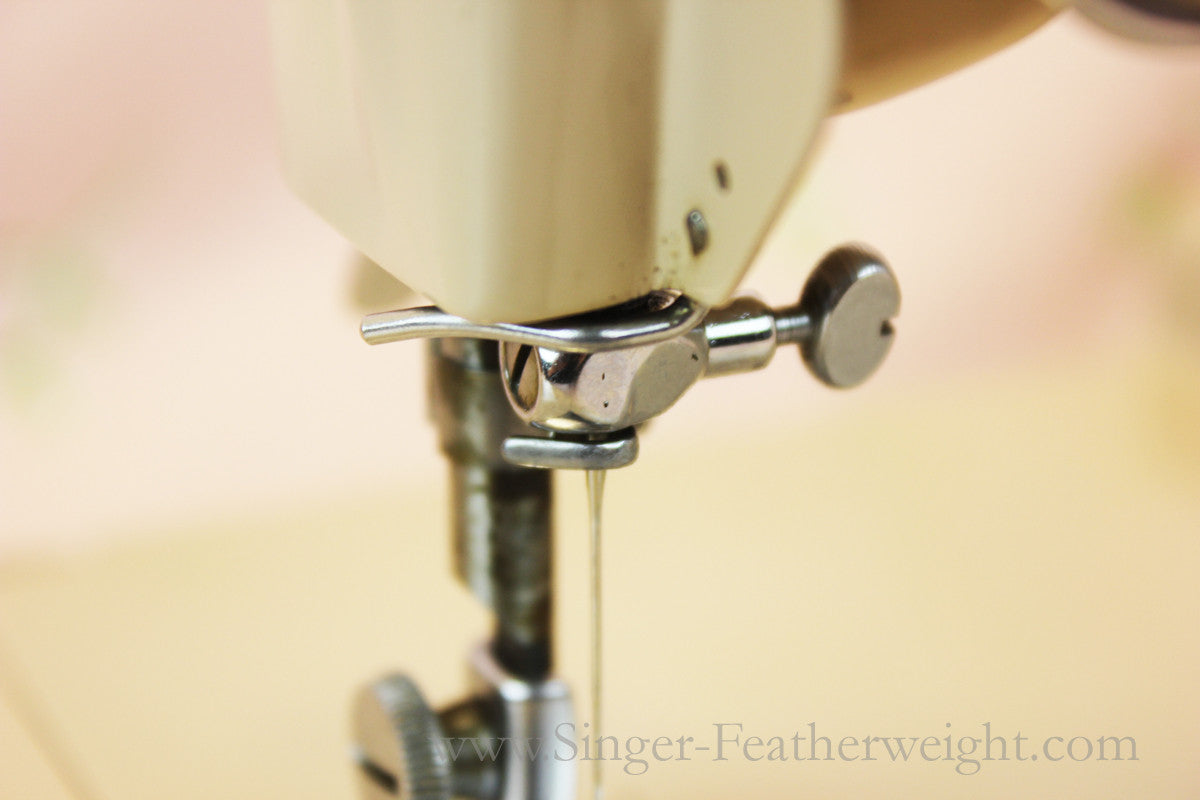
Lubricate your Singer’s moving parts quarterly with sewing-machine oil to reduce stress on the needle mechanism. For pre-1950s machines, store needles in airtight containers to prevent oxidation. When troubleshooting, prioritize needle-bar alignment checks—bent bars (common in stored machines) cause diagonal breakage patterns. If your vintage Singer breaks needles within five stitches, cease use immediately to avoid gear damage.
Emergency Troubleshooting Reference
Needle snaps upon first stitch:
→ Verify Singer 20 needles for toy models; standard needles are too long
→ Confirm flat shank faces backward with full upward insertion
Breaks when sewing thick seams:
→ Downsize needle immediately (e.g., switch from 90/14 to 80/12)
→ Remove pins from fabric—needles shatter on metal contact
Hits bobbin case during operation:
→ STOP SEWING—this indicates timing misalignment
→ Professional service required; continued use destroys hook assembly
Consistent breakage mid-project:
→ Clean lint from bobbin race with a small brush
→ Replace needle every 8 hours of sewing; fatigue weakens shafts
Mastering how to fix needle in singer sewing machine issues transforms sewing from frustrating to fluid. By selecting model-perfect needles, installing them with military precision, and adhering to replacement schedules, you’ll eliminate mid-project catastrophes. Remember: When breakage defies these solutions, professional timing adjustment isn’t optional—it’s essential machine preservation. Keep this guide handy, and your Singer will deliver decades of reliable stitching.


