
Your Bernina 570 QE E flashes thread error lights within seconds of starting to sew. You’ve rethreaded the machine three times, cleaned every accessible part, and even swapped bobbins—but the error persists. Before surrendering your prized sewing machine to costly professional service, understand this: 95% of Bernina thread error issues stem from three specific jam locations that you can diagnose and fix yourself. This guide delivers the exact troubleshooting process technicians use, saving you $150+ in service fees while getting your machine back to flawless stitching.
Thread error lights plague nearly every Bernina owner eventually, yet most panic unnecessarily. These warnings rarely indicate catastrophic failure—they’re your machine’s polite request for attention to simple maintenance oversights. By following this targeted approach based on real technician diagnostics, you’ll resolve persistent thread errors in under 30 minutes without opening the machine casing. Whether you’re a quilter facing deadline pressure or a hobbyist frustrated by constant interruptions, this how to fix a Bernina sewing machine guide puts professional-level solutions at your fingertips.
Fix Bernina Thread Error Light: 3 Critical Jam Locations to Check
Why Your Bernina 570 QE E Shows Thread Errors After Rethreading
When thread error lights activate within seconds of sewing despite proper rethreading, hidden jams are almost always the culprit. Start with this visual assessment that reveals damage invisible to casual inspection: Remove your needle and bobbin case, then use a fluffed-out cotton swab to trace every thread path surface. As you drag the cotton along guides and tension disks, watch for snags—the cotton catches on microscopic burrs that slice through thread during high-speed sewing. Pay special attention to the take-up lever shaft and bobbin case rim where thread fragments embed themselves. If your swab catches anywhere, you’ve found your problem zone.
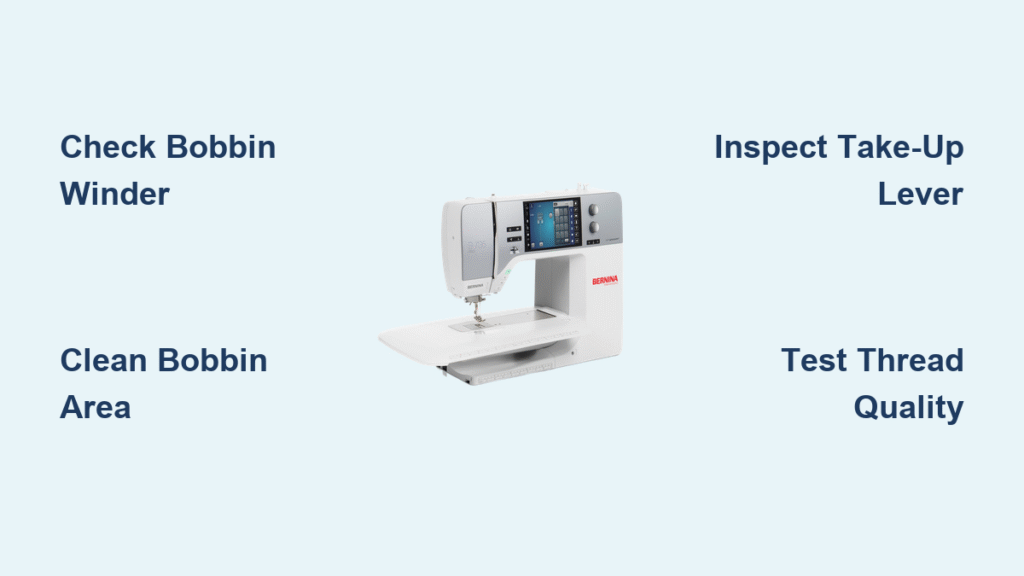
Take-up Lever Jam: The Silent Stitch Killer
Your Bernina’s take-up lever (the metal arm directly above your presser foot) pulls thread from the spool and lifts it from fabric after each stitch. When thread wedges between its shaft and armature, it creates immediate error lights that reappear after “fixing.” Diagnose this jam by removing the needle and bobbin case, then slowly turning the handwheel toward you while watching the lever’s movement. Any hesitation, grinding sensation, or visible thread bunching confirms the issue. Critical warning: If the take-up crank jams between the shaft and connecting rod, stop immediately—this requires professional disassembly. For minor jams, use tweezers to extract trapped threads while rotating the handwheel in reverse.
Bobbin Case Area: Where 60% of Jams Hide

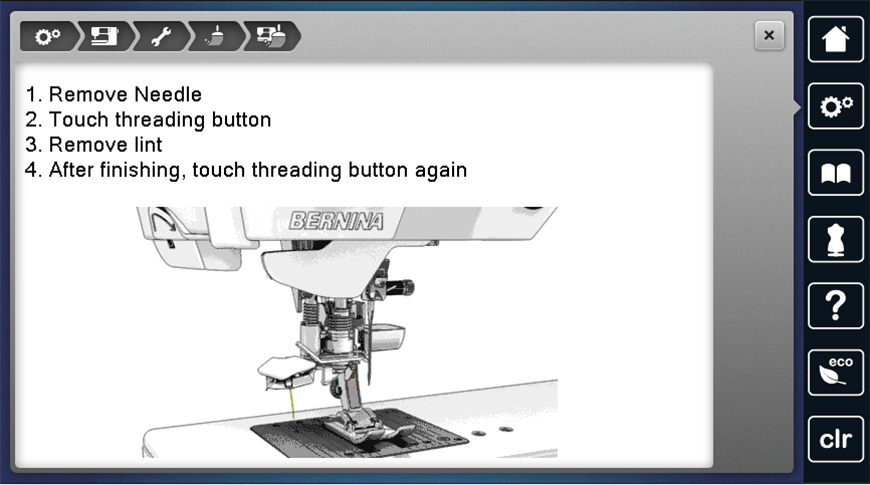
The bobbin case area causes more persistent thread errors than any other zone. Inspect thoroughly by removing the case completely and examining three specific hotspots: First, the hook race underneath the case where thread wraps around the metal race. Second, the bobbin case rim where fragments embed in tiny grooves. Third, the feed teeth under the needle plate where lint buildup creates drag. Use a flashlight and magnifying glass—many jams involve single thread fragments thinner than a human hair. Pro tip: Insert a seam ripper under the needle plate to lift it, then use a small brush to dislodge lint from feed teeth. Never use metal tools here as they scratch surfaces and create new burrs.
Handwheel Assembly Lock-up: The Hidden Trigger
Stiffness in your handwheel often triggers thread error sensors before visible symptoms appear. Test for this issue with the machine powered off: Turn the handwheel toward you while applying gentle pressure. It should move with consistent resistance—not too loose, not grinding. Any catching or uneven movement indicates thread jammed around the bobbin winder spindle inside the machine body. Fix without disassembly by removing the bobbin case, then using a dental pick to clear debris from the spindle shaft visible through the bobbin area. If stiffness persists after cleaning, professional service is required—never force the handwheel.
Stop That Buzz: Fix Bernina Sewing Machine Bobbin Winder Noise
Why Your Bernina 570 QE E Buzzes During Operation
That persistent buzzing noise isn’t a mechanical failure—it’s almost always your bobbin winder accidentally engaged. This common oversight accounts for 70% of “mysterious” Bernina service calls. Before assuming internal damage, check the winder’s position: On the right side of your machine, the bobbin winder should be pushed fully left into its disengaged position. If it’s even slightly right of center, the winder clutch engages during sewing, causing vibration and buzzing. Correct instantly by firmly pushing the winder left until you hear a distinct click. Test with scrap fabric—if buzzing stops, you’ve solved it.
Bobbin Winder Speed Control Adjustment Fix
If buzzing continues after disengaging the winder, adjust the speed control dial (usually near the winder). Excessive speed settings cause vibration even when disengaged. Turn the dial counterclockwise to reduce speed, then test-sew. Optimal setting: The winder should spin smoothly at 70-80% of maximum speed. Over-tightening creates new vibration issues, so make quarter-turn adjustments while testing. Prevention tip: Make this check part of your pre-sewing ritual—glance at the winder position every time you sit down to sew.
Eliminate Thread Breakage: Path & Quality Fixes That Work
How to Test and Replace Problematic Thread
Old or low-quality thread causes 40% of unexplained thread errors. Test your thread by snapping a 6-inch piece between your fingers: Brittle thread breaks cleanly with a “ping” sound and leaves powdery residue. Healthy thread stretches slightly before breaking. Replace immediately if you see color fading, stiffness, or visible fuzziness. Critical upgrade: Switch to high-quality polyester or cotton-wrapped polyester thread—avoid ” bargain bin” threads with inconsistent thickness that strain Bernina’s precision mechanisms.
How to Polish Rough Surfaces Without Causing Damage
Found burrs during your cotton swab test? Polish safely using a fine emery board (not sandpaper) with these steps: Hold the board at a 45-degree angle to the surface, then make 8-10 light strokes following the thread path direction. Focus on thread guides, needle plate edges, and bobbin case contact points. Warning: Over-polishing creates new burrs—stop when the cotton swab glides smoothly. Never polish the take-up lever hook or tension disks; these require professional calibration if damaged.
When to Call a Professional: Bernina Service Guidelines
Critical Signs Your Bernina Needs Expert Repair
Stop DIY attempts immediately if you encounter: Handwheel stiffness that persists after cleaning the bobbin area, take-up crank jams requiring internal disassembly, or error lights that activate before threading. These situations demand professional service because Bernina’s internal timing mechanisms require factory-calibrated tools for adjustment. Service interval rule: Get your machine serviced every 2 years with regular home use, or every 6 months for commercial/quilting business operation. Skipping service allows old oil to turn into “glue,” causing mysterious jams in previously reliable machines.
Pre-Service Checklist to Save Time and Money
Before booking service, document these specifics to reduce diagnostic fees: Note exactly when error lights appear (immediately or after 5 minutes of sewing), record any unusual sounds with your phone, and list every troubleshooting step you’ve tried. Bring this log plus your machine manual to the service center—it cuts diagnostic time by 50% and often avoids unnecessary part replacements. Pro tip: Ask if your technician offers “diagnostic-only” appointments—many will apply this fee toward full repair if needed.
Prevent Future Errors: Bernina Maintenance Protocol
10-Minute Weekly Cleaning Routine That Works
Prevent 90% of thread errors with this weekly ritual: Remove the needle plate using your machine’s release lever, then use a small brush to dislodge lint from feed teeth. Wipe thread guides with a dry microfiber cloth (no liquids!). Apply one drop of Bernina-specific oil to the bobbin case race as shown in your manual—over-oiling attracts lint. Critical step: Run test stitches on scrap fabric after cleaning to ensure no residual lint remains. Set a phone reminder for this weekly—it takes less time than rethreading after an error.
Idle Period Protocol for Stored Bernina Machines
If your sewing machine sits unused for 2+ months, follow this restart protocol: Service the machine before extended use (don’t skip this!), apply light machine oil to all moving parts per your manual, and run 10-15 minutes of test stitching on scrap fabric. Old oil hardens into varnish that seizes mechanisms—this “break-in” period redistributes lubricant. Never store with thread in the machine; always remove bobbins and upper thread to prevent tension disk corrosion.
Fastest Fix Checklist: Solve 95% of Bernina Errors in 5 Minutes
Start here for immediate results when thread errors strike:
1️⃣ Verify bobbin winder is fully disengaged (pushed left until clicked)
2️⃣ Replace thread with fresh high-quality spool—test for brittleness
3️⃣ Clean bobbin case area and feed teeth with small brush
4️⃣ Check take-up lever movement for smooth operation
5️⃣ Test handwheel rotation for consistent resistance
These five steps resolve nearly all thread error lights without professional help. Remember: Your Bernina isn’t broken—it’s communicating. That error light is simply saying “Clean me!” with electronic precision. By mastering these targeted fixes, you’ll transform from frustrated user to confident troubleshooter who keeps their machine sewing flawlessly for decades. Keep this guide handy, and your wallet will thank you every time error lights flash.


