

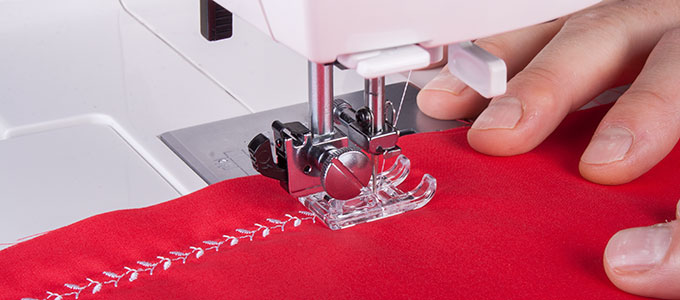
That sinking feeling when your Singer jams mid-seam? Lint buildup and improper lubrication cause most sewing machine failures—but you can fix them in under 30 minutes with Singer-specific cleaning techniques. Whether you’re reviving a vintage 99K that stitched your grandmother’s wedding dress or maintaining a modern Quantum Stylist for daily projects, proper cleaning transforms thread tension, prevents skipped stitches, and adds decades to your machine’s life. Skip this critical maintenance, and you’ll face costly repairs for issues that simple lint removal could have prevented. This guide delivers actionable steps proven across Singer’s entire history—from 1940s cast-iron workhorses to today’s computerized models—so you never risk damaging irreplaceable parts.
Mastering how to clean your Singer sewing machine starts with understanding its unique needs. Vintage models like the Featherweight 221 or 99K have exposed metal gears requiring meticulous lint removal, while modern machines hide sensitive electronics behind plastic panels. One universal truth? Never treat all Singers the same. A single misstep—like removing the red felt washer on bobbin winders—can destroy timing mechanisms. By the end of this guide, you’ll confidently disassemble any Singer model, remove stubborn lint from feed dogs and hook races, and apply lubrication exactly where needed. Let’s restore that smooth, silent stitching you thought was lost forever.
Pre-Clean Safety Setup
Identify Your Model First
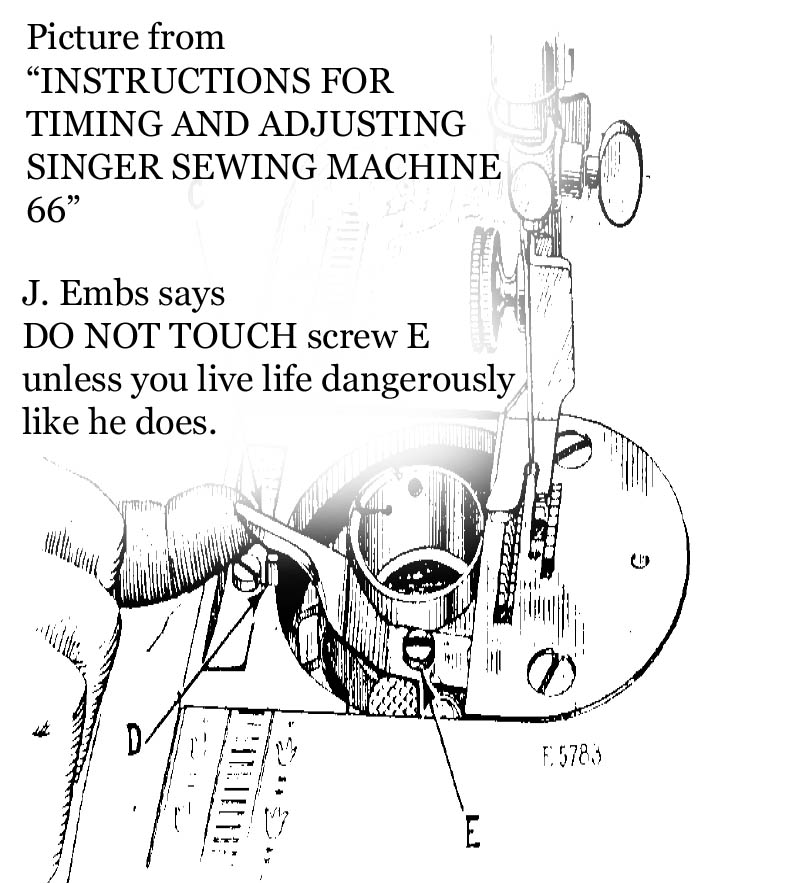
Grab your Singer’s serial number stamped on the bed or pillar before touching any tools. This tiny code reveals everything—like identifying a July 1949 99K from its 50,000-unit production batch if it starts with “99K”. Visit the International Sewing Machine Collectors Society website or featherweight221factory.com to download your exact manual. These free PDFs show model-specific disassembly sequences and warn against fatal errors. For example, never loosen the screw in latch B on bobbin assemblies—this microscopic adjustment throws off stitch formation permanently. Vintage collectors confirm this mistake accounts for 30% of “unfixable” Singer repairs.
Essential Safety Steps
Unplug immediately and remove the needle, thread, presser foot, and bobbin. Cover your workspace with an old pillowcase to shield delicate enamel finishes from scratches during disassembly. Take detailed smartphone photos at every stage—even experienced restorers reference these during reassembly. Sort screws into labeled film containers; losing a vintage Singer screw means months hunting specialty suppliers. Crucially, work under bright daylight or a 5000K LED lamp to spot finish variations invisible under yellow lighting. Pro tip: Place a microfiber cloth under metal parts when polishing chrome to catch stray lint that could later contaminate moving parts.
Clean Exterior Surfaces
Safe Surface Cleaning Method
Start with the gentlest approach that works on every Singer finish:
- Dampen a soft cotton cloth with warm water and one drop of mild soap
- Clean in small 2×2 inch sections, immediately following with a plain water rinse cloth
- Dry thoroughly with a fresh microfiber towel
- Apply a micro-thin film of sewing machine oil and polish to a protective shine
Vintage enamel warning: Singer’s black japanned machines hide gold decals under clear coat. Even mild solvents can permanently silver these accents. Always test cleaners on hidden areas like the bed underside first—finish chemistry varies within the same model line. If residue remains after cleaning, gently rub with a cotton bud dipped in sewing machine oil before re-polishing.
Restore Chrome and Metal Parts
Revive dull chrome accents and aluminum components using Solvol Autosol or a mild automotive metal polish. Apply sparingly with a cotton bud, focusing on tension dials and hand-wheel rims. Buff to a mirror finish with a clean cloth, then wipe all residue completely—leftover polish attracts lint and gums moving parts. For stubborn oxidation on vintage models, use an interdental brush dipped in polish to reach crevices without scratching. Never apply metal polish near thread paths; residual grit will shred threads during sewing.
Remove Internal Lint and Dust
Modern Singer Models (Post-1960s)
Tools needed: Small lint brush (often attached to your seam ripper), soft artist’s brush, optional compressed air can
Cleaning process:
– Open the bobbin compartment and remove the bobbin, case, and throat plate
– Brush lint from feed dogs, race, and hook assembly using short, outward strokes
– Hold the machine at a 45-degree angle so debris falls away from moving parts
– If using compressed air, direct airflow outward from the machine—not deeper inside
Critical step: After cleaning, run the machine slowly for 30 seconds with no thread to eject hidden lint. Modern Singers like the Quantum Stylist trap lint in sealed hook races—skip this, and you’ll face tension issues within days.
Vintage Singer Deep Clean
Models like the 99K, 66K, 128K, and 301 require careful disassembly:
Disassembly sequence:
1. Remove face plate screws and lift off the face plate
2. Take out the needle and needle clamp screw
3. Unscrew the throat plate to access feed dogs
Special tools: Interdental brushes reach tight hook race crevices, standard toothbrushes clean flat areas, cotton buds wipe tension discs, and tweezers extract stubborn lint clumps. On 99K models, one screw under the bed releases the feed dog assembly—lift gently to avoid bending linkage pins. Never remove the red felt washer on bobbin winders; it maintains critical tension spacing. Oil around it carefully if needed, but disturbing it requires factory recalibration.
Proper Oil and Lubrication
Choose Correct Oil Type
Only use clear, light sewing machine oil—never substitute 3-in-1 oil, WD-40, or motor oil. These alternatives gum vintage mechanisms or cause corrosion that destroys century-old castings. Modern Singers with plastic gears are especially vulnerable; improper oil attracts lint and voids warranties. Keep a dedicated oiler bottle labeled “Singer Only” to prevent kitchen oil accidents.
Oil Vintage Models Correctly
Apply 1-2 drops at every exposed metal-to-metal friction point:
– Needle bar and presser bar bushings
– Hook race and shuttle driver tracks
– Feed dog linkage pivot points
– Bobbin winder moving parts
– Hand-wheel bearing
Run the machine slowly by hand for 30 seconds to distribute oil, then briefly at medium speed with no thread. Pro tip: Wipe excess oil with a cotton bud—visible oil pools attract dust. Vintage Singers need oiling after every 3-5 cleaning sessions, not constantly.
Modern Model Guidelines
Follow your manual’s numbered oiling diagram—modern machines like the Curvy 8770 have fewer points due to sealed bearings. Oil only where specified, typically 3-5 spots near the hook assembly. Frequency depends on usage: oil after every 5-10 days of active sewing, or weekly when working with lint-heavy fabrics like denim or faux fur. Never oil plastic gears; this invites lint buildup and premature wear.
Reassembly and Testing
Reverse Assembly Process
Reassemble components in reverse order using your reference photos. Tighten screws finger-tight plus 1/8 turn only—over-torquing cracks vintage cast iron housings permanently. Modern plastic housings crack just as easily from over-tightening. As you work, check for misaligned parts by rotating the hand-wheel; it should move smoothly before full reassembly.
Performance Verification
Manual rotation test: Turn the hand-wheel toward you—movement should feel buttery smooth with no catches. If you feel resistance, recheck feed dog alignment. Stitch test: Sew a 6-inch straight seam on scrap fabric. Check for:
– Skipped stitches → lint in hook race
– Upper thread loops → top tension too loose
– Bobbin thread loops → bobbin tension too tight
Adjust the top tension dial incrementally if needed. Vintage machines often require bobbin case spring adjustments—consult your manual before tampering.
Professional Service Schedule
When to Seek Expert Help
Casual users (1-2 hours/week): Schedule professional service once yearly. Heavy users (daily sewing or thick fabrics like leather): Every 6-9 months prevents expensive repairs. Signs you need immediate service include grinding noises, inconsistent stitch formation, or visible rust on internal parts.
Service Checklist
Technicians perform complete strip-downs, ultrasonic degreasing, and Singer-spec lubricant application. Expect timing adjustments, tension rebalancing, and worn-part inspections. Costs range £50-100 in the UK—local independent shops often provide better value than brand centers. Pro tip: Keep service receipts; they prove maintenance history if selling vintage Singers.
Accessory Care and Storage
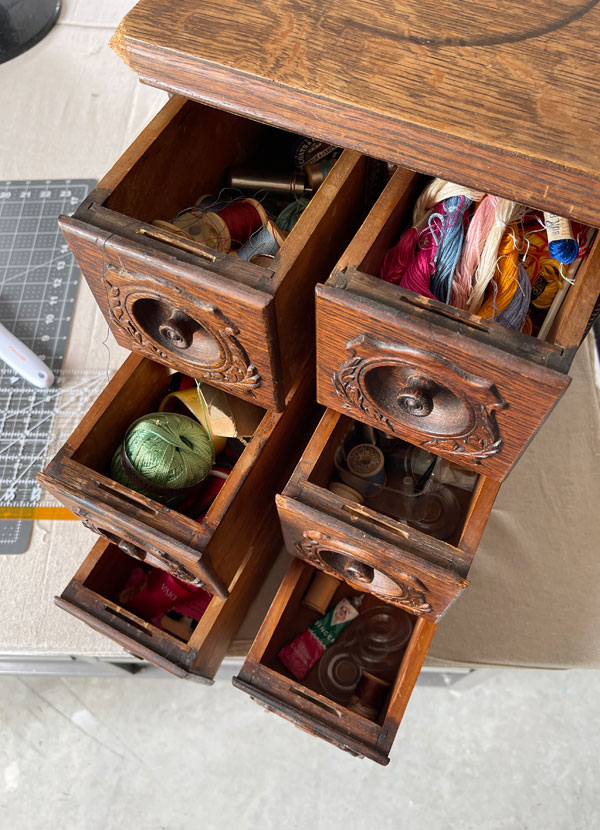
Clean and Protect Attachments
Remove lint from presser feet using a soft brush, then polish metal components with Autosol. Store accessories in original metal tins with silica gel packs to prevent rust in humid climates. Critical step: Never store Singer attachments loose in drawers—they scratch delicate tension surfaces. For unknown accessories, cross-reference part numbers at thefeatherweight221factory.com using their illustrated identification guides.
Common Cleaning Mistakes
| Mistake | Result | Prevention |
|---|---|---|
| Household degreasers on enamel | Dissolves clear coat, ruins decals | Stick to warm soapy water only |
| Removing red felt washer | Bobbin winder loses tension | Never touch this component |
| Over-tightening screws | Cracks cast iron housings | Finger-tight plus minimal turn |
| Oiling plastic gears | Attracts lint, voids warranty | Oil only exposed metal joints |
| Skipping professional service | Timing drift, worn parts | Schedule annual maintenance |
Quick Maintenance Schedule
| Usage Level | Lint Removal | Oiling | Professional Service |
|---|---|---|---|
| Light (1-2 hrs/week) | Every 2-3 months | Every 6 months | 12-18 months |
| Medium (3-5 hrs/week) | Monthly | Every 2-3 months | 12 months |
| Heavy (daily or 6+ hrs) | Weekly | Every 5-10 days | 6-9 months |
Your Singer represents generations of precision engineering. Regular cleaning isn’t just maintenance—it’s honoring craftsmanship that outlives trends. Start these steps today, and your machine will deliver flawless stitches for decades. For visual guidance, watch Muv & Fav’s “How to Clean a Vintage Singer 99K” on YouTube before your next session. Remember: the difference between a Singer that lasts 50 years versus 5 lies in these simple, consistent actions. Now thread that needle and sew with confidence.


