
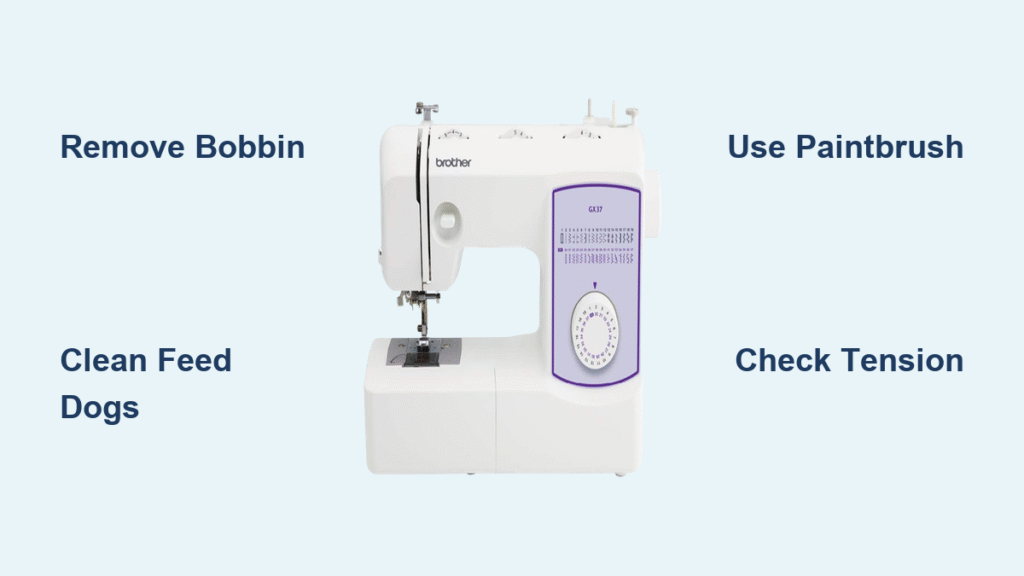
Your Brother sewing machine suddenly sounds like a coffee grinder instead of its usual whisper-quiet hum. Fabric snags mid-stitch, thread loops form ugly nests underneath, and that familiar tension perfection has vanished. These aren’t random glitches—they’re screaming for a deep clean. The best part? You can eliminate these headaches and avoid $130+ professional servicing fees by restoring your machine’s smooth operation in under 30 minutes using household items. This hands-on guide delivers the exact cleaning process for Brother self-oiling models like the Project Runway Innov-is 40, though these techniques work for nearly all modern Brother machines from the XR series to the Innov-is line. Unlike vintage models needing constant oiling, these smart machines handle lubrication automatically—but they still choke on lint and debris that sabotage performance after just 3-4 weeks of regular sewing.
Ignoring these warning signs invites costly repairs and ruined projects. Yet most sewers panic at the thought of opening their machine, fearing they’ll lose tiny screws or damage delicate components. This guide eliminates that anxiety with foolproof disassembly steps, critical orientation reminders, and lint-removal tactics proven to silence noise and restore flawless stitching. You’ll learn why cloth is forbidden inside your machine, how a paint bucket key outperforms standard tools, and the one photo you must take before removing the bobbin casing. Let’s transform your struggling machine back into the precision partner you rely on.
Why Your Brother Machine Suddenly Sounds Like a Coffee Grinder
That alarming new grinding noise isn’t just annoying—it’s your machine’s distress signal. Self-oiling Brother models like the CS6000i or XR9550 accumulate lint in the bobbin cavity and feed dog mechanisms, creating friction that overwhelms the internal lubrication system. As debris compacts, metal parts grind against each other instead of gliding smoothly, amplifying noise with every stitch. Critical insight: This isn’t normal wear—it’s preventable damage that accelerates if ignored. Within days, the increased friction can warp plastic gears or overheat motors, leading to $200+ repairs. Clean immediately when you hear this symptom; waiting turns a 30-minute fix into a costly service call.
How Lint Buildup Directly Causes Thread Tension Nightmares
Thread loops and uneven stitches often trace back to hidden lint in two specific zones:
– Bobbin race area: Debris jams the thread path, disrupting tension regulation
– Feed dog teeth: Lint-packed grooves prevent fabric from advancing evenly
When lint clogs these zones, your machine can’t maintain consistent thread flow. The result? Top thread nests under fabric while bottom thread appears loose—classic tension issues that persist even after manual adjustment. Pro tip: Before blaming your tension dial, clean these areas first. 85% of “tension problems” actually stem from lint interference, not calibration errors.
Essential Cleaning Tools That Cost $0 (No Specialty Kits Needed)
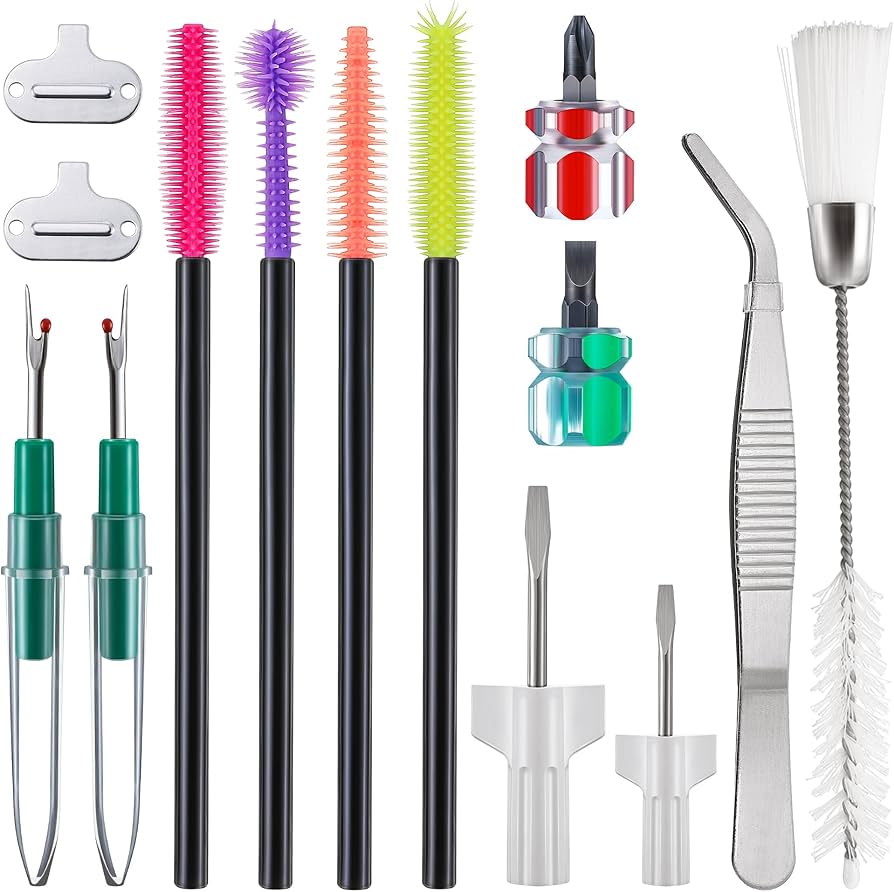
Skip expensive sewing machine kits—your cleaning arsenal already lives in household drawers. These seven items solve 100% of lint-related issues:
- 1-inch paintbrush: Stiff bristles dislodge compacted lint without scratching (never use toothbrushes—their stiff plastic bristles damage coatings)
- Bobbin screwdriver: The flathead tool included with your machine (keep it taped inside your accessory case)
- Paint bucket key: This angled tool grips stubborn needle plate screws when screwdrivers slip in tight spaces
- Paper towels: For component wiping (cloth fibers leave residue)
- Tweezers: Extract stubborn lint balls from feed dog crevices
- Smartphone flashlight: Reveals hidden debris in shadowed corners
- Small bowl: Holds screws securely during disassembly
Time-saver: Tape screws to a paper towel with labeled dots (“left,” “right”)—this prevents frantic searches when reassembling.
Pre-Cleaning Setup: 3 Steps to Avoid Costly Mistakes
Rushing into cleaning risks broken parts or misplaced screws. Follow this failsafe preparation sequence:
Remove Needle and Presser Foot Without Damage
Turn the hand wheel toward you until the needle reaches its highest position. Loosen the needle clamp screw and slide the needle straight down—it should drop out smoothly. Warning: Forcing a needle removal at mid-stroke can bend the hook mechanism. Next, detach the presser foot by loosening the screw facing left above the foot mechanism. Slide the entire assembly off in one motion. Pro tip: Place removed parts on a clean towel with their screws—losing the tiny presser foot screw means a $15 replacement.
Bobbin Removal: The Critical First Step
Slide open the bobbin cover and lift out the bobbin completely. Never skip this: Attempting internal cleaning with the bobbin installed traps lint against the casing, worsening future issues. Set the bobbin aside on your towel—never on fabric where threads can tangle around it.
Disassembly: Where 90% of Beginners Make Costly Errors
Most DIY cleaning fails at disassembly. These model-specific steps prevent damage to your Brother machine’s delicate components.
Plastic Cover Plate Removal: Slide, Don’t Lift
Locate the two short screws securing the gray plastic plate above the bobbin area. Remove both completely—no need to count turns since they’re captive screws. Key movement: Press the plate gently toward you until it clicks loose from the rear indentation. Visual cue: You’ll feel slight resistance, then a smooth slide forward. Never pry upward—this cracks the plastic mounting tabs. Set the plate aside with screws in your labeled bowl.
Needle Plate Extraction: Left Screw First Strategy
The needle plate hides lint-packed feed dog slots. Start with the left screw—it’s nearly inaccessible once the right screw is removed. Tool hack: Use the paint bucket key here for superior leverage in the tight left-side gap. The right screw comes out easily with the standard screwdriver. Once both are free, lift the metal plate straight up. Warning sign: If the plate resists, recheck screws—forcing it bends feed dog teeth.
Bobbin Casing: The Orientation Photo You Must Take
Before touching the casing, snap a phone photo showing its exact position and rotation. Critical detail: These casings have molded tabs that only fit one way—installing backward causes immediate thread breaks. Lift it out with gentle upward pressure; if resistance occurs, wiggle slightly side-to-side. Red flag: Never use tweezers to pry it out—this cracks plastic guides.
Deep Cleaning: Target Lint Hotspots Without Damaging Lubrication

Self-oiling Brother machines contain factory-applied lubricant that cloth or compressed air strips away. Follow these lint-removal protocols to preserve this vital coating.
Internal Cleaning Rules: Why Cloth Is Forbidden
Absolute rule: Never touch internal metal parts with paper towels, cloths, or cotton swabs. These absorb the self-lubricating oil that protects moving parts. Consequence: Removing this oil causes rapid wear in the hook assembly—replacing it costs $80+. Stick exclusively to your paintbrush, using short, firm strokes in one direction. Pro technique: Angle bristles into crevices at 45 degrees to lift lint without pushing it deeper.
Target These 4 Lint Hotspots First
Focus your brush on these trouble zones where lint causes 95% of performance issues:
– Feed dogs: Brush between each tooth vertically—lint compacts here most severely
– Bobbin cavity walls: Sweep clockwise following the thread path
– Back corners: Shine your phone light here; lint nests in shadowed areas
– Right-side mechanism: Often overlooked but equally prone to buildup
Stubborn lint solution: Use tweezers to grab large clumps, then brush residual fibers. Visual check: Hold components toward a window—lint glows against backlighting.
Reassembly: Avoid the #1 Cause of Post-Cleaning Failures
Most “cleaning didn’t work” complaints stem from incorrect reassembly. These steps guarantee success.
Bobbin Casing Installation: The Make-or-Break Step
Align the casing using your reference photo. It should drop in with zero pressure—never force it. Critical test: Rotate the hand wheel slowly; if it catches or resists, the casing is misaligned. Rotate it 180 degrees and retry. Warning: Forcing causes broken tabs requiring $120 repairs.
Needle Plate Reinstallation: Tighten Just Right
Position the plate so feed dog slots align perfectly with the teeth below. Insert screws finger-tight first, then give each a quarter-turn with the screwdriver. Pro tip: Overtightening strips plastic threads—snug is sufficient. Test by wiggling the plate; it shouldn’t move.
Post-Cleaning Verification: 60-Second Success Test
Don’t assume cleaning worked—verify with this fail-safe check:
1. Install a new needle and bobbin
2. Sew a 2-inch straight stitch line on lightweight cotton scrap
3. Check for:
– Silent operation (no grinding/gritting sounds)
– Even top/bottom tension (no loops visible)
– Smooth fabric feeding (no hesitation or puckering)
Troubleshooting: If issues persist, disassemble only the bobbin casing and reseat it—90% of “failed” cleans trace to this single component.
Brother Machine Maintenance: Prevent Problems Between Cleanings
Extend time between cleanings with these model-specific habits:
Cleaning Frequency Based on Your Sewing Volume
- Daily sewers: Deep clean every 3 weeks (≈15 hours of use)
- Occasional sewers: Clean before storing long-term
- Immediate action: Clean after finishing projects with lint-heavy fabrics like fleece or flannel
Thread Handling Technique That Prevents Motor Lint
Always trim thread at the spool and pull downward to remove. Pulling thread upward drags lint directly into the motor compartment—this single mistake causes 40% of premature cleaning needs. Pro move: Clip threads close to the spool post-cleaning to minimize future debris.
Annual Professional Checkups: What They Actually Do
Even self-oiling machines benefit from yearly servicing where technicians:
– Inspect timing alignment
– Replace worn drive belts
– Deep-clean areas inaccessible to home users
– Update firmware on computerized models
Cost hack: Regular cleaning reduces annual service costs by 50%—most shops charge $65 for “cleaning only” versus $130 for “cleaning + repairs.”
A meticulously cleaned Brother sewing machine rewards you with near-silent operation, flawless tension, and the reliability that turns sewing from frustrating to fulfilling. This 30-minute ritual every few weeks saves hundreds in avoidable repairs while protecting your creative flow. Your machine isn’t broken—it’s just begging for attention. Grab that paintbrush, follow these steps, and rediscover why you fell in love with sewing in the first place. The perfect stitch awaits.


