
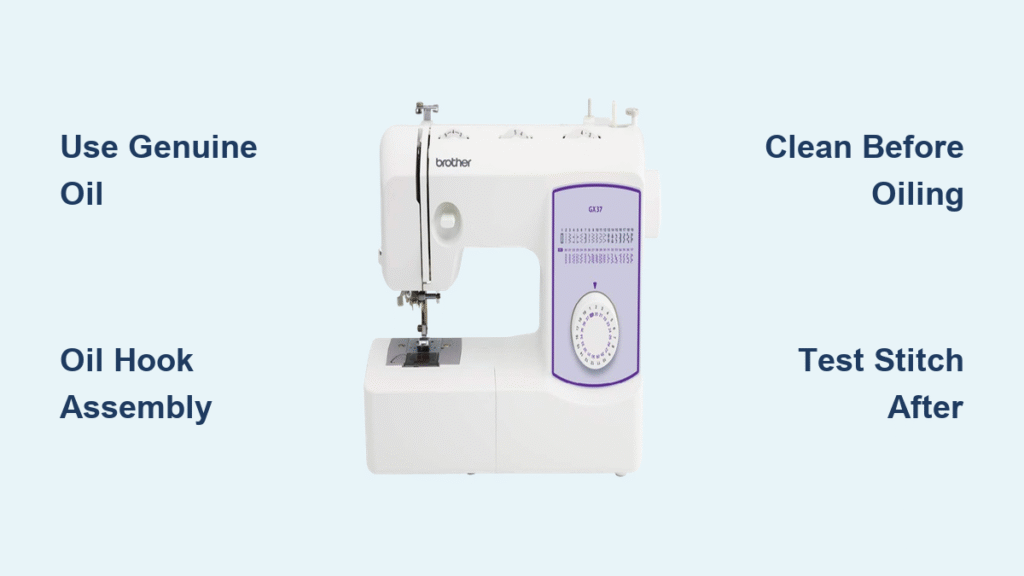
That frustrating moment when your stitches suddenly skip or your thread keeps snapping—it’s often your Brother sewing machine screaming for a fresh needle. A worn or bent needle can destroy hours of work in minutes, leaving snags in delicate fabrics or failing to pierce heavy materials. Knowing how to change needle on Brother sewing machine properly takes just 90 seconds but saves you endless frustration. Whether you’re working with a basic LX3817 or advanced PE800 embroidery unit, this guide delivers precise, model-specific instructions so you’ll never wonder which way the flat side faces or how tight to secure that clamp screw.
Safety Protocols Before Touching Your Needle
Complete Power Disconnection Procedure
Switch your Brother machine’s power switch to “O” and physically unplug it from the wall outlet—never skip this critical step. Computerized models like the CS6000i can accidentally activate during needle changes if left plugged in. Wait 15 seconds for all internal components to power down completely. Position your machine where you have clear visibility of the needle area, preferably under bright task lighting that reveals even the smallest needle imperfections.
Workspace Preparation Checklist
Clear all fabric, threads, and tools from your sewing surface to prevent accidental needle drops. Place a magnetic needle holder or small container directly beneath the needle area—those tiny needles vanish instantly on wooden floors. If replacing a bent needle, wear thin nitrile gloves to protect against sharp edges. Confirm your replacement needle matches your machine’s requirements before beginning; grabbing the wrong size mid-process wastes precious sewing time.
Selecting the Perfect Replacement Needle

Brother-Specific Compatibility Guide
All Brother home sewing machines use standard 130/705 H system needles—check for this stamped code on the needle shank. Your project fabric determines the ideal needle type:
– Universal: Everyday cottons and linens
– Ballpoint: Knits and stretch fabrics (prevents skipped stitches)
– Denim/Jeans: Heavy fabrics like canvas and denim
– Microtex: Delicate silks and fine woven fabrics
– Embroidery: Specialty threads and decorative stitching
Size Selection Made Foolproof
Match needle size to both fabric weight and thread thickness:
– 60/8: Chiffon, organza, fine silks
– 70/10: Lightweight cottons, voile, lawn
– 80/12: Standard quilting cottons, broadcloth
– 90/14: Denim, canvas, twill
– 100/16: Upholstery, leather, multiple layers
Pro tip: When working with metallic embroidery thread, always use a size 90/14 embroidery needle—its larger eye prevents thread shredding that plagues standard needles.
Recognize When Your Needle Needs Replacement

Immediate Visual Warning Signs
Hold your needle under bright light and rotate slowly. Replace immediately if you detect:
– Any visible bend or curve in the shaft
– Blunt or mushroomed needle tip
– Nicks, burrs, or rough spots along the shaft
– Rust spots or corrosion
– Visible deformation from hitting pins
Performance Red Flags You Can’t Ignore
Your Brother machine tells you when it needs a new needle through these symptoms:
– Popping or clicking sounds during sewing
– Frequent thread breaks despite proper tension
– Skipped stitches on straight seams
– Fabric snags or visible holes where needle penetrated
– Difficulty sewing through previously manageable fabric layers
Standard Mechanical Model Replacement (LX, XR, LS Series)
Precise Needle Positioning Technique
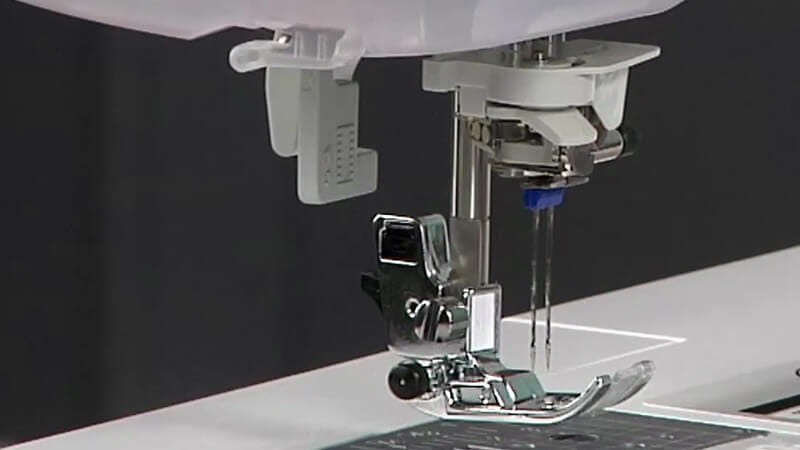
Turn the handwheel toward you (counterclockwise) until the needle reaches its absolute highest position—this exposes the needle clamp screw fully. On front-loading models like the LS2125i, the screw faces directly forward for easy access. The flat side of the needle always faces the back of the machine on these models—this orientation is non-negotiable for proper hook timing.
Correct Removal and Installation Sequence
- Hold the needle shaft firmly with left hand
- Loosen the clamp screw counterclockwise 2-3 turns (don’t remove completely)
- Pull needle straight down and out
- Insert new needle with flat side to back, pushing up until it stops
- Tighten screw clockwise until firm (about 1/4 turn past hand-tight)
Critical mistake to avoid: Overtightening the clamp screw strips the threads—apply only moderate pressure with your screwdriver.
Computerized Model Adjustments (CS, SE, PE Series)
LCD-Assisted Needle Changes
On models like the SE600, press the settings (gear) icon and select “Maintenance” > “Needle Replacement.” The machine automatically positions the needle bar at optimal height and raises the presser foot. The screen displays exact orientation—note that needle clamp screws on these models often sit on the left side of the needle bar rather than front.
Automatic Needle Threader Protocol
For machines with automatic threaders (PE800, CS6000i):
1. Move the threader lever down before removing old needle
2. Complete needle replacement
3. Return lever to upper position
4. Run the built-in threader test function
Warning: Never force the threader mechanism—it contains delicate parts easily damaged during needle changes.
Embroidery Machine Specifics (PE500, PE770)
Special Pre-Change Requirements
Remove the embroidery hoop and presser foot before starting. Lower the needle completely using the handwheel, then raise to highest position. Use only embroidery-specific needles (75/11 or 90/14) with larger eyes—standard needles cause constant thread breaks with embroidery threads.
Sensor and Timing Considerations
Embroidery machines have sensitive thread sensors near the needle area. After installation, manually thread the machine and verify the thread path indicator lights function correctly. Test on scrap fabric with both straight and zigzag movements—embroidery machines require perfect needle alignment to prevent hoop collisions.
Twin Needle Installation Process
Compatibility Verification Steps
Confirm twin needle capability by checking for:
– Second spool pin on machine
– Zigzag stitch function
– Manual indication of twin needle use
Twin needles come in specific widths (1.6mm, 2.0mm, 3.0mm)—check your manual for maximum compatible width. The package indicates which stitch widths are safe to use.
Correct Installation and Threading
Insert the twin needle with flat side to back, ensuring both needles seat fully. Thread following this sequence:
1. Left needle through standard thread path
2. Right needle through secondary thread guide (if present)
3. Use two separate thread tails
4. Select only straight stitch or approved decorative patterns
Never use zigzag wider than the twin needle’s specified width—this causes needle collisions and machine damage.
Post-Installation Verification Protocol
Mandatory Function Check
Slowly turn the handwheel through one full rotation while watching the needle path. The needle must pass cleanly through the needle plate hole without touching sides. Listen for unusual scraping sounds that indicate misalignment.
Fabric Test Sequence
Test on matching fabric scrap using this sequence:
1. Straight stitch (10 stitches)
2. Zigzag stitch (width 3.0, length 2.5)
3. Check both fabric sides for even stitches
4. Verify no thread shredding or skipped stitches
5. Listen for abnormal machine sounds
Troubleshoot Common Needle Problems
Needle Won’t Seat Fully
This usually means:
– Debris in needle clamp (clean with compressed air)
– Needle inserted backward (flat side must face back)
– Wrong needle system (confirm 130/705 H stamp)
– Bent needle shaft (discard and try new needle)
Persistent Breakage After Replacement
If new needles keep breaking:
– Verify needle size matches fabric weight
– Check needle plate for burrs around hole
– Confirm timing hasn’t been disrupted
– Ensure you’re not sewing over pins
Maintenance Schedule for Flawless Stitching
Replacement Timing Guidelines
Change needles:
– Every 6-8 hours of continuous sewing
– After completing major projects
– When switching between fabric categories (knits to denim)
– Immediately after hitting a pin
Pro tip: Keep a small notebook tracking needle usage—note fabric types and hours sewn between changes to optimize your replacement schedule.
Proper Storage Solutions
Store needles in original packaging or compartmentalized organizers with size labels visible. Include silica gel packets in storage containers to prevent moisture damage. Keep embroidery needles separate from standard needles to avoid accidental misuse.
Model-Specific Quick Reference
Top-Loading Bobbin Models (CS6000i, SE600)
Needle clamp screw on left side—use mini-screwdriver from accessory tray. Automatic threader requires lever positioning before changes. After installation, run the built-in threader test function.
Heavy-Duty Models (XR9500PRW, PQ1500SL)
Requires Phillips head screwdriver for larger clamp screw. Use only high-speed rated needles—standard needles fail under high RPMs. Insert until needle shoulder contacts stop (visible depth markings on bar).
When to Seek Professional Service
Contact Brother service immediately if you experience:
– Needle bar wobble during rotation
– Clamp screw won’t tighten despite proper technique
– Consistent needle breakage at identical positions
– Clicking sounds during needle installation
These indicate timing issues or mechanical damage beyond DIY repair.
Changing your Brother sewing machine needle correctly takes under two minutes but prevents hours of troubleshooting and fabric waste. Keep quality needles organized by size and type, replace them proactively based on usage rather than failure, and always verify proper installation with a fabric test. Your machine’s perfect stitch formation depends on this simple maintenance task—make it part of your sewing ritual and enjoy frustration-free projects from the first stitch to the last.


