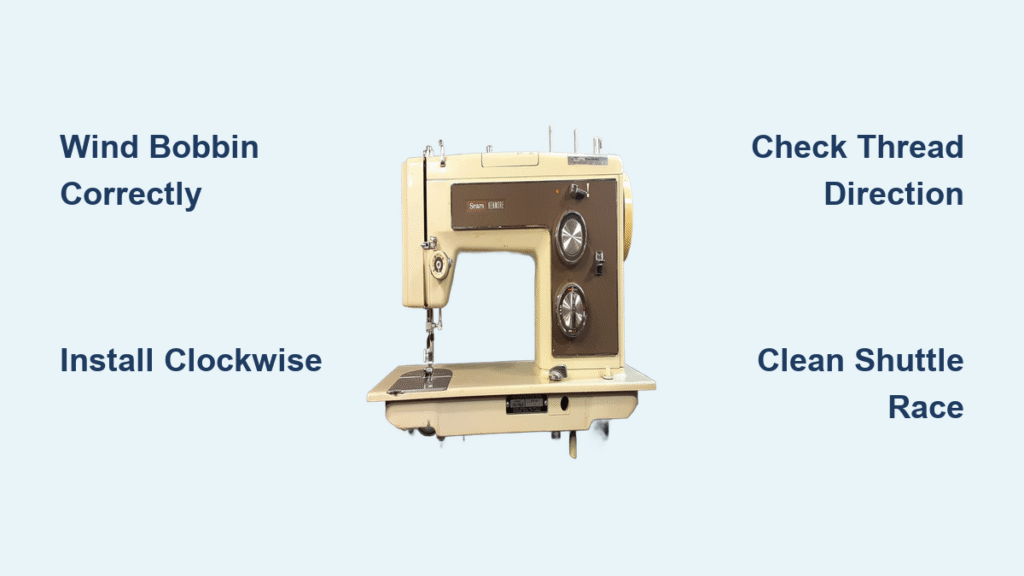
You’re halfway through sewing a delicate silk blouse when the fabric layers shift, ruining your carefully pinned alignment. Pins have fallen out, and your permanent seams are puckering. This frustrating scenario happens to every sewer—but there’s a simple solution you’re probably overlooking. Your Singer sewing machine’s basting stitch is the secret weapon that holds everything perfectly in place before you commit to final stitching. Every Singer model, from vintage mechanical machines to computerized powerhouses, can create this essential temporary stitch that transforms sewing accuracy.
Mastering the basting stitch means no more shifting fabric, ill-fitting garments, or frustrating rework. This guide reveals exactly how to set up any Singer machine for perfect basting stitches, with model-specific instructions, professional techniques, and troubleshooting tips you won’t find in your manual. You’ll discover why basting is the professional’s secret for flawless zippers, perfect gathers, and accurate fittings—plus how to create basting stitches that remove cleanly every time.
Set Up Any Singer Machine for Flawless Basting
Maximum Stitch Length Method for Mechanical Models
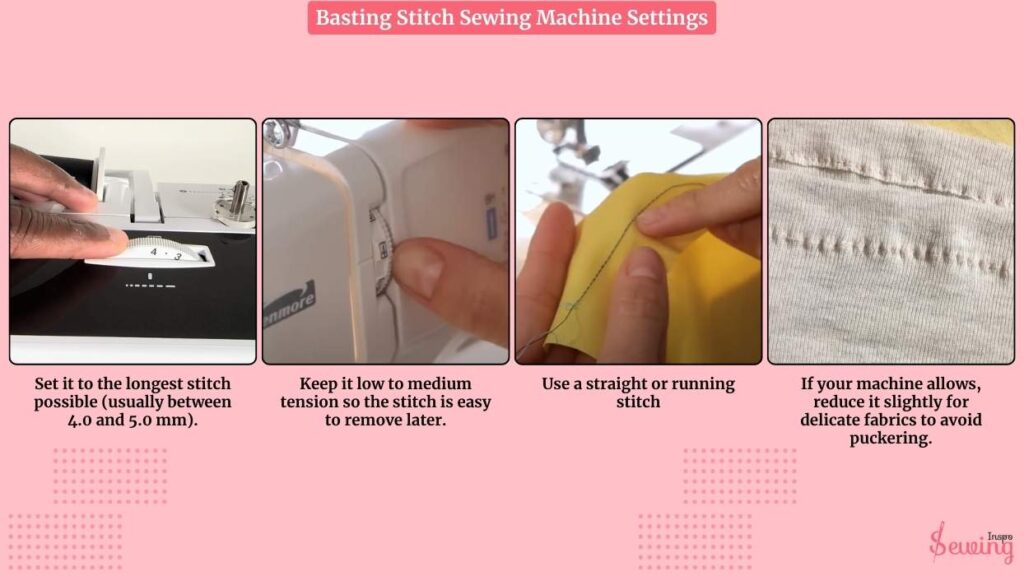
Your Singer creates basting stitches by using the longest straight stitch available—typically 4-6mm depending on your model. Locate the stitch length dial (usually numbered 0-4 or 0-6) and turn it completely to the highest number. This gives you the 4-6mm stitches ideal for temporary holding. For the Singer 237 Fashion Mate, this means turning the dial fully right to 6.0 for the maximum 6mm stitch length.
Critical setup steps:
– Select straight stitch (center needle position)
– Adjust stitch length dial to maximum setting
– Use contrasting thread color for visibility
– Always test settings on scrap fabric first
Singer 9970 Computerized Basting Shortcut
Modern Singer machines like the 9970 make basting effortless with dedicated pre-programmed settings. Simply access your stitch menu, select the basting stitch option, and the machine automatically optimizes length and tension. No manual adjustments needed—just press start and sew smooth, even basting stitches immediately. The 9970’s intelligent system even drops the feed dogs when you attach a darning foot, enabling free-motion basting for quilting and special projects without additional setup.
Hand Wheel Technique for Extra-Long Stitches
When your Singer’s maximum stitch length isn’t long enough for special projects, use the hand wheel method. Disengage the foot pedal, turn the hand wheel manually for each stitch, and lift the presser foot between stitches to advance the fabric. This creates unlimited length basting perfect for delicate fabrics that require minimal handling. Vintage Singer 237 owners particularly benefit from this technique when working with sheer materials where standard basting might still be too dense.
Transform Basting into Professional Gathering Power
Two-Row Gathering Method That Never Fails
Convert your basting stitch into a gathering powerhouse with this professional technique. Set your Singer to maximum straight stitch length and slightly loosen the upper thread tension. Sew two parallel lines inside your seam allowance—one exactly at the stitching line, another 1/4 inch away—leaving long thread tails at both ends.
Gathering execution:
1. Pull both bobbin threads simultaneously from the fabric’s wrong side
2. Distribute gathers evenly along the thread without tugging
3. Adjust fullness to match your pattern requirements
4. Pin gathered section to flat piece before permanent stitching
5. Sew permanent seam between the two basting rows
Zigzag Cord Gathering Alternative for Delicate Fabrics
For fabrics that break easily with traditional gathering, try this Singer-approved alternative. Set your machine to a wide zigzag stitch and place heavy thread or cord under the presser foot. Zigzag over the cord without catching it in your stitches, then pull the cord to gather fabric in one smooth motion. This technique eliminates thread breakage and creates perfectly even gathers every time—ideal for chiffon, organza, and other delicate materials.
Professional Basting Applications That Save Hours
Precision Garment Fitting Without Guesswork
Basting transforms fitting from stressful to precise. Baste your muslin pieces together at actual seam allowances before cutting expensive fabric. Try on the basted garment to identify fitting issues early—this method catches problems like tight armholes or uneven hemlines that flat pattern adjustments miss. Focus basting on critical areas like princess seams, set-in sleeves requiring easing, pant side seams for waist adjustment, and dart placements on fitted bodices.
Pin-Free Zipper Installation Technique
Pins create bulk and shift during zipper insertion, causing crooked zippers and puckered fabric. Instead, baste your zipper in place first. Position the zipper tape exactly where needed, baste close to the teeth using maximum stitch length, then attach your zipper foot for permanent stitching. The basting holds everything perfectly while keeping pins away from your needle—resulting in invisible, professional zipper installations every time.
Optimize Thread and Needle Selection for Clean Removal

Strategic Thread Choices for Every Fabric
Choose lightweight, contrasting thread that pulls out cleanly without leaving impressions. All-purpose cotton works well for most projects, but avoid heavy threads that damage delicate fabrics. White thread on dark fabric or bright thread on light fabric makes removal simple—you’ll spot every stitch instantly during removal. Match thread weight to your fabric:
- Lightweight fabrics: 50-60 weight thread
- Medium fabrics: 40-50 weight weight thread
- Heavy fabrics: 30-40 weight thread
Correct Needle Setup for Smooth Basting
Use your regular sewing needle sized appropriately for your fabric weight—no special needle required. Ensure the needle is sharp and properly threaded; Singer 237 owners should position the needle with the flat side facing right. The correct needle prevents skipped stitches that compromise basting effectiveness and makes thread removal effortless.
Troubleshoot Common Basting Problems Like a Pro
When Basting Stitches Won’t Release Easily
If your basting threads resist removal, check these frequent culprits:
- Tension too tight: Loosen upper tension slightly
- Stitch length too short: Verify dial is at maximum setting
- Thread too heavy: Switch to lighter weight thread
- Delicate fabric: Use silk thread instead of cotton
The ideal basting stitch should slide out with gentle pulling—no seam ripper required. If you find yourself fighting the thread, your settings need adjustment before continuing.
Fixing Uneven Basting Stitches Immediately
Inconsistent stitch length usually stems from inconsistent fabric handling. Keep fabric taut but never stretched while sewing. Maintain steady pressure on the foot pedal and let the feed dogs do the work. For delicate fabrics, reduce presser foot pressure if your Singer model allows adjustment. Always test your basting setup on a fabric scrap first—this five-second check prevents wasted time and fabric.
Quick Reference Settings for Immediate Success
Universal Singer Basting Formula:
– Stitch type: Straight stitch (center position)
– Length: Maximum available setting
– Tension: Normal or slightly loose for gathering
– Thread: Lightweight, contrasting color
– Needle: Appropriate for fabric weight
Model-Specific Cheat Sheet:
– Singer 237: 6mm maximum, use hand wheel method for extra length
– Singer 9970: Use programmed basting stitch for automatic optimization
– Singer 4423: 6mm maximum mechanical setting, ideal for beginners
Master Basting for Professional Results Every Time
Perfect basting comes down to three fundamentals: maximum stitch length, contrasting thread, and pre-project testing. These simple steps work across every Singer model, from vintage machines to modern computerized wonders. When you master this technique, you’ll wonder how you ever sewed without it—no more shifting seams, puckered zippers, or ill-fitting garments.
Start your next project with confidence by setting your Singer to basting mode first. Create temporary stitches that hold perfectly during fitting and construction, then remove cleanly without damaging your fabric. This single technique elevates your sewing from amateur to professional, saving hours of rework while delivering garments and projects that fit and finish beautifully. Press that foot pedal with your new basting knowledge, and transform how you approach every sewing project from today forward.