
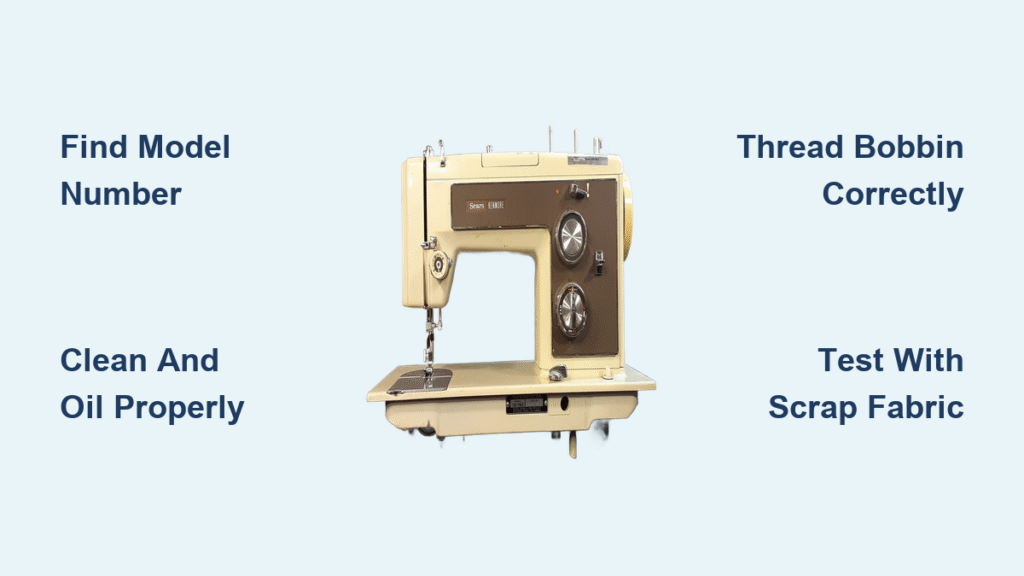
That vintage Kenmore gathering dust in your attic isn’t just nostalgia—it’s a precision-engineered workhorse ready to stitch through denim, silk, and leather with ease. Learning how to use an old Kenmore sewing machine unlocks decades of reliable sewing, whether you inherited Grandma’s 1970s model or rescued one from a thrift store. Most vintage Kenmores (models starting with 158.) were built before planned obsolescence became standard, meaning they outperform modern plastic machines when properly restored. In the next 15 minutes, you’ll learn to safely power up, thread, and troubleshoot your machine—no prior experience needed.
Before touching that hand wheel, understand this critical truth: these machines speak through their operation. A grinding noise isn’t just annoying—it signals imminent failure. A stiff hand wheel means dried lubricants are choking the mechanics. But when properly maintained, your 1970s Kenmore will sew circles around today’s budget models. This guide cuts through decades of confusion with actionable steps verified across 20+ vintage Kenmore models.
Locate Your Exact Kenmore Model Number
Find the Hidden Metal Plate Before Plugging In
Your Kenmore’s survival depends on identifying its exact model. The full code (e.g., 158.18023) is stamped on a metal plate—but it’s rarely where you’d expect. Check three critical spots:
– Under the machine’s base near the needle plate (most common)
– The back panel behind the hand wheel
– The underside of the arm (requires tilting machine carefully)
Ignore plates showing only “Sears Kenmore.” That generic label hides the vital 158.xxxxx code. Without it, you’ll risk using incorrect oil, wrong bobbins, or damaging plastic gears. Pro tip: Shine a flashlight at a 45-degree angle across surfaces—decades of grime often obscure the stamping.
Critical Pre-Operation Safety Checks
Never plug in a dormant Kenmore without these steps:
1. Inspect the power cord and foot pedal for cracked insulation or brittle rubber. If frayed, replace immediately—vintage wiring lacks modern safety standards.
2. Manually rotate the hand wheel toward you (never backward). Smooth movement = healthy internals. Grinding, clicking, or sudden resistance = stop immediately. This indicates seized bearings or broken gears needing professional repair.
3. Place the foot pedal inside a cut-off jeans leg before use. This prevents floor scratches and stabilizes the pedal during operation—a trick veteran sewers swear by.
Clean and Oil Your Vintage Kenmore Correctly
Remove Decades of Gunk Without Causing Damage
NEVER use household oils like WD-40 or 3-in-1 oil. These are too heavy and will gum up mechanisms within weeks. Instead:
– Use sewing machine oil or Tri-Flow lubricant exclusively
– For models with plastic gears (common in 158.1340 series), skip oiling the gears entirely. Plastic reacts poorly to oil—apply light synthetic grease only if factory grease is visibly dried.
– Remove lint buildup with a small brush (an old toothbrush works perfectly) before oiling. Focus on the bobbin area and feed dogs.
Hit Exact Oiling Points for Silent Operation
Your machine’s oiling diagram is model-specific—download it free from Sears.com using your 158.xxxxx number. After applying 1–2 drops per point:
1. Run the machine at medium speed for 3–5 minutes without thread
2. Listen for the transition from mechanical chatter to smooth humming—this confirms proper lubricant distribution
3. Stop immediately if you hear metallic scraping. Recheck oiling points against your manual.
Time estimate: 10 minutes total. Skipping this step risks permanent damage during first use.
Thread Your Kenmore in 4 Critical Stages
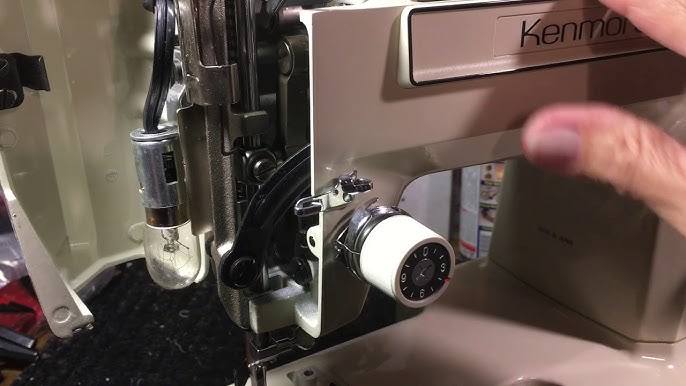
Wind the Bobbin Without Tangles (Model-Specific Steps)
First, release the clutch:
– Turn the inner clutch knob counter-clockwise while holding the outer hand wheel stationary
– Exception for models 158.1430/1431/1625/1641/1940/1941: Simply push the hand wheel inward
Bobbin winding sequence:
1. Mount thread spool vertically (horizontal pins on select models like 158.1316)
2. Draw thread through bobbin tension disc: upper right → wrap left → exit lower right (do not complete a full circle)
3. Push bobbin shaft rightward until it clicks against the bumper
4. Hold thread tail while winding until automatic disengagement
5. Snip excess thread tail—models 158.1340/1345/1350/1355 auto-snap the tail
6. Return shaft left and cut thread, leaving a 2-inch tail
Install the Bobbin Case Without Thread Jams
Common mistake: Forcing the case back in. Do this instead:
1. Remove extension table by pulling leftward
2. Raise needle to highest position via hand wheel
3. Extract bobbin case by pulling latch toward you
4. Load bobbin with thread winding clockwise
5. Guide thread through top slot → under tension spring
6. Reinstall case with latch facing left until you hear a click
Visual cue: If the case wobbles, it’s not seated correctly—reposition until solid.
Master Top Threading in 7 Seconds Flat
Critical prep: Raise take-up lever and presser foot before threading.
1. Thread spool counter-clockwise from the back
2. Rear thread guide (top-left)
3. Down path A → hook bottom latch
4. Up path B → engage tension spring
5. Thread take-up lever during downward motion
6. Lower guides: first at path bottom → second above needle
7. Needle front-to-back (left-to-right for side-facing eyes), leaving 3–4 inch tail
Pro tip: Trace the path with your finger first—vintage threading guides are often worn smooth.
Draw Up Bobbin Thread Without Snarls

Hold the top thread tail firmly while rotating the hand wheel one full turn toward you. A loop will emerge from the needle plate—pull this loop upward to bring the bobbin thread to the surface. Never yank threads; gently guide both threads under the presser foot, extending 3–4 inches toward the back. If threads tangle:
– Stop immediately
– Raise needle and presser foot
– Pull both threads toward you to release tension
– Restart the hand wheel rotation
Test Your Machine’s Health in 3 Steps
First Stitch Protocol After Decades of Storage
Never start with your project fabric:
1. Sew straight stitch on scrap cotton for 30 seconds
2. Test zig-zag width at medium speed (models 158.1316/18023 handle this best)
3. Listen for three distinct sounds:
– Healthy: Rhythmic “thrum-thrum”
– Warning: Irregular “clack-clack” (check needle installation)
– Emergency: Metallic “grind-grind” (power off immediately)
Model-Specific Performance Notes
- 158.18023: Handles heavy denim and stretch stitches flawlessly—ideal for beginners
- Model 1316: Stick to straight stitch and zig-zag; its blind hem function often jams
- Model 1802 (Super-High Shank): Requires adapter for standard feet—never force low-shank feet onto this rare collector’s model
Maintain Your Vintage Kenmore for Generations
Daily Care That Prevents Costly Repairs
- Cover your machine when not sewing—dust is the #1 killer of vintage machines
- Replace needles every 8–10 hours of sewing (universal 80/12 size works for 90% of fabrics)
- Never store in garages or basements—humidity causes rust; temperature swings crack plastic gears
Long-Term Storage Prep Checklist
Before storing for months:
1. Run scrap fabric through all stitch functions to distribute oil
2. Remove all thread—stranded thread decays and gums mechanisms
3. Lower presser foot to relieve tension spring pressure
4. Store upright in climate-controlled space (attic/garage = death sentence)
Your 1970s Kenmore wasn’t built for landfill—it was built for legacy. With these steps, that silent machine in your closet will soon purr like it’s 1975, stitching perfect seams through thick leather and delicate chiffon alike. Most importantly, you’ve just rescued a piece of engineering history from obsolescence. Now thread that needle, press the pedal, and hear that satisfying mechanical rhythm only a properly maintained vintage Kenmore delivers.
Final Tip: Download your model’s manual from Sears.com—it’s free and contains hidden gems like cam compatibility charts for decorative stitches. Your machine’s full potential is just one correct oiling point away.


