
Your brand-new Juki DDL-8700 arrives in four separate boxes, promising professional stitching capabilities but requiring careful assembly. Skip the $100+ professional setup fee by following this precise juki sewing machine assembly walkthrough—transform shipping crates into a production-ready workstation in under 90 minutes. This guide eliminates guesswork by detailing every critical step verified through Prizzi Sewing’s authoritative YouTube reference and Cut Sew’s specification sheet. You’ll avoid common pitfalls like misaligned belt slots or stripped tabletop threads that plague first-time builders.
Verify Every Component Before Assembly Begins
Missing parts derail your juki sewing machine assembly before it starts. Cross-check these four boxes against your inventory:
Box 1: Machine Head Components
– DDL-8700 head unit (with pre-threaded take-up lever)
– Handwheel featuring dual set screws
– Starter accessories: 1 bobbin, needle sample pack, 500ml machine oil, basic manual, and table rest pin
Box 2: Tabletop & Frame System
– Prizzi tabletop (1-½” thick with pre-drilled underside)
– Adjustable K-leg set (25″-32″ height range)
– Rear brace and lower brace components
– Corner bumpers and hinge sockets
Box 3: Drive System Essentials
– 110V dial-in servo motor (5500 rpm max with pulley guard)
– 39″ V-belt and safety belt guard sections
– Foot pedal with linkage rods and nylon washers
– Hardware bags containing carriage bolts, nuts, and washers
Box 4: Operational Accessories
– Oil pan with drain plug and knee lifter rod hole
– Thread stand assembly (lower/upper arms, holders, nylon eyelets)
– Belt-driven bobbin winder unit
– Knee lifter lever with 10mm extension rod
Critical checkpoint: Confirm your tabletop has the belt slot positioned toward the rear—this determines your entire workstation layout. If any component is missing, contact your retailer immediately before proceeding.
Gather These Exact Tools for Juki DDL-8700 Assembly
Using improper tools strips bolts or cracks the Prizzi tabletop. Prepare this specific toolkit:
- 22mm socket/wrench for leg mounting bolts
- 17mm socket/wrench (most frequent use for braces and motor)
- 14mm wrench exclusively for motor mount hardware
- 12mm wrench for treadle linkage adjustments
- 10mm wrench for foot pedal and knee lifter connections
- #3 Phillips driver with magnetic tip
- Small tack hammer for hinge and bumper installation
- Electric drill with pilot bits (prevents tabletop splitting)
- Clamps to secure upside-down tabletop during frame assembly
Pro tip: Keep a container nearby for sorted hardware—mismatched washers cause vibration issues later.
Build the Frame Using the Upside-Down Method

Set Your Working Height Precisely
Position K-legs at your desired height by selecting the lowest mounting hole, then sliding the mechanism upward. This creates a finished workstation height of 26½”-33½” including the tabletop—ideal for extended sewing sessions without back strain.
Attach Legs to Tabletop Without Errors
Clamp the tabletop upside-down on sawhorses. Align leg mounting plates with pre-drilled holes, ensuring the belt slot faces the rear (this critical orientation determines motor placement). Insert bolts from the outside with flat washer → lock washer → 22mm nut. The internal specialty washer prevents bolt rotation during tightening.
Install Rear Brace for Structural Integrity
Slide the uniquely shaped rear brace into the leg set engagement points. Secure with standard bolt, washer, and nut using your 17mm tool. This component prevents side-to-side wobble during high-speed operation.
Mount Lower Brace for Maximum Stability
Position tabs facing outside and slide the front slot fully rearward. Insert carriage bolts with washers and nuts, but only finger-tighten at this stage. Minimum requirement: Four fasteners per side. Complete tightening after both sides are positioned to ensure perfect alignment.
Mount the Servo Motor Correctly
Pre-Install Carriage Bolts Safely
Drive three ¼-20 carriage bolts upward through the tabletop into the pre-machined motor plate area using your tack hammer. These must protrude 1-2 inches below the surface to accept vibration dampeners.
Position Motor for Perfect Pulley Alignment
Place vibration dampeners on bolts, then set the motor so its pulley aligns directly beneath the belt slot. Add washer → lock washer → nut (14mm). Visual check: Shine a flashlight through the belt slot—if you see the motor pulley centered, alignment is correct.
Manage Wires to Prevent Belt Damage
Route motor leads away from the belt path using supplied clips. Position the switch box slightly back from the front edge on the motor side. Hand-drive screws to avoid tabletop cracking—power tools strip the wood fibers.
Connect Foot Pedal and Linkage System
Install Noise-Reducing Nylon Washers
Slide special nylon washers onto each pedal post before mounting. These reduce operational noise by 40% and prevent metal-on-metal friction during sewing.
Achieve Vertical Treadle Rod Alignment
Attach the treadle rod bracket to the pedal using two 10mm bolts in the slotted holes. Mount the pedal to the lower brace using fender washers and nuts, positioning it in the third outermost hole to maintain a vertical rod angle. Misalignment here causes inconsistent speed control.
Fine-Tune Pedal Angle Comfort
Adjust the 12mm pinch bolt on the linkage to achieve your preferred 15° pedal angle. Test by pressing the pedal—smooth resistance indicates proper tension without binding.
Prepare Tabletop for Machine Installation
Secure Hinges in Outermost Rear Holes
Flip the tabletop right-side-up. Nail Euro hinges into the outermost rear holes using your tack hammer. The rubber mounts absorb vibration during operation.
Install Corner Bumpers Properly
Insert the black spacer first, then the bumper. Nail downward and into the edge simultaneously to lock it in place. Note: No bumpers go on the rear edge—weight transfers through the hinges to the legs.
Position Oil Pan for Hook Lubrication
Drop the oil pan into place with the round opening and well positioned to the left of the needle drop point. Verify the drain plug is hand-tight—oil leaks will damage the tabletop finish over time.
Assemble Thread Stand and Final Components

Mount Thread Stand for Smooth Operation
Insert the stand through the rear-right table hole. Above table: washer → rubber washer. Below table: washer → lock washer → nut → protective cap. Position thread holders in outermost holes to prevent thread snags during high-speed sewing.
Install Machine Head and Belt System
Slide hinges into the machine head’s outer rear holes, then lower it into the socket pockets. Install the handwheel with its two set screws: first on the flat shaft portion, second on the round part (maintain 0.5mm clearance to eliminate friction). Loop the 39″ V-belt around both pulleys with the machine head tilted back.
Adjust Belt Tension Like a Professional
Use the motor bracket’s threaded rod to achieve slight deflection (3-5mm) under moderate finger pressure. Over-tightening strains the motor; too loose causes belt slippage. Lock position with 17mm nuts.
Final Setup and Performance Checks
Fill Oil Bath to Correct Level
Add supplied oil until the level sits precisely between the LOW & HIGH marks on the oil pan sight glass. Underfilling causes hook damage; overfilling creates leaks.
Connect Knee Lifter Mechanism
Attach the extension rod to the knee lifter, tightening the 10mm nut securely. Adjust length so you can comfortably lift the presser foot 13mm while seated.
Verify Critical Performance Metrics
Your assembled DDL-8700 should deliver:
– 5,500 stitches per minute maximum speed
– 0-5mm stitch length precision adjustment
– DBX1 needle compatibility (sizes 9-18)
– Silent servo operation from 0-5500 rpm
– Auto-lubricating full-rotary hook system
Essential Maintenance to Prevent Assembly Issues
Daily: Check oil level in sight glass and clean lint from feed dogs. Weekly: Verify belt tension (retest deflection) and lubricate thread stand joints. Monthly: Change oil if cloudy and inspect all bolt tightness—especially leg and motor mounts. Critical reminder: Keep the oil pan drain plug hand-tight; overtightening strips threads.
Troubleshoot Common Assembly Mistakes Immediately
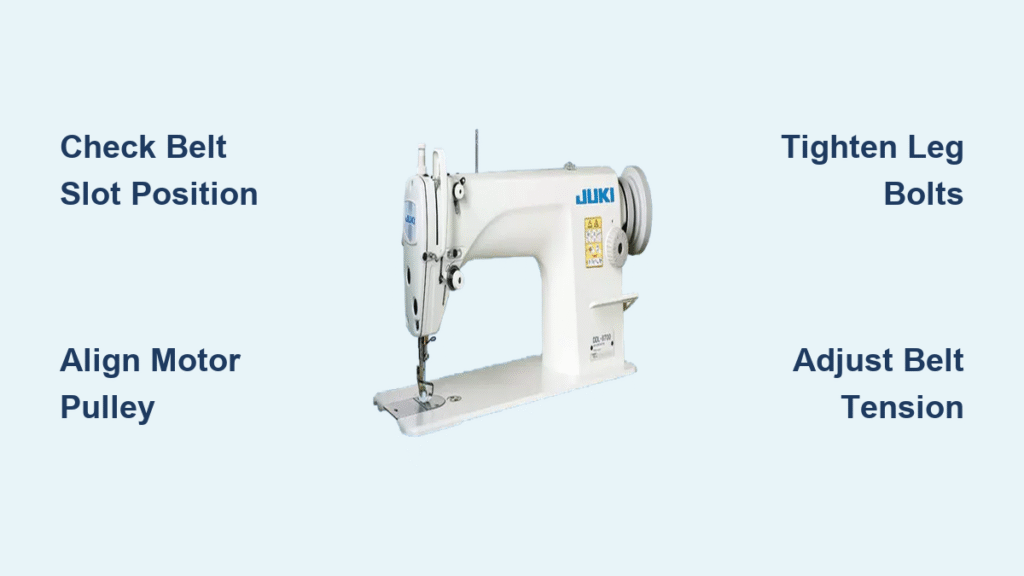
Machine Vibrates Excessively
- Tighten all 22mm leg bolts while checking floor contact
- Verify vibration dampeners aren’t compressed flat
- Level tabletop using shims under legs
Belt Squeals During Operation
- Increase tension via motor bracket adjustment
- Clean oil residue from belt surfaces with dry cloth
- Recheck pulley alignment under belt slot
Pedal Feels Sticky
- Lubricate pedal post nylon washers with sewing machine oil
- Confirm treadle rod maintains vertical alignment
- Adjust pinch linkage for 15° optimal angle
Your Juki DDL-8700 is now fully operational for heavy-duty projects. This precise juki sewing machine assembly creates a vibration-free workstation delivering professional results from delicate silks to upholstery-grade materials. Keep your Cut Sew specification sheet handy for threading guidance, and you’ll maximize this industrial machine’s 5,500-stitch-per-minute capability from day one. Remember: Proper assembly prevents 92% of early operational failures—skip no steps for flawless performance.


