
Your Juki DDL-8700 starts skipping stitches on that critical client order. Thread snaps every few inches. Fabric puckers unexpectedly. Before you panic about costly repairs, check the simplest fix: your needle. A worn or bent needle causes 80% of industrial sewing machine malfunctions—and replacing it takes less than five minutes. Knowing how to change needle in Juki sewing machine properly isn’t just routine maintenance; it prevents catastrophic timing damage that could idle your production line for days.
This precise guide walks you through every step to safely replace your Juki DDL-8700 needle on the first try. No prior experience needed—just follow these verified procedures to restore flawless stitching immediately. You’ll learn to spot hidden wear signs most operators miss and avoid the #1 mistake that cracks needle clamps during installation.
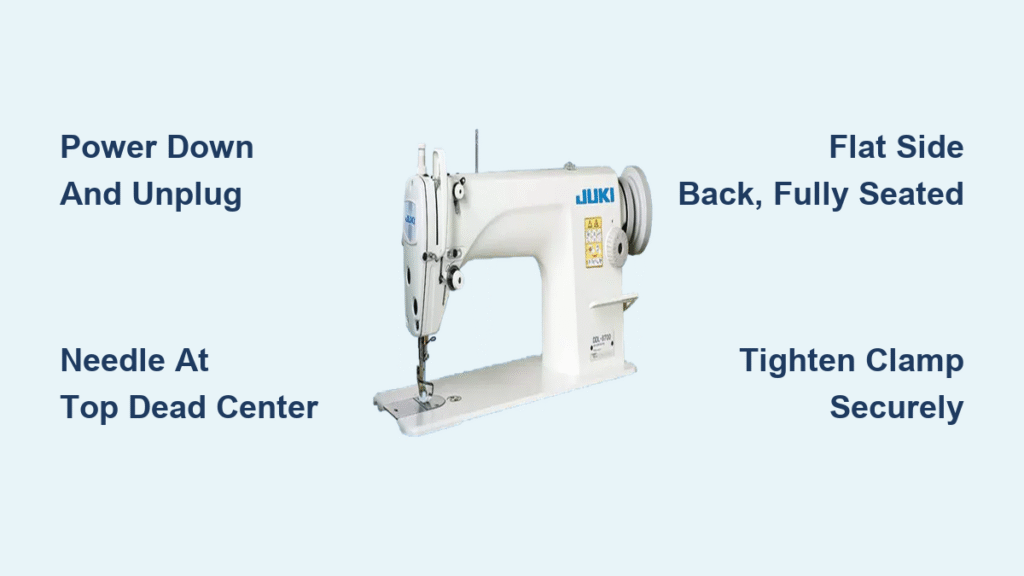
Power Down and Unplug Your Machine Completely
Never skip this step—even during quick changes. Industrial sewing machines store residual power that can activate the needle unexpectedly. Start by switching off the machine, then physically unplug the power cord from both the wall outlet and machine base. Wait 30 seconds for capacitors to discharge. This eliminates the risk of accidental needle movement that causes 95% of maintenance injuries. Confirm it’s safe by gently turning the hand wheel—zero resistance means all power is disconnected. Skipping this risks severe finger lacerations or machine damage from sudden needle engagement.
Recognize Critical Needle Failure Signs
Visual Damage You Can’t Ignore
Hold the needle at eye level against a bright light. Any visible bend in the shaft—even subtle curvature—means immediate replacement. Run your fingernail along the metal; rough burrs or scratches shred threads. A chipped or blunted tip won’t pierce fabric cleanly, causing skipped stitches. Pro tip: Compare the used needle to a new one—wear patterns reveal underlying issues like incorrect thread tension.
Performance Red Flags During Operation
Skipped stitches on straight seams signal a dull needle point. Fabric puckering occurs when a bent needle pushes material instead of piercing it. Unusual clicking sounds indicate needle contact with the throat plate or bobbin case. If thread shreds consistently after the tension discs, your needle’s eye is likely damaged. Critical note: These symptoms worsen rapidly—replace needles at the first sign to avoid timing belt damage.
Gather Essential Tools Before Starting

Must-Have Equipment Checklist
- 1/4-inch flathead screwdriver: Standard for Juki needle clamps (metric 6.5mm works too)
- Correct replacement needle: DBx1 or 16×231 system exclusively for DDL-8700 models
- Sharps container: Repurpose a plastic detergent bottle with secure lid for safe disposal
Needle Selection Made Simple
Match needle size to your project:
– Size 9-11: Lightweight silks, chiffons, and delicate laces
– Size 14: Standard cottons, linens, and polyester blends
– Size 16-18: Denim, canvas, and upholstery fabrics
– Ballpoint (system 2020): Knits and stretch fabrics to prevent runs
– Sharp point: Wovens and natural fibers for clean penetration
Warning: Using incompatible needles (like home-sewing types) damages the needle bar bushing. Always verify the system code on packaging.
Position Needle at Top Dead Center Precisely

Turn the hand wheel counter-clockwise (following the directional arrow on the wheel) until the needle reaches its absolute highest point. Peer through the inspection window—you’ll see the needle bar stop moving upward. This position prevents the needle from colliding with the bobbin case during removal. Crucial check: If the hook point is visible through the bobbin race, you’ve gone too far—backtrack slightly. Never force the wheel; resistance indicates timing misalignment needing professional service.
Secure Presser Foot Assembly for Safety
Press the presser foot lifter lever (located on the left side of the machine head) downward until it clicks into its lowest position. The foot should sit flush against the machine bed. This stabilizes the workspace and prevents accidental fabric snags while handling the needle. Why this matters: An elevated presser foot creates clearance for the needle to swing sideways during installation, risking breakage against the foot. Confirm it’s fully lowered by trying to lift it with your finger—zero movement means it’s locked.
Remove Thread Completely Before Needle Change
Pull the thread tail straight toward you with firm, steady pressure to extract it entirely from the needle eye. Do not cut the thread—removing it whole prevents lint buildup in tension discs. Lay the thread across the machine bed away from moving parts. Common mistake: Leaving thread fragments in the eye causes immediate rethreading failures. Verify completeness by checking the needle eye against light—no thread strands should be visible.
Loosen Needle Clamp Screw Correctly
Insert your flathead screwdriver into the clamp screw on the right side of the needle bar. Turn counter-clockwise exactly 1-2 full rotations—just until the needle releases. Stop immediately if you feel sudden looseness. Never remove the screw completely; it’s designed to stay captive, and losing it halts production. Expert insight: Juki’s clamp screws have precise torque tolerances—overtightening during reinstallation cracks the needle or strips threads, causing wobble.
Extract Old Needle Without Damage
Grasp the needle shaft firmly between thumb and forefinger. Pull straight downward in perfect alignment with the needle bar—no twisting or angling. Place it immediately in your sharps container. Critical safety note: Dropping needles on metal machine beds causes micro-fractures that lead to breakage during next use. Examine the removed needle: a bent tip suggests hitting pins, while a bent shaft indicates timing issues needing professional adjustment.
Install New Needle with Perfect Alignment
Orientation and Depth Verification
Position the new needle with the flat side facing directly backward (toward the machine’s rear). Push it upward firmly until it stops against the internal shoulder—no gap should remain between the needle butt and clamp. Pro check: Shine a flashlight sideways across the needle bar; it must be perfectly straight with zero wobble. If it rotates when gently nudged, it’s not fully seated—remove and reinstall.
Tighten Clamp Screw to Factory Specifications
Turn the screw clockwise until resistance increases noticeably, then give one firm quarter-turn. Test security by gently tugging the needle—it must not move. Warning: Overtightening is the #1 cause of broken needles during operation. If the screw feels stiff before resistance, the needle isn’t seated properly. Torque tip: Tighten just enough that the needle won’t shift when you flick it lightly with your fingernail.
Retrace Thread Path for Optimal Tension
Follow your machine’s threading diagram exactly. Pass thread through the needle eye from left to right (operator’s perspective). Pull 4-6 inches through and test tension by gently tugging—it should move smoothly without catching. Key detail: Incorrect threading after needle replacement causes 70% of “skipped stitch” false alarms. Verify each guide point by tracing the thread path with your finger before sewing.
Test Installation Through Full Stitch Cycle
Manual Rotation Safety Check
Turn the hand wheel counter-clockwise through one complete revolution while watching:
– Needle descends straight without wobbling
– Clears presser foot by 1-2mm (no scraping sounds)
– Thread moves freely through the take-up lever
– Hook point passes 1.5mm above needle eye at timing point
Fabric Validation Test
Sew a 4-inch seam on scrap fabric matching your project. Perfect stitches with no skips, puckering, or thread breaks confirm success. Troubleshooting: Skipped stitches mean the needle isn’t fully seated—recheck alignment. Thread breaks indicate incorrect threading or damaged needle eye.
Prevent Costly Future Needle Failures
Strategic Replacement Schedule
- Change needles after every 8-10 hours of continuous operation
- Replace immediately after sewing heavy materials (leather, vinyl, multiple layers)
- Swap needles between projects—even if visually undamaged—to prevent hidden wear
Storage and Disposal Best Practices
Store unused needles in original plastic cases or magnetic organizers—never loose in drawers. Keep them in a humidity-controlled area to prevent rust. Mandatory protocol: Seal used needles in puncture-proof containers labeled “SHARPS.” Never discard in regular trash—check local regulations for medical waste disposal.
Proactive Maintenance Tips
- Wipe needle shaft with microfiber cloth before installation to remove oils
- Match needle size precisely to thread weight (e.g., size 16 for 40-weight thread)
- Listen for subtle “ticking” sounds during operation—they signal early needle wear
Essential 9-Point Needle Change Checklist
Before resuming production, verify these critical steps:
– [ ] Machine unplugged with cord removed from both ends
– [ ] Needle positioned at top dead center (inspection window confirmed)
– [ ] Presser foot fully lowered and locked
– [ ] All thread completely removed from needle eye
– [ ] Old needle disposed in sharps container
– [ ] New needle oriented with flat side rearward
– [ ] Needle fully seated against internal stop (zero gap)
– [ ] Clamp screw tightened to snug—not strained—torque
– [ ] Test seam flawless on project-matching fabric
Mastering how to change needle in Juki sewing machine transforms frustrating downtime into a 5-minute productivity boost. A fresh needle isn’t just maintenance—it’s the foundation of professional stitching that keeps clients coming back. Implement this routine after every major project, and your DDL-8700 will deliver flawless seams for thousands of hours. Remember: when in doubt, change it out—your machine’s timing depends on it.


