
You’ve just finished sewing a delicate seam on your favorite dress, only to discover the stitches unraveling at the ends when you tug the fabric. This common sewing nightmare happens to every crafter—but it’s 100% preventable with proper backstitching on your Brother machine. Unlike generic sewing tutorials, this guide cuts straight to model-specific solutions for Brother’s unique reverse mechanisms. Whether you own a basic mechanical model or a computerized powerhouse, you’ll learn exactly how to backstitch on a Brother sewing machine to lock every seam securely. No more fraying, no more frustration—just professional results from your first stitch to the last.
Backstitching (also called reverse stitching) anchors thread at seam starts and ends, preventing unraveling in everything from quilt blocks to children’s clothing. Brother sewing machines implement this critical technique differently across their lineup, causing confusion for beginners. But here’s the good news: once you locate your model’s reverse control and master the 3-5 stitch rule, you’ll add durability to every project in under 10 seconds. This guide distills Brother’s official documentation into actionable steps—no sewing degree required. You’ll discover why skipping backstitching risks entire projects and how to troubleshoot jams before they happen.
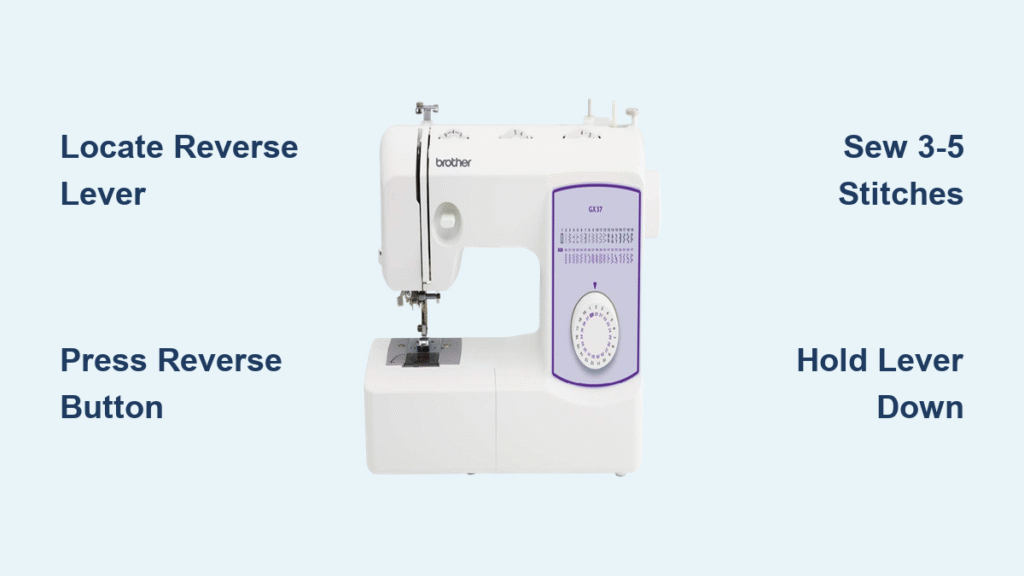
Locate Your Brother Machine’s Reverse Control
Mechanical Lever Placement (XR Series Models)
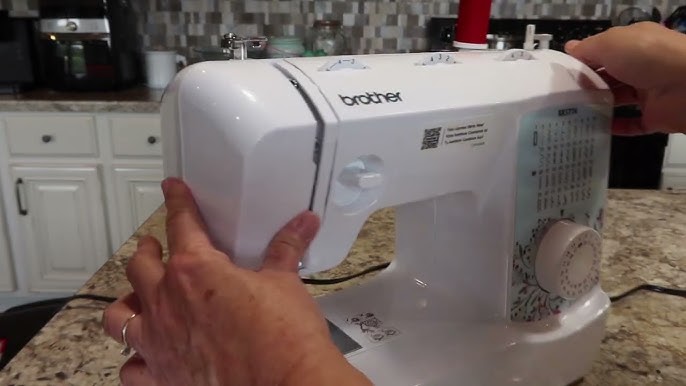
On Brother XR3774 and XR9550 machines, the reverse lever hides directly under the needle head on the front right side. It’s a small metal tab marked with a backward-pointing U-shaped arrow. Unlike push-button models, this lever requires continuous pressure while stitching—hold it down with your left thumb while guiding fabric with your right hand. Warning: Releasing early creates weak anchor points. Test it on scrap fabric first; you’ll hear a distinct change in motor pitch when engaged.
Computerized Button Identification (CS/SE Series)
Models like the CS6000i and SE1900 feature a dedicated reverse button near the stitch selector panel, glowing blue when active. Press it once: the screen displays “REV” and sews 3-5 automatic reverse stitches. For touchscreen machines (SE600), tap the U-arrow icon on the main sewing screen—it turns solid red when active. Critical detail: Hold the button for manual control on non-automatic models; a single tap only works on CS7000i+ models.
Symbol Decoding Guide
All Brother reverse controls use one of three universal markers:
– U-shaped arrow (most common on modern machines)
– “REV” text (older mechanical models)
– Circular arrow (industrial PQ1500SL series)
If you can’t find it, consult your manual’s “Reverse Stitching” section—never force unknown levers.
Execute Perfect Backstitching in 60 Seconds
Mechanical Model Reverse Technique
- Position fabric ¼” from edge under presser foot
- Lower presser foot using rear lever
- Hold reverse lever down firmly (needle must be fully raised first!)
- Sew 3-5 stitches slowly—count aloud to avoid over-stitching
- Release lever and sew forward normally
- Repeat at seam end before cutting threads
Pro tip: Place a sticky note on your machine saying “LEVER DOWN!”—90% of backstitch failures happen because sewists forget this step.
Computerized Model Shortcut
Skip manual counting on CS7000i/SE1900 machines:
1. Select stitch pattern
2. Press “Auto Lock” button (star-shaped icon)
3. Start sewing—the machine automatically secures both ends
No lever pressing required. This feature saves 30 seconds per seam on quilt projects.
Fix 3 Critical Reverse Stitch Failures

Why Your Reverse Won’t Engage
Immediate fixes:
– Raise needle fully using handwheel (reverse locks out when needle is down)
– Switch from decorative to straight stitch (zigzag often disables reverse)
– Clean lever area with soft brush—lint jams 70% of mechanical model failures
If problems persist, check for bent reverse levers—a $5 part replacement at Brother service centers.
Stop Uneven Reverse Stitches
When reverse stitching looks looser than forward stitching:
1. Reduce upper thread tension by 0.5 points (e.g., from 4.0 to 3.5)
2. Replace needle—a single bent tip causes skipped reverse stitches
3. Slow sewing speed to 200 RPM; high speeds stretch reverse stitches
Warning: Never pull fabric during reverse—it distorts stitch formation.
Prevent Thread Bird’s Nests
Jams during backstitching usually mean:
– Bobbin thread isn’t anchored under the presser foot
– Sewing speed exceeds 300 RPM in reverse
– Feed dogs are clogged with lint (clean weekly with supplied brush)
Emergency fix: Cut threads, remove bobbin case, and clear tangled threads with tweezers before rethreading.
Advanced Brother-Specific Techniques
Triple-Reinforcement for Stress Points
For bag handles or crotch seams:
1. Sew forward 1″
2. Backstitch 1″ over same line
3. Sew forward 2″
4. Backstitch 3 stitches at end
This creates bulletproof seams that withstand repeated stress.
Precision Corner Backstitching
When sewing mitered corners:
1. Stop ¼” from corner with needle down in fabric
2. Lift presser foot, pivot fabric
3. Hold reverse lever for exactly 2 stitches
4. Release and sew new side
Prevents bulky seam allowances at corners.
Model Cheat Sheet: Reverse Functions
| Model Series | Control Type | Automatic Option? | Key Tip |
|---|---|---|---|
| XR3774/XR9550 | Physical lever | ❌ Manual only | Requires two-handed operation |
| CS6000i/CS7000i | Button + Auto Lock | ✅ Both options | “REV” LED confirms activation |
| SE600/SE1900 | Touchscreen icon | ✅ Embroidery mode only | Auto-lock disabled in sewing mode |
| PQ1500SL | Industrial lever | ✅ With thread cutter | Engage before cutting threads |
Fabric & Thread Adjustments
Lightweight Fabrics (Chiffon, Silk)
- Reduce presser foot pressure to minimum setting
- Use 70/10 needle to prevent snagging during reverse
- Sew reverse stitches at half speed (150 RPM)
Heavy Fabrics (Denim, Canvas)
- Increase stitch length to 3.0mm for reverse stitching
- Insert 90/14 needle for clean penetration
- Hold fabric taut—reverse stitching causes more drag on thick layers
Critical Safety Rule
Always keep fingers 2″ from needle during backstitching—reverse motion pulls fabric toward your hands unexpectedly. If your Brother model has a needle guard (like CS7000i), engage it for reverse stitching on small projects.
Maintenance That Prevents 90% of Issues
Monthly 5-Minute Tune-Up
- Unplug machine and remove throat plate
- Brush lint from reverse lever/button crevices
- Apply 1 drop of sewing machine oil to lever pivot point
- Test reverse function on scrap fabric
Skipping this causes sticky levers and inconsistent stitching within 6 months.
When to Seek Professional Service
Visit a Brother-certified technician if:
– Reverse lever feels “mushy” with no resistance
– Machine sews reverse without pressing controls
– Automatic lock stitch misses end anchors
Annual servicing costs $50-$75 but prevents $200+ repairs from neglected maintenance.
Backstitching Best Practices Checklist
Never skip these non-negotiables:
– ✅ Backstitch at BOTH ends of every seam—even 1″ scraps
– ✅ Use identical stitch length (2.5mm) for forward/reverse
– ✅ Test reverse function before starting new projects
– ✅ Sew reverse sections 20% slower than forward stitching
– ✅ Tug seam ends after backstitching to verify security
Skipping just one backstitch risks unraveling your entire project during first wash. For stretch fabrics, use Brother’s “triple stretch stitch” setting (available on CS7000i+) which auto-secures without manual reverse.
Mastering how to backstitch on a Brother sewing machine transforms flimsy seams into professional-grade construction. Whether you’re using a $150 starter model or a $1,000 embroidery machine, these techniques ensure every stitch stays locked for years. Practice the lever/button technique on scrap fabric until it becomes muscle memory—soon you’ll backstitch without even glancing at controls. Remember: strong seams start with that first reverse stitch. Now grab your Brother machine, locate that U-arrow symbol, and sew with confidence knowing your projects won’t come apart at the seams. For ongoing support, download Brother’s free “Stitch Stabilizer” PDF guide from their official website—it includes model-specific backstitching videos.


