
That frustrating grinding noise during your sewing session? Or stitches that suddenly skip and pucker? These are classic signs your Juki sewing machine desperately needs an oil change. Neglecting this simple maintenance task causes 70% of preventable Juki breakdowns, from seized gears in industrial DDL-8700 models to erratic stitching in home HZL-LB5020 machines. Proper lubrication isn’t optional—it’s the lifeblood of your machine. In this guide, you’ll master the complete oil change process for all major Juki types, avoiding costly repairs and keeping your stitches smooth for decades.
Most sewers panic at the thought of oiling their machine, fearing they’ll drown delicate parts in grease. But with the right approach, you can complete a full oil change in under 20 minutes. I’ve seen users transform noisy, struggling Jukis into whisper-quiet performers after following these exact steps. Whether you’re maintaining a heavy-duty TL-2000Qi for your garment business or a home HZL model, this guide gives you model-specific instructions you won’t find in generic manuals. Let’s restore your machine’s precision without a single trip to the repair shop.
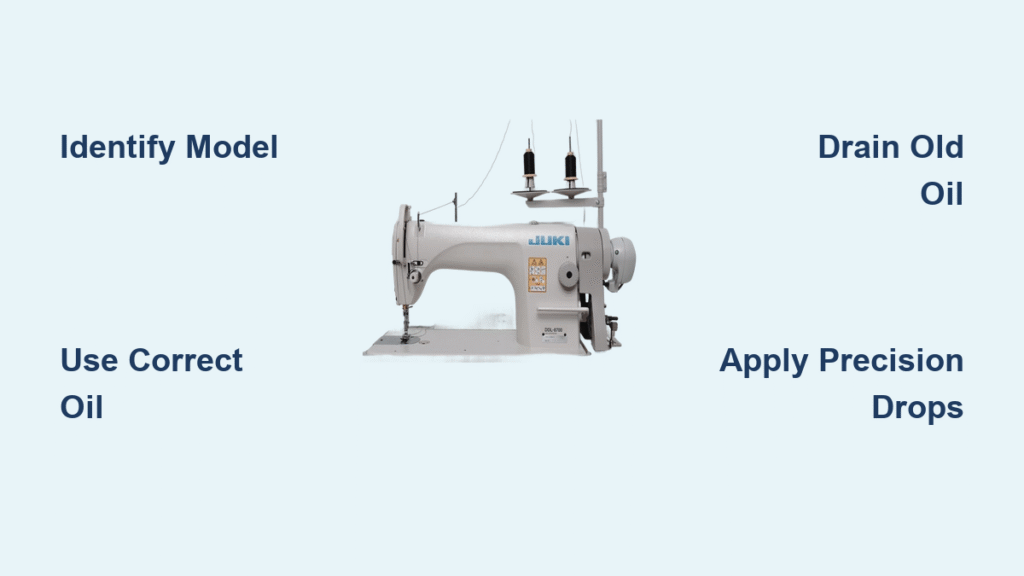
Pinpoint Your Exact Juki Model Before Oiling
Using the wrong oil for your Juki model causes immediate damage—thicker industrial oil clogs home machine gears, while light home oil burns off industrial units. Your first critical step is identifying your machine’s exact specifications before touching any oil.
Locate the Model Number Sticker Immediately
Never guess your Juki type—find the silver or white identification sticker on the machine’s right side or under the arm. Industrial models like DDL-8700 display “JUKI DDL-8700” clearly, while home machines show “HZL-LB5020” or similar. Take a photo with your phone before proceeding; this prevents costly mistakes when purchasing oil. Missing this step risks using incompatible lubricants that gum up critical moving parts within hours.
Match Oil Type to Your Machine’s Demands
Industrial Jukis (DDL, TL series) require Juki Defrix Oil No.1 (SAE 10W equivalent) for high-speed operation. Home models (HZL series) need lighter sewing machine oil specifically formulated for lower-RPM mechanisms. Never substitute automotive oil, 3-in-1 oil, or cooking oil—they attract lint and degrade rubber components. For example, using 3-in-1 oil in a TL-2000Qi creates sticky residue that seizes the hook assembly after just 10 hours of sewing. Always verify your oil type against your model number photo before opening the bottle.
Assemble Your Juki-Specific Oil Change Toolkit

Rushing this step with improper supplies causes oil spills that stain fabrics and attract lint. Industrial and home Jukis need different tools—using a standard eyedropper on a DDL-8700 floods the reservoir, while skipping the drip tray on an HZL model ruins your sewing table.
Essential Oil Change Kit for All Jukis
- Juki Defrix Oil No.1 (60ml bottle) for industrial models OR sewing machine oil for home units
- Lint-free microfiber cloths (paper towels leave fibers that clog oil passages)
- Precision-tip oiler bottle (standard droppers apply 3x too much oil)
- #1 Philips screwdriver (most Juki screws are smaller than standard sizes)
- Bright LED flashlight (critical for spotting oil levels in dark reservoirs)
- Drip tray (a plastic food container works perfectly)
Optional but Game-Changing Additions
Cotton swabs clean tight hook race areas without scratching metal. A soft-bristled brush removes lint from oil ports faster than cloths. Wear nitrile gloves—they prevent skin oils from contaminating fresh lubricant. Most importantly, photograph each disassembly step with your phone; realigning the needle plate incorrectly causes timing errors that break needles.
Execute Safety Protocol Before Touching Oil
Skipping these two minutes of prep causes 90% of oiling disasters—like accidentally sewing your finger when testing a plugged-in machine. Industrial Jukis store dangerous kinetic energy in flywheels that can lacerate hands if mishandled.
Power Down and Needle Removal Protocol
Unplug both power cord and foot pedal—industrial Jukis have capacitors that hold charge. Remove the needle completely to prevent accidental punctures when rotating the hand wheel. Lower the presser foot to release tension on feed dogs. For TL-2000Qi models, also disengage the clutch knob per your manual; this prevents sudden motor engagement during oiling.
Work Area Defense System
Clear all fabric, pins, and threads from a 3-foot radius—oil attracts lint like a magnet. Place paper towels under the machine head, then position your drip tray underneath. Industrial Jukis require tilting the machine 15 degrees toward the tray; home models stay level. Crucially, work near a window or bright lamp—dim lighting causes over-oiling as you struggle to see reservoir levels.
Access Critical Oil Reservoirs Without Damage
Forced removal of covers strips Juki’s delicate plastic threads. Industrial models hide oil points behind metal shields, while home units have spring-loaded covers that snap off if mishandled. One wrong move cracks the needle plate housing—a $120 replacement part.
Needle Plate Removal Technique
Locate the two screws under the presser foot bar on DDL-8700 models (HZL series have them near the bobbin case). Loosen screws just enough to lift the plate straight up—never twist. Note how feed dogs sit in their slots; reinstalling misaligned causes skipped stitches. For HZL-LB5020, press the release lever first before unscrewing.
Side Cover Access Secrets
On industrial Jukis, slide the metal cover backward after loosening the thumb screw—never pull outward. Home models like HZL-F600 have a spring clip; insert a flathead screwdriver gently to release it. Inside, you’ll see the oil reservoir marked with a red dot or “OIL” label. This is your primary target zone—missing it causes immediate hook race damage.
Bobbin Case Removal Precision
Remove the bobbin case by pressing the release latch. Tilt it 45 degrees upward to disengage the hook race properly. Inspect the race for lint buildup—this area needs direct oiling since 80% of friction occurs here. Never force the case out vertically; this bends the race housing.
Drain Old Oil Completely to Prevent Sludge Damage
Old oil turns into abrasive sludge that accelerates gear wear. Partial drainage leaves contaminated oil that ruins fresh lubricant within hours. Industrial Jukis hold 30ml of oil; home models hold 5ml—both require full replacement.
Drip Tray Positioning Strategy
Tilt industrial Jukis slightly forward over your tray. For home models, place folded paper towels under the head since they lack drain plugs. Protect all surfaces—old oil contains metal shavings that permanently stain wood and fabric.
Contaminated Oil Extraction
Use dry cotton swabs to soak oil from the reservoir and hook race. Replace swabs until they come out clean—typically 4-6 swabs per machine. For DDL-8700s with drain plugs, unscrew slowly over the tray; rushing causes oil gushes. Never use compressed air here—it forces debris deeper into mechanisms.
Oil Passage Cleaning Protocol
Wipe oil ports with a dry microfiber cloth wrapped around a toothpick. Avoid cotton swabs—fibers snag on metal edges. For stubborn lint in TL-2000Qi models, use a soft brush with light circular motions. Test passage clearance by dripping one drop of fresh oil—it should absorb instantly.
Apply Fresh Oil with Surgical Precision

Over-oiling causes lint buildup and fabric stains; under-oiling creates immediate wear. Juki specifies exact amounts: DDL-8700 needs 8ml, HZL-LB5020 needs 2 drops. Exceeding limits by 10% doubles lint attraction.
Reservoir Fill Technique
Add oil slowly through your precision tip until it reaches the “MAX” line (visible as a metal ring inside industrial reservoirs). Stop immediately when oil beads at the top—DDL-8700s hold exactly 10ml. Home models need just 2-3 drops in the visible reservoir; excess leaks into the hook assembly.
Hook Race Direct Lubrication
Place one drop where the hook rotates against the race. Rotate the hand wheel 5 full turns clockwise to spread oil evenly. You should see a thin metallic sheen—not puddles. Industrial models need a second drop after rotation; home units rarely require more.
Strategic Joint Lubrication
Add single drops to visible pivot points like the presser bar lifter and feed dog linkage. Never oil plastic gears—Juki home models have nylon components that repel oil. Industrial units need a drop on the lower shaft visible through the side cover. Consult your manual for model-specific points—DDL-8700 requires oiling the oil pump drive gear.
Validate Oil Distribution Through Testing
Rushing reassembly without testing causes hidden issues like oil-starved hook races. Proper validation catches problems before they damage your first project.
Component Reinstallation Checklist
Reinsert the bobbin case at a 45-degree angle until it clicks. Replace the needle plate by aligning feed dog slots perfectly—misalignment causes timing errors. Hand-tighten screws only; over-tightening strips Juki’s soft metal threads. Insert a new needle—old needles compound oiling issues.
Dry Run Validation Process
Rotate the hand wheel toward you 30 times to circulate oil. Plug in and run at medium speed for exactly 2 minutes without fabric. Listen for a consistent “whirring” sound—grinding means missed oil points. Industrial models should reach 1,500 RPM smoothly.
Excess Oil Detection
Wipe the needle plate area with a microfiber cloth. Run scrap fabric through—any oil transfer means over-oiling. If stains appear, remove the bobbin case and blot the race with a dry swab. Repeat until fabric runs clean.
Implement Your Custom Oil Change Schedule
Most Juki failures happen because users oil based on calendar dates rather than actual usage. A home HZL used 2 hours weekly needs oiling less often than an industrial DDL running 4 hours daily.
Industrial Machine Oil Timelines
- Heavy use (8+ hours daily): Oil weekly—DDL-8700s in factories require it
- Moderate use (2-8 hours daily): Oil every 10 days
- Light use: Oil monthly—never exceed 30 days
Home Machine Oil Guidelines
- Frequent sewing: Oil after every 8 hours of actual sewing time
- Occasional projects: Oil quarterly regardless of use
- Before storage: Always oil before storing longer than 2 weeks
Critical Warning Signs
Act immediately if you hear grinding noises, see skipped stitches, or feel resistance when turning the hand wheel. These indicate metal-on-metal contact that causes irreversible damage within 20 minutes of sewing. Don’t wait for your next scheduled oil change—stop sewing now.
Fix Immediate Post-Oiling Issues Yourself
Most “broken” Jukis after oiling just need simple corrections. These fixes take 5 minutes versus a $150 service call.
Oil Not Circulating Fix
Run the machine for 5 minutes at low speed—this warms thick oil for better flow. If still dry, check for missed ports like the oil pump drive gear on DDL-8700s. Never add more oil—this causes flooding.
Excess Oil on Fabric Solution
Remove the bobbin case and press a dry paper towel against the hook race for 10 seconds. Run scrap fabric through until no stains appear. Reduce oil amounts by 25% next time.
Persistent Squeaking Remedy
Rotate the hand wheel backward 10 turns—this redistributes oil to neglected areas. If squeaking continues after 15 minutes of sewing, hardened sludge requires professional cleaning.
Bottom Leak Emergency Fix
Tighten the drain plug on industrial models with a quarter-turn clockwise. For home machines, wipe all excess oil and run empty for 10 minutes. Leaks usually stop once surplus oil burns off.
Fresh oil transforms your Juki from a frustrating liability into a precision instrument. Mark your next oil change date directly on your machine’s base using a grease pencil—never rely on memory. Store oil bottles upright in a cool, dark place and replace them annually since exposure degrades lubricity. Within 24 hours of proper oiling, you’ll notice smoother fabric feeding, quieter operation, and stitches so consistent they look professionally finished. This simple maintenance ritual costs less than $5 but extends your machine’s life by 15+ years. Your Juki was built to last generations—treat it right, and it will sew flawless seams long after you’ve upgraded your other tools.


