
Your Brother sewing machine pedal suddenly stopped responding, leaving you mid-project with fabric bunched under the needle. This frustrating scenario happens more often than you’d think, but most pedal problems have straightforward solutions you can tackle at home. Whether your pedal feels completely dead, responds intermittently, or only works at full speed, this guide walks you through proven diagnostic steps and repairs to get you sewing again today.
Ignoring pedal issues can damage your machine’s motor or create dangerous sewing conditions. The good news is that 80% of Brother sewing machine pedal not working problems stem from simple connection issues or dirty components rather than internal failures. With basic tools and this step-by-step guide, you’ll identify and fix the problem faster than scheduling a service appointment.
Diagnose Your Specific Pedal Failure

Complete Power Loss: No Response When Pressed
When your Brother sewing machine pedal not working shows zero response, the machine won’t start regardless of how hard you press. This typically indicates electrical disconnection rather than mechanical failure. Check for loose connections first, as this symptom often stems from simple plug issues rather than pedal damage. Before disassembling anything, ensure both ends of the pedal cord are fully seated in their respective ports on the machine and wall outlet.
Intermittent Response: Starts and Stops Unexpectedly
Pedals that work sporadically usually suffer from internal wiring problems or dirty contact points. You might notice the machine starts and stops unexpectedly, or only responds when you press at specific angles. These issues worsen over time without intervention, potentially leading to complete failure. Pay attention to when the problem occurs—does it happen more when you move the pedal cord in certain ways? This can help pinpoint where the break exists.
Full-Speed Only Operation: Dangerous Uncontrolled Sewing
If your machine runs only at maximum speed regardless of pedal pressure, the variable speed control mechanism has failed. This creates dangerous sewing conditions and requires immediate attention before further use. Never attempt to sew with a pedal stuck at full speed, as you’ll have no control over stitch formation and risk damaging both your project and machine components.
Essential Tools for Pedal Diagnosis

Basic Testing Equipment You Already Own
Gather these items before starting repairs: multimeter for electrical testing, small Phillips head screwdriver, needle-nose pliers, electrical contact cleaner, and a flashlight. These basic tools handle 90% of pedal repairs without specialized equipment. Most home workshops already have these items, so you won’t need to make a special trip to the store before beginning your diagnosis.
Critical Safety Preparation Steps
Unplug your sewing machine completely and disconnect the pedal from both machine and wall outlet. Allow any capacitors to discharge for 5 minutes before handling internal components. Work on a clean, well-lit surface with plenty of room to organize small parts. Never attempt electrical testing while the machine remains connected to power—that’s a serious shock hazard you can easily avoid.
Quick Visual Inspection Guide
Power Cord Examination: Find Hidden Damage
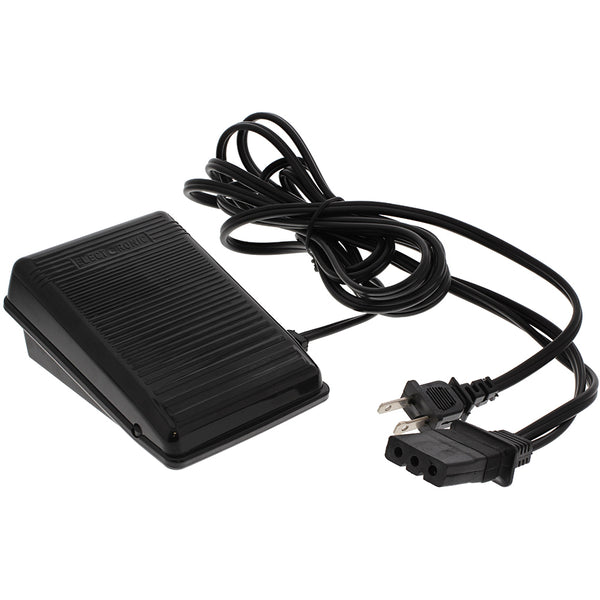
Start by examining the entire pedal cord length for visible damage. Look for cuts, severe kinks, or melted spots that indicate electrical shorts. Pay special attention to where the cord enters the pedal housing, as this high-stress point frequently develops internal breaks that aren’t immediately visible. Gently flex the cord while it’s connected to see if you can reproduce intermittent operation, which helps locate the problem area.
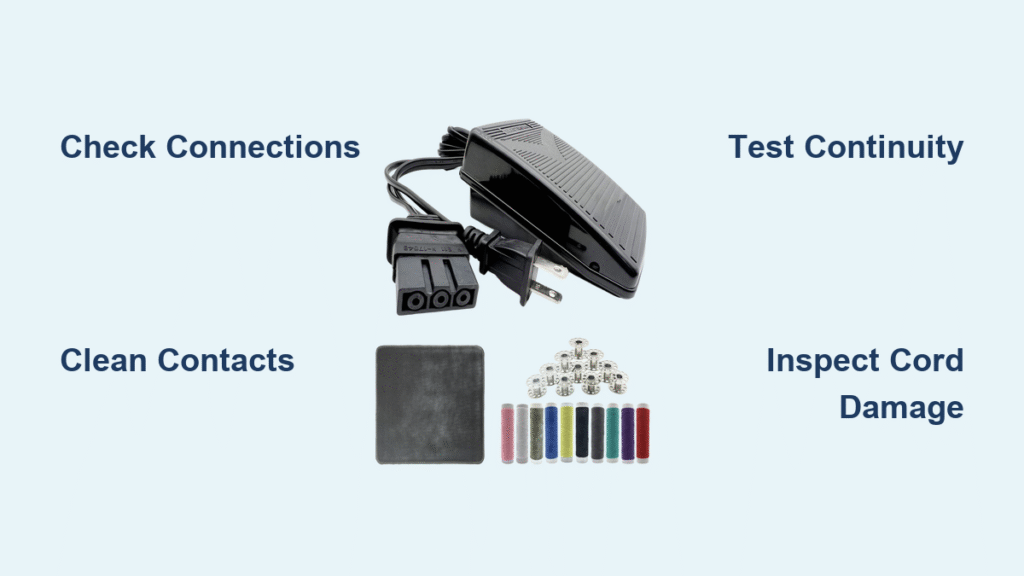
Connection Point Check: The Most Common Fix
Inspect both the machine-side and pedal-side connections for bent pins, corrosion, or debris. Brother machines typically use either 2-prong or 3-prong connectors depending on model year. Clean any visible dirt or oxidation with electrical contact cleaner and a lint-free cloth. Many “broken” pedals simply need their connection points cleaned—this takes less than two minutes and solves the problem in nearly 30% of cases where Brother sewing machine pedal not working issues occur.
Pedal Housing Inspection: What Lies Beneath
Remove the pedal’s bottom cover using your screwdriver. Look for loose wires, burnt components, or accumulated dust that might interfere with electrical contacts. Take photos before disassembly to aid reassembly later. Most Brother pedal housings have four to six screws that are easily accessible once you turn the pedal upside down. Don’t force any components—you should be able to separate the housing with gentle pressure after removing all visible screws.
Step-by-Step Electrical Testing
Continuity Test Procedure: Find Wire Breaks
Set your multimeter to continuity mode and test between the plug prongs and the internal pedal connections. A continuous beep indicates good wiring, while no sound suggests a break. Test both the live and neutral wires separately, wiggling the cord during testing to identify intermittent breaks. This simple test takes less than five minutes and immediately tells you whether your problem is a broken wire or something more complex.
Variable Resistance Check: Test Speed Control
With the pedal reassembled but still open, test the resistance across the speed control terminals while slowly pressing the pedal. Resistance should change smoothly from infinite (no connection) to near-zero (full speed). Jerky or non-existent changes indicate potentiometer failure. This test confirms whether the speed control mechanism is functioning properly and helps determine if you need to clean or replace internal components.
Fix Common Connection Issues
Re-terminate Wires: Fix Broken Cord Sections
Cut back damaged cord sections using wire strippers, exposing 1/4 inch of fresh wire. Reconnect using wire nuts or crimp connectors, ensuring tight mechanical connections. Wrap each connection individually with electrical tape before reassembling the pedal housing. This repair takes about 15 minutes and costs virtually nothing compared to replacing the entire pedal assembly.
Secure Strain Relief: Prevent Future Failures
Install new strain relief where the cord enters the pedal if the original is damaged. This prevents future wire breakage from repeated flexing. Many hardware stores carry universal strain relief bushings that fit Brother pedal housings. Proper strain relief absorbs the tension from normal pedal movement, protecting the delicate internal wires from breaking at the connection point.
Clean Internal Components
Contact Cleaning Process: Fix Intermittent Operation
Spray electrical contact cleaner directly onto the carbon contacts and copper traces inside the pedal. Work the pedal through its full range 10-15 times to distribute the cleaner. Wipe away residue with lint-free cloth and allow 10 minutes for complete drying. This simple cleaning procedure resolves most intermittent operation issues and takes less than 20 minutes to complete.
Dust Removal Techniques: Clear Obstructions
Use compressed air to blow out accumulated dust from the pedal mechanism. Pay attention to the variable resistor area where dust causes erratic operation. For stubborn debris, use a soft brush dipped in rubbing alcohol, avoiding over-wetting any components. Regular dust removal prevents many common pedal failures and keeps your sewing machine running smoothly.
Prevent Future Pedal Problems
Proper Storage Methods: Extend Pedal Life
Store pedals by loosely coiling the cord in 8-inch loops, avoiding tight kinks that stress internal wires. Hang the pedal rather than letting it sit on the floor where dust accumulates. Keep away from direct sunlight and heat sources that degrade plastic components. Proper storage adds years to your pedal’s lifespan and prevents many common failure modes.
Regular Maintenance Schedule: Stay Ahead of Problems
Clean pedal contacts every 6 months using contact cleaner. Inspect cord condition quarterly, especially near stress points. Replace the entire pedal assembly every 5-7 years under heavy use, as internal components gradually wear out. Scheduled maintenance prevents 90% of unexpected pedal failures, keeping your sewing projects on track.
When to Seek Professional Help
Complex Electronic Failures: Know Your Limits
If your pedal contains electronic speed control circuits rather than simple mechanical contacts, professional repair becomes necessary. These sealed units rarely offer serviceable components and require specialized testing equipment. Don’t waste hours trying to fix what can’t be repaired—recognize when it’s time to consult a professional technician.
Warranty Considerations: Protect Your Investment
Check your Brother warranty status before attempting repairs. Most new machines include 25-year limited warranties covering pedal defects. Unauthorized repairs void remaining warranty coverage, making professional service the wiser choice for newer machines. Always verify warranty terms before opening any sealed components.
Quick Reference Troubleshooting
Symptom: Pedal feels hot
Likely Cause: Internal short circuit
Action: Unplug immediately and inspect for melted insulation or burnt components
Symptom: Pedal works only at certain angles
Likely Cause: Broken internal wire
Action: Test continuity while flexing the cord to locate the break
Symptom: Machine runs when pedal is plugged in, regardless of pressure
Likely Cause: Shorted internal switch
Action: Replace the pedal assembly or internal switch mechanism
Your Brother pedal should now respond smoothly to pressure, giving you precise speed control for all your sewing projects. Test the repair thoroughly on scrap fabric before tackling important work. Keep this guide handy for future reference, as pedal issues can reappear after several years of service. Regular maintenance prevents most problems, ensuring your Brother sewing machine remains ready whenever inspiration strikes.


