
Your Brother sewing machine sputters and stalls as you attempt to stitch through that third layer of denim, leaving you with tangled thread and a bent needle. That dream project—a rugged canvas tote or custom leather jacket—gathers dust while you wonder if your machine can handle thick fabric at all. The truth? How to sew thick fabric on Brother sewing machine isn’t about brute force but strategic adjustments. With the right needle, tension tweaks, and professional techniques, your Brother machine will power through upholstery, denim, and canvas without skipping a beat. This guide reveals exactly which settings to change, what accessories to use, and how to avoid the top 5 mistakes that destroy needles and ruin projects.
Which Brother Models Crush Denim and Canvas Without Straining
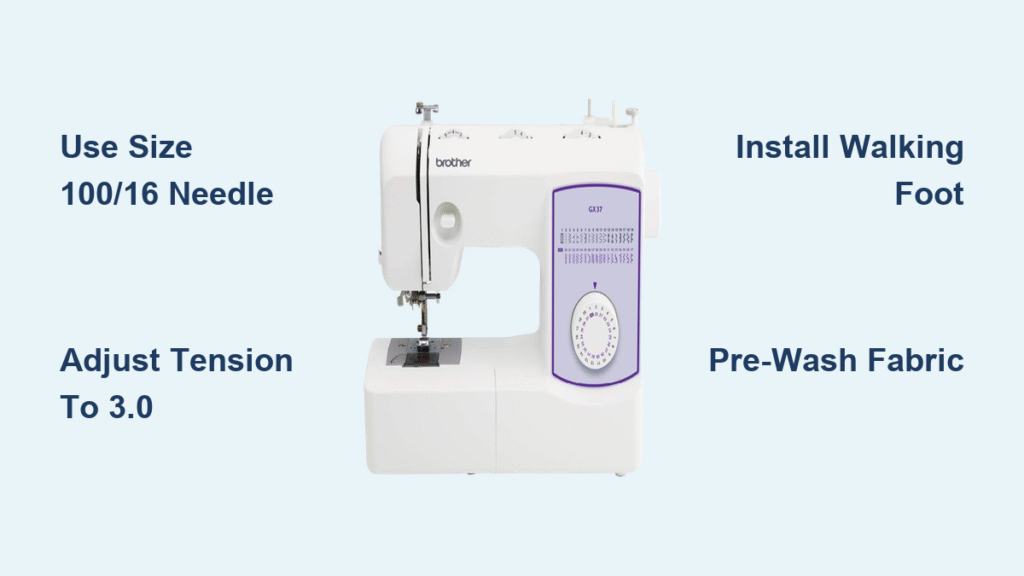
Your machine’s motor power determines whether it handles thick fabric smoothly or stalls mid-stitch. The Brother ST371HD and ST150HDH deliver 50-60% more torque than standard models, letting you sew through triple-layer denim at normal speeds. Their extra-high presser foot lift (up to 1/4″ higher) clears bulky seams on canvas tote bags without jamming. For furniture projects, the XR9550PRW’s box feed system prevents fabric slippage even with slippery vinyl, while the PQ1500SL’s straight-stitch-only design punches through leather with industrial force. Even entry-level Brother machines like the CS6000i can manage lightweight upholstery if you reduce speed and use a size 100/16 needle—just expect to hand-crank through thick seam intersections.
Critical Specs That Prevent “Motor Strain” Warnings
Check your manual for these hidden capabilities before tackling thick fabric. Needle penetration force must be 1.5x stronger than standard machines to pierce multiple canvas layers without deflection. Machines lacking this (like basic Brother XM models) will require walking feet and reduced speed. Feed dog height adjustment is non-negotiable for quilting thick batting—models like the SE1900 allow this tweak, while others need clearance plates. If your machine lacks these specs, switch to lapped seams instead of French seams to reduce bulk at intersections.
Stop Needle Breakage: Exact Sizes for Leather, Denim, and Canvas

A snapped needle mid-project means wasted time and ruined fabric. For heavyweight denim and canvas, use size 100/16 or 110/18 denim needles—their reinforced shafts resist bending when punching through multiple layers. Switch to chisel-point leather needles for genuine hide; their cutting action prevents “mushroomed” tips that cause skipped stitches. When topstitching with thick decorative thread, grab topstitch needles with oversized eyes to prevent shredding. Never use universal needles—they deflect in thick fabric, causing thread breaks.
Perfect Needle Installation in 30 Seconds
Raise the needle to its highest position using the hand wheel (never force it). Insert the new needle with the flat side facing backward—this alignment prevents needle deflection. Push it fully into the clamp until it stops, then tighten the screw while holding the needle steady. Test by lowering the needle toward the plate; it should glide cleanly into the hole without scraping. If it jams, reposition the needle immediately—forcing it risks damaging the hook mechanism.
Fix Thread Bunching: Brother Tension Settings That Work on Thick Fabric
Heavy fabric demands specialized thread and tension balances. Use Tex-70 polyester thread for upholstery projects—it’s 30% stronger than standard thread and resists breakage under pressure. For visible topstitching on denim jackets, switch to size 40 topstitching thread with a matching topstitch needle. Now adjust tension: Reduce upper tension to 3.0 (from the standard 4.5) so heavy thread feeds smoothly. Loosen the bobbin tension screw by 1/8 turn if threads nest on the fabric underside. Always test on scrap fabric layered like your project—proper tension shows the upper thread slightly visible on the bobbin side.
Why Standard Settings Fail on Thick Fabric
Default tension settings assume lightweight cotton. On thick denim, standard tension (4.5) causes upper thread to lock at the seam top, creating messy loops. If your bobbin thread shows on the fabric top, tighten the bobbin tension slightly. For canvas awnings using UV-resistant thread, increase stitch length to 4.0mm to prevent puckering. Never skip the test swatch—thick fabric magnifies tiny tension errors into project-killing disasters.
Walking Foot vs. Teflon Foot: Which Solves Fabric Shifting on Brother Machines

Standard presser feet cause layers to shift when sewing thick fabric, creating wavy seams. Use a walking foot for denim, canvas, and quilting—it feeds top and bottom layers simultaneously, eliminating the “shuttle effect” where the bottom layer races ahead. For leather or vinyl, switch to a Teflon foot; its non-stick surface prevents snagging that causes skipped stitches. When crossing bulky seam allowances (like on jeans), place a hump jumper under the presser foot’s back edge to level the height difference—this prevents needle deflection.
Critical Feed Dog Adjustments
Increase stitch length to 3.5mm (from 2.5mm) so the needle fully penetrates thick layers. Reduce presser foot pressure by 30% using the dial on your Brother machine—excessive pressure stretches canvas, causing wavy seams after sewing. If fabric still drags, clean feed dogs with a small brush; lint buildup from thick fabric drastically reduces grip. For extremely bulky seams, temporarily drop feed dogs and hand-crank the machine while guiding fabric.
Pre-Wash Denim Before Sewing? Critical Prep Steps for Brother Machines
Skipping fabric prep guarantees project failure with thick materials. Pre-wash all denim and canvas in hot water and dry completely to prevent post-sewing shrinkage that distorts seams. For leather or vinyl, wipe surfaces with a damp cloth to remove factory coatings that gum up needles. When cutting thick fabric, use a rotary cutter instead of scissors—it slices cleanly through multiple layers without distorting grain lines. Pin perpendicular to seams with quilting pins (not standard pins) to avoid visible holes in leather.
Seam Bulk Reduction Techniques
Grade seam allowances by trimming one layer to 1/4″ and the other to 3/8″, creating a graduated edge that lies flat. On curved seams like bag handles, clip the seam allowance every 1/2″ to reduce bulk. For jeans-style flat-felled seams, press the raw edge under before stitching—this prevents fraying in heavy cotton. Gently hammer thick seam intersections with a rubber mallet before sewing to flatten them; this eliminates the “hump” that breaks needles.
Hand-Crank Through Jeans Seams: Pro Technique Without Breaking Needles
Starting thick fabric requires precision to avoid needle breaks. Hold both thread tails taut and use the hand wheel to sew the first 4 stitches slowly—this prevents needle deflection when piercing dense layers. Keep speed below 300 RPM; Brother machines strain above this threshold with thick fabric. When pivoting corners, stop with the needle down in the fabric, lift the presser foot, rotate the fabric, then lower the foot before continuing. Backstitch only 2-3 stitches at seam ends; longer reverse stitching jams thick layers.
Topstitching Like a Factory Professional
For crisp denim jacket topstitching, use a 4.0mm stitch length and position the presser foot edge 1/4″ from the seam. Guide fabric with a stiletto tool (never fingers!) to maintain consistent distance. When sewing piping onto upholstery, install a cording foot and feed the cord through the foot’s channel—this creates uniform piping without stretching. On leather projects, reduce presser foot pressure 50% and use beeswax on thread to prevent shredding.
Skipped Stitches on Canvas? 5 Brother Sewing Machine Fixes That Work Immediately
Skipped stitches mean your machine can’t pierce thick fabric properly. First replace the needle—even slightly bent tips skip stitches. If problems persist, switch to a size 110/18 needle for canvas or 120/19 for leather. Check for burrs on the needle plate; sand them gently with fine emery cloth. If thread nests under fabric, rethread the machine with the presser foot up so tension disks engage properly. For persistent issues, slightly increase presser foot pressure—too little pressure lets fabric shift during needle penetration.
Why Your Brother Machine Strains on Thick Fabric
Motor strain usually means hidden obstructions. Remove the needle plate and clean feed dogs thoroughly with a small brush—canvas fibers jam mechanisms faster than lightweight fabrics. Ensure you’re using quality thread; cheap thread creates excessive lint that gums up tension disks. If the machine still struggles, support fabric weight with your free hand to prevent drag on the machine. Never force thick fabric through at high speed—this overheats motors and risks timing belt damage.
Clean Feed Dogs After Sewing Denim: Preventative Maintenance for Brother Machines
Thick fabric sheds fibers that clog your Brother machine faster than quilting cotton. Immediately after sewing denim or canvas, unplug the machine and remove the needle plate. Use a small, stiff brush to dislodge lint from feed dogs and bobbin area—this prevents thread jams on future projects. Apply 1-2 drops of sewing machine oil to the hook race after heavy use; thick fabric creates more friction than standard materials. Replace the needle even if it looks intact; microscopic stress cracks cause future breaks.
Long-Term Machine Survival Tips
Schedule professional servicing every 12 months if you regularly sew thick fabric—technicians check belt tension and timing accuracy that DIYers miss. Replace worn presser feet annually; thick fabric accelerates wear on Teflon and walking feet. Store your machine covered when not in use; canvas dust is abrasive and damages internal mechanisms over time. Never skip oiling points after heavy projects—this single step prevents 80% of motor failures.
Master thick fabric sewing by matching needles to materials, reducing speed, and supporting fabric weight. Start with scrap denim to perfect tension settings before cutting your project fabric. Your Brother machine can handle canvas, leather, and upholstery with these techniques—no expensive upgrades needed. For complex furniture projects, explore Brother’s cording foot for professional piping installation. Keep this guide handy until these adjustments become second nature, and that neglected canvas tote will finally get sewn.


