

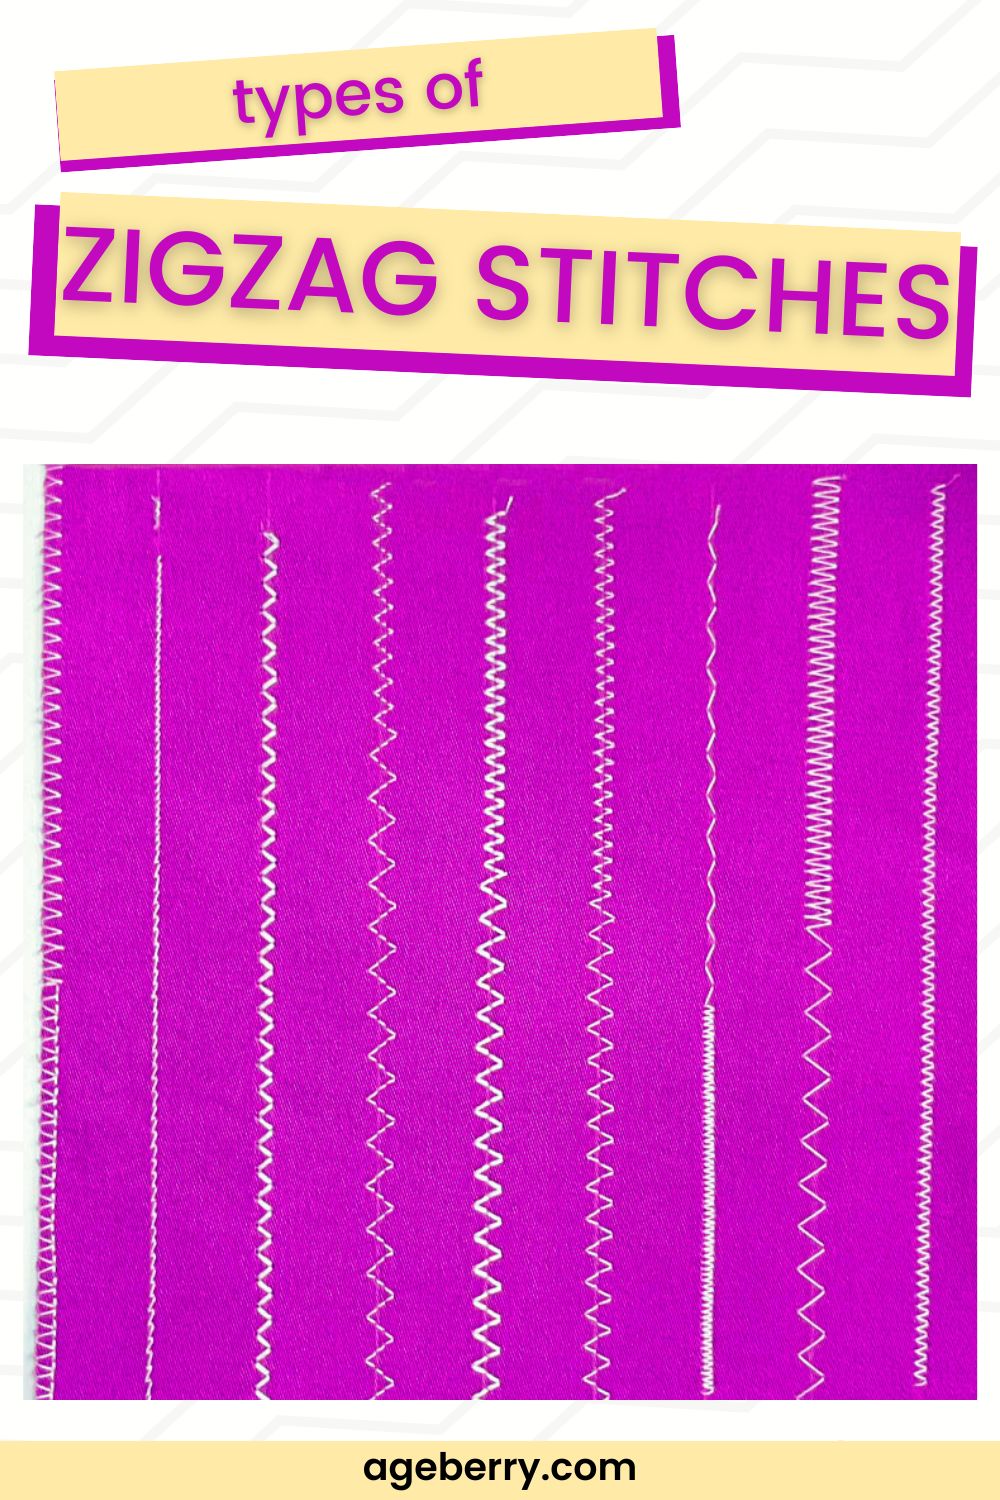
That perfect zigzag edge on your stretch t-shirt or the satin-stitched appliqué on your quilt? Brother sewing machines make it effortless once you know the secrets. Whether you’re finishing seams or creating decorative borders, this guide transforms your machine from basic straight-stitch to zigzag powerhouse in minutes. Stop wrestling with skipped stitches and uneven patterns—learn exactly how to do zigzag stitch on Brother sewing machine models correctly for professional results every time.
Find Your Brother Machine’s Zigzag Controls Instantly
Mechanical vs. Computerized Model Settings
On mechanical Brother models like the LS-2125, turn the stitch selector dial to positions 2-4 where you’ll find basic zigzag patterns. Computerized models such as the SE600 require navigating through the LCD menu—press “Stitch,” select “Utility,” then choose the zigzag icon. Don’t waste time searching; mechanical units have physical dials while computerized versions use digital interfaces with +/- adjustment buttons.
Width and Length Dial Locations
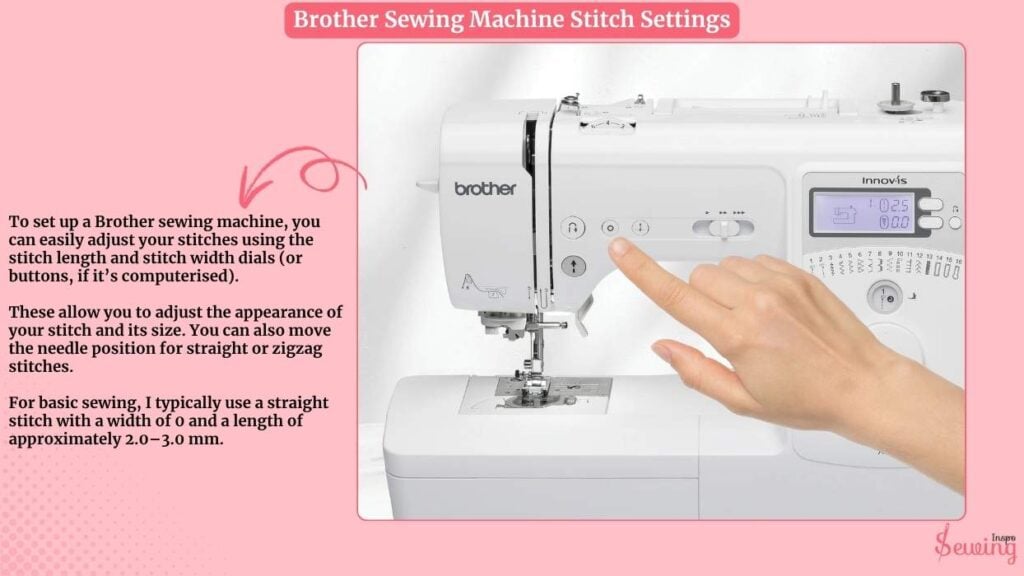
Mechanical Brothers position width and length controls prominently on the front panel—turn the width dial between 0-5mm to control needle swing distance. Computerized models like the XR9550PRW display these settings on-screen after selecting your zigzag pattern. Remember this critical distinction: width determines how far your needle moves side-to-side, while length controls stitch density. Most garment construction requires 3-4mm width with 2.0-2.5 length.
Quick Reference for Popular Brother Models
- LS/XR series: Turn dial to stitch 2 or 3, adjust width/length dials
- CS/SE series: Press “Utility” → select zigzag icon → use +/- buttons
- DreamWeaver models: Touch screen shows real-time width/length preview
- PE series: Navigate to decorative stitches menu for specialty zigzags
Thread Your Brother Machine for Flawless Zigzag Every Time
Correct Upper Threading Sequence
Raise your presser foot before threading—this opens tension discs properly. Follow the numbered threading guides on your machine in exact sequence. Missing guide #3 causes tension disasters specifically during zigzag stitching because the thread doesn’t seat correctly in the tension discs. Pull thread through last guide with gentle tension—no slack allowed.
Bobbin Setup That Prevents Bird’s Nests
Wind your bobbin with thread matching your project fabric. Insert into the bobbin case with thread unwinding counter-clockwise (opposite direction from straight stitch). Draw thread through the tension slot until you hear the distinct “click”—this critical step prevents thread jams when executing wide zigzag stitches. Always test bobbin tension by holding the thread end; the bobbin should drop slightly but not fall freely.
Needle Selection for Specific Fabrics
Use universal 80/12 needles for most zigzag applications on Brother machines. Switch to ballpoint 90/14 needles when sewing stretch fabrics to prevent skipped stitches. For dense satin zigzag (appliqué work), upgrade to 90/14 metallic needles that handle heavier decorative threads. Always insert needles with the flat side facing backward and tighten securely—loose needles cause zigzag timing issues.
Execute Perfect Zigzag Stitches in 5 Simple Steps
Test Stitching Protocol You Must Follow
Grab scrap fabric identical to your project before starting. Set width to 3mm and length to 2.0, then stitch 6 inches. Check both fabric sides—top thread should lie flat while bottom shows smooth loops. If you see tension issues, adjust in 0.5 increments: increase tension for loose bottom threads, decrease for puckered top threads. Never skip this test—zigzag requires different tension than straight stitch.
Edge Finishing Technique for Professional Results
Align your fabric edge with the right side of the presser foot, allowing the zigzag to wrap 1/16″ over the raw edge. Lower the needle using the hand wheel for the first stitch to ensure proper penetration. If the zigzag doesn’t fully cover the edge, increase width; if it extends too far, decrease width or shift fabric left. This precise alignment prevents fraying while maintaining seam strength.
Corner Pivoting Without Thread Snarls
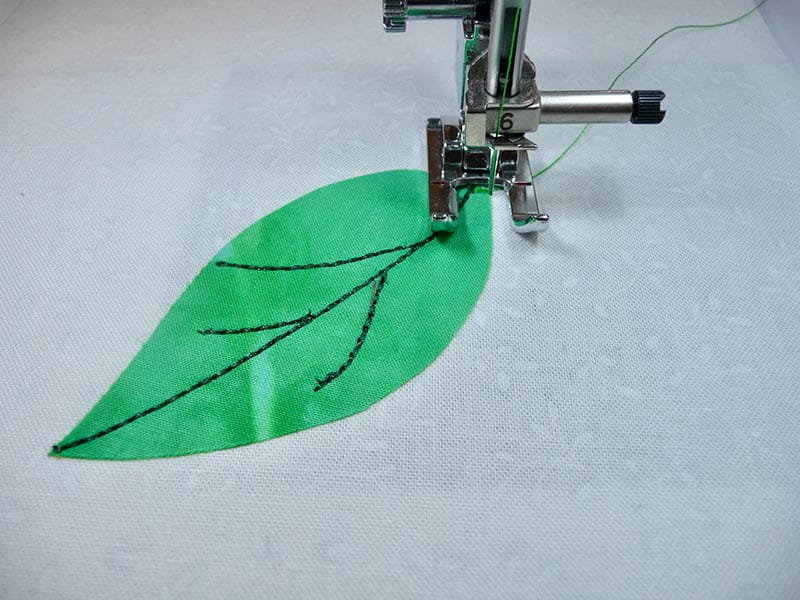
Stop stitching with the needle down in the right swing position at corners. Lift the presser foot while keeping the needle embedded, pivot your fabric 90 degrees, then lower the foot to continue. This technique creates crisp corners on appliqué work without backstitching. For tight curves, take one stitch at a time with frequent needle-down pivots—rushing causes thread tangles and uneven zigzag patterns.
Solve Brother Zigzag Stitch Problems Immediately
Skipped Stitches Emergency Fix
Replace your needle immediately—dull needles skip during zigzag’s side-to-side motion. Verify proper insertion with the flat side facing backward. For heavy decorative threads, switch to size 90/14 metallic needles. If skipping continues, remove the bobbin case and clean lint buildup around the hook race with a small brush. Warning: Never force fabric through—this bends needles and worsens skipped stitches.
Uneven Zigzag Pattern Correction
Adjust presser foot pressure first—zigzag requires different pressure than straight stitch. Increase pressure for heavy fabrics, decrease for lightweight materials. Ensure feed dogs are properly engaged (not lowered for free-motion). Test on scrap fabric while guiding gently—pulling fabric causes uneven zigzag. If issues persist, check for bent needles or burrs on the needle plate that disrupt smooth needle movement.
Fabric Puckering Elimination
For knits, use ballpoint needles and reduce presser foot pressure to prevent stretching. Add lightweight tear-away stabilizer underneath when executing dense satin zigzag on lightweight wovens. Decrease stitch length to 1.5-2.0 for standard zigzag to reduce puckering. Let feed dogs move the fabric naturally—never pull or push as this distorts zigzag patterns on Brother machines.
Advanced Brother Zigzag Techniques Worth Mastering
Satin Stitch Appliqué Like a Pro
Set stitch length to 0.5-1.0 for dense satin zigzag. Place tear-away stabilizer underneath your fabric. Start slowly—dense stitches build up heat quickly. Use metallic thread with 90/14 needles and reduce machine speed by 50%. Practice curves on scrap first; stop with needle down at curve points, lift presser foot, rotate fabric slightly, then continue. This prevents thread breaks and maintains consistent zigzag density.
Perfect Elastic Attachment Method
Mark elastic and fabric quarters with pins. Set zigzag to 3mm width and 2.5 length. Pin elastic to fabric at quarter points. Stretch elastic slightly while stitching, keeping fabric flat underneath. The zigzag motion accommodates stretch without breaking threads. Release tension after stitching for smooth gathers—no additional gathering stitches required with this Brother zigzag technique.
Decorative Thread Effects That Impress
Try variegated thread for rainbow zigzag effects on borders. Use water-soluble stabilizer for freestanding lace zigzag projects. For holiday sparkle, switch to metallic thread with reduced tension (2.5-3.0) and slower speed. Pro tip: When using specialty threads, wind an extra bobbin with matching color— Brother machines perform best with balanced top and bottom threads during decorative zigzag work.
Brother Model-Specific Zigzag Settings Cheat Sheet
LS-2125 Mechanical Model
Set stitch selector to “3”, width dial between 3-5, and length dial to 2-2.5 for standard zigzag. Reduce length to 0.5 for satin stitch appliqué. These mechanical models require manual adjustments but deliver reliable zigzag performance when properly set.
SE600 Computerized Model
Press “Stitch” → “Utility” → select zigzag icon. Adjust width using +/- buttons (3-5 recommended), then set length with sliding scale. Save custom settings by pressing “M” for future projects—this eliminates repeated setup for your favorite Brother zigzag applications.
XR9550PRW Advanced Model
Navigate LCD menu: Press “Stitch” → “Decorative” → zigzag. Use arrow keys to fine-tune width/length. Press “M” to save settings—this model remembers up to 10 custom zigzag configurations. The automatic tension adjustment works well for most zigzag applications but requires manual override for metallic threads.
Essential Post-Zigzag Maintenance for Brother Machines
Feed Dog Cleaning Procedure
Zigzag stitching pushes more lint into feed dogs than straight stitch. After completing zigzag projects, remove the throat plate (typically 2 screws), then use a small brush to clean between feed dog teeth. Never use compressed air—it redistributes lint deeper into mechanisms. Proper cleaning prevents uneven zigzag feeding on future projects.
Reset Protocol Before Storage
Always return your Brother machine to straight stitch settings before powering off. This prevents accidental wide zigzag on your next project, which could damage delicate fabrics. Cover your machine immediately after use—dust accumulation affects zigzag timing more than straight stitch due to wider needle movement.
Service Indicators You Can’t Ignore
Schedule professional cleaning after extensive decorative zigzag work. If you notice persistent uneven zigzag, tension fluctuations, or skipped stitches despite needle replacement, seek service immediately. Annual maintenance prevents costly timing belt adjustments caused by thread lint buildup from zigzag stitching.
Ready to transform your Brother sewing projects? Start with scrap fabric matching your project weight—master these zigzag settings once, and every Brother machine project from stretch seams to decorative appliqué becomes effortless. Your zigzag stitch expertise begins with proper setup, precise technique, and model-specific knowledge. No more second-guessing—your Brother machine is now a zigzag expert.


