
Your Brother sewing machine’s tension issues are probably driving you crazy right now—those frustrating loops on the underside of your fabric, the top thread snapping mid-project, or that puckered seam ruining what should have been a beautiful finish. These tension problems affect 9 out of 10 sewers at some point, but here’s the good news: Brother machines have intuitive tension systems that, once mastered, will transform your stitching from frustrating to flawless.
In this guide, you’ll discover exactly how to diagnose tension problems, locate your specific Brother model’s tension controls, and make precise adjustments that work with your fabric and thread—not against them. Whether you’re sewing delicate lingerie or heavy upholstery, understanding tension settings will save you hours of frustration and transform your sewing results from amateur to professional.
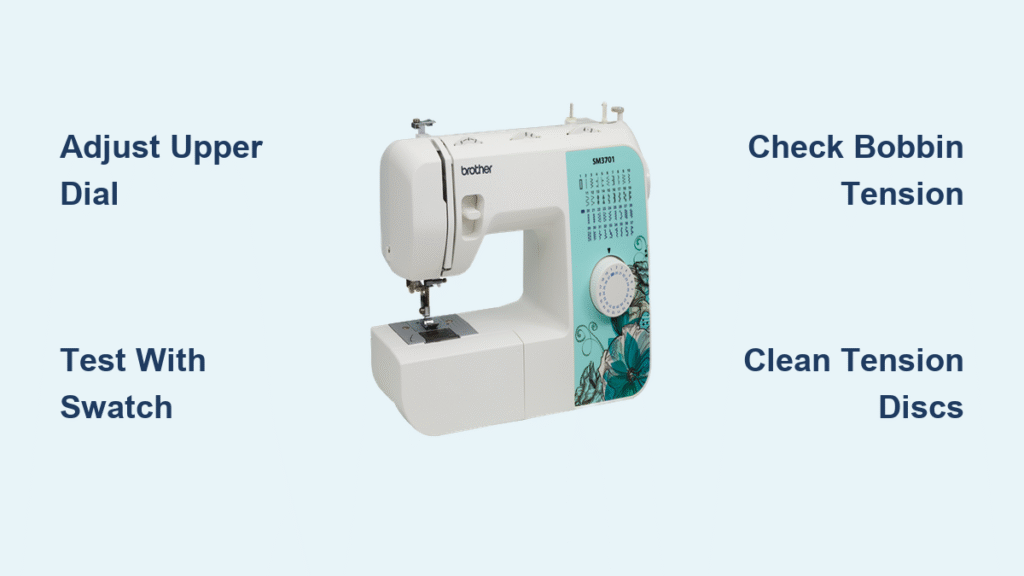
Locate Your Brother Machine’s Tension Controls
Find the Upper Tension Dial on Your Model
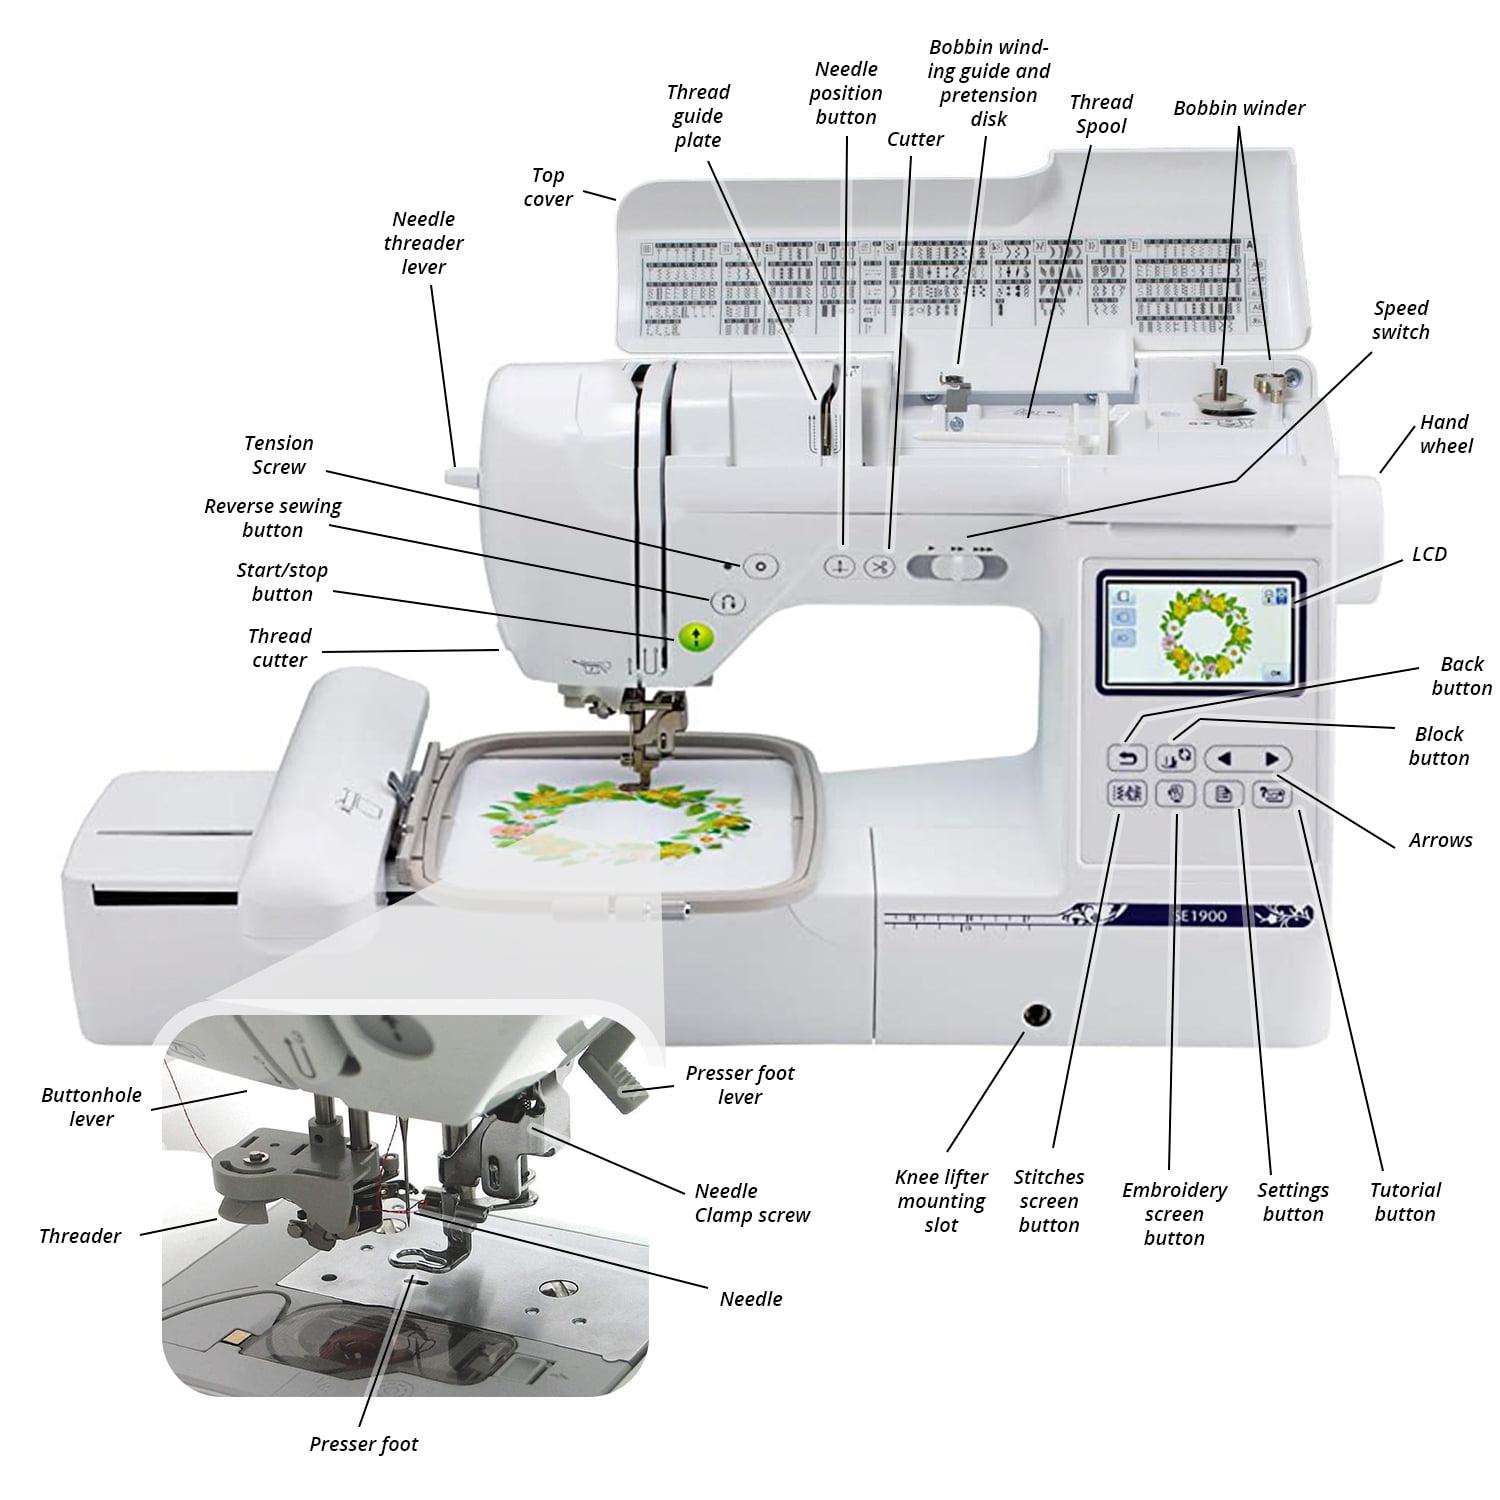
Your Brother sewing machine’s primary tension control appears as a numbered dial on the front panel, typically positioned above the needle assembly. Look for markings ranging from 0-9 or 0-10, with the sweet spot for most fabrics sitting between 4 and 5. This dial regulates how tightly the tension discs grip your upper thread as it flows toward the needle. On computerized Brother models like the SE1900 or CS6000i, you’ll find digital tension controls on the touchscreen interface instead of a physical dial.
Identify Bobbin Tension Access Points
While most tension adjustments happen with the upper dial, your bobbin case contains a tiny screw that controls lower thread tension. For front-loading Brother machines (common on models like the Project Runway series), remove the bobbin case from its compartment to reveal the tension screw near the spring mechanism. Top-loading models require removing the bobbin case from above. Remember: clockwise turns tighten bobbin tension, while counterclockwise loosens it—these adjustments require extreme precision.
Check Model-Specific Tension Indicators
Newer Brother machines feature helpful tension guides you shouldn’t ignore. Many display tension numbers through a small window that aligns with markers on the dial. Higher-end models like the Dream Machine series show real-time tension readings on their LCD screens. Some even include fabric-specific tension recommendations printed directly on the machine body near the tension control. These visual cues prevent guesswork when returning to previous successful settings.
Test Your Current Tension Before Adjusting
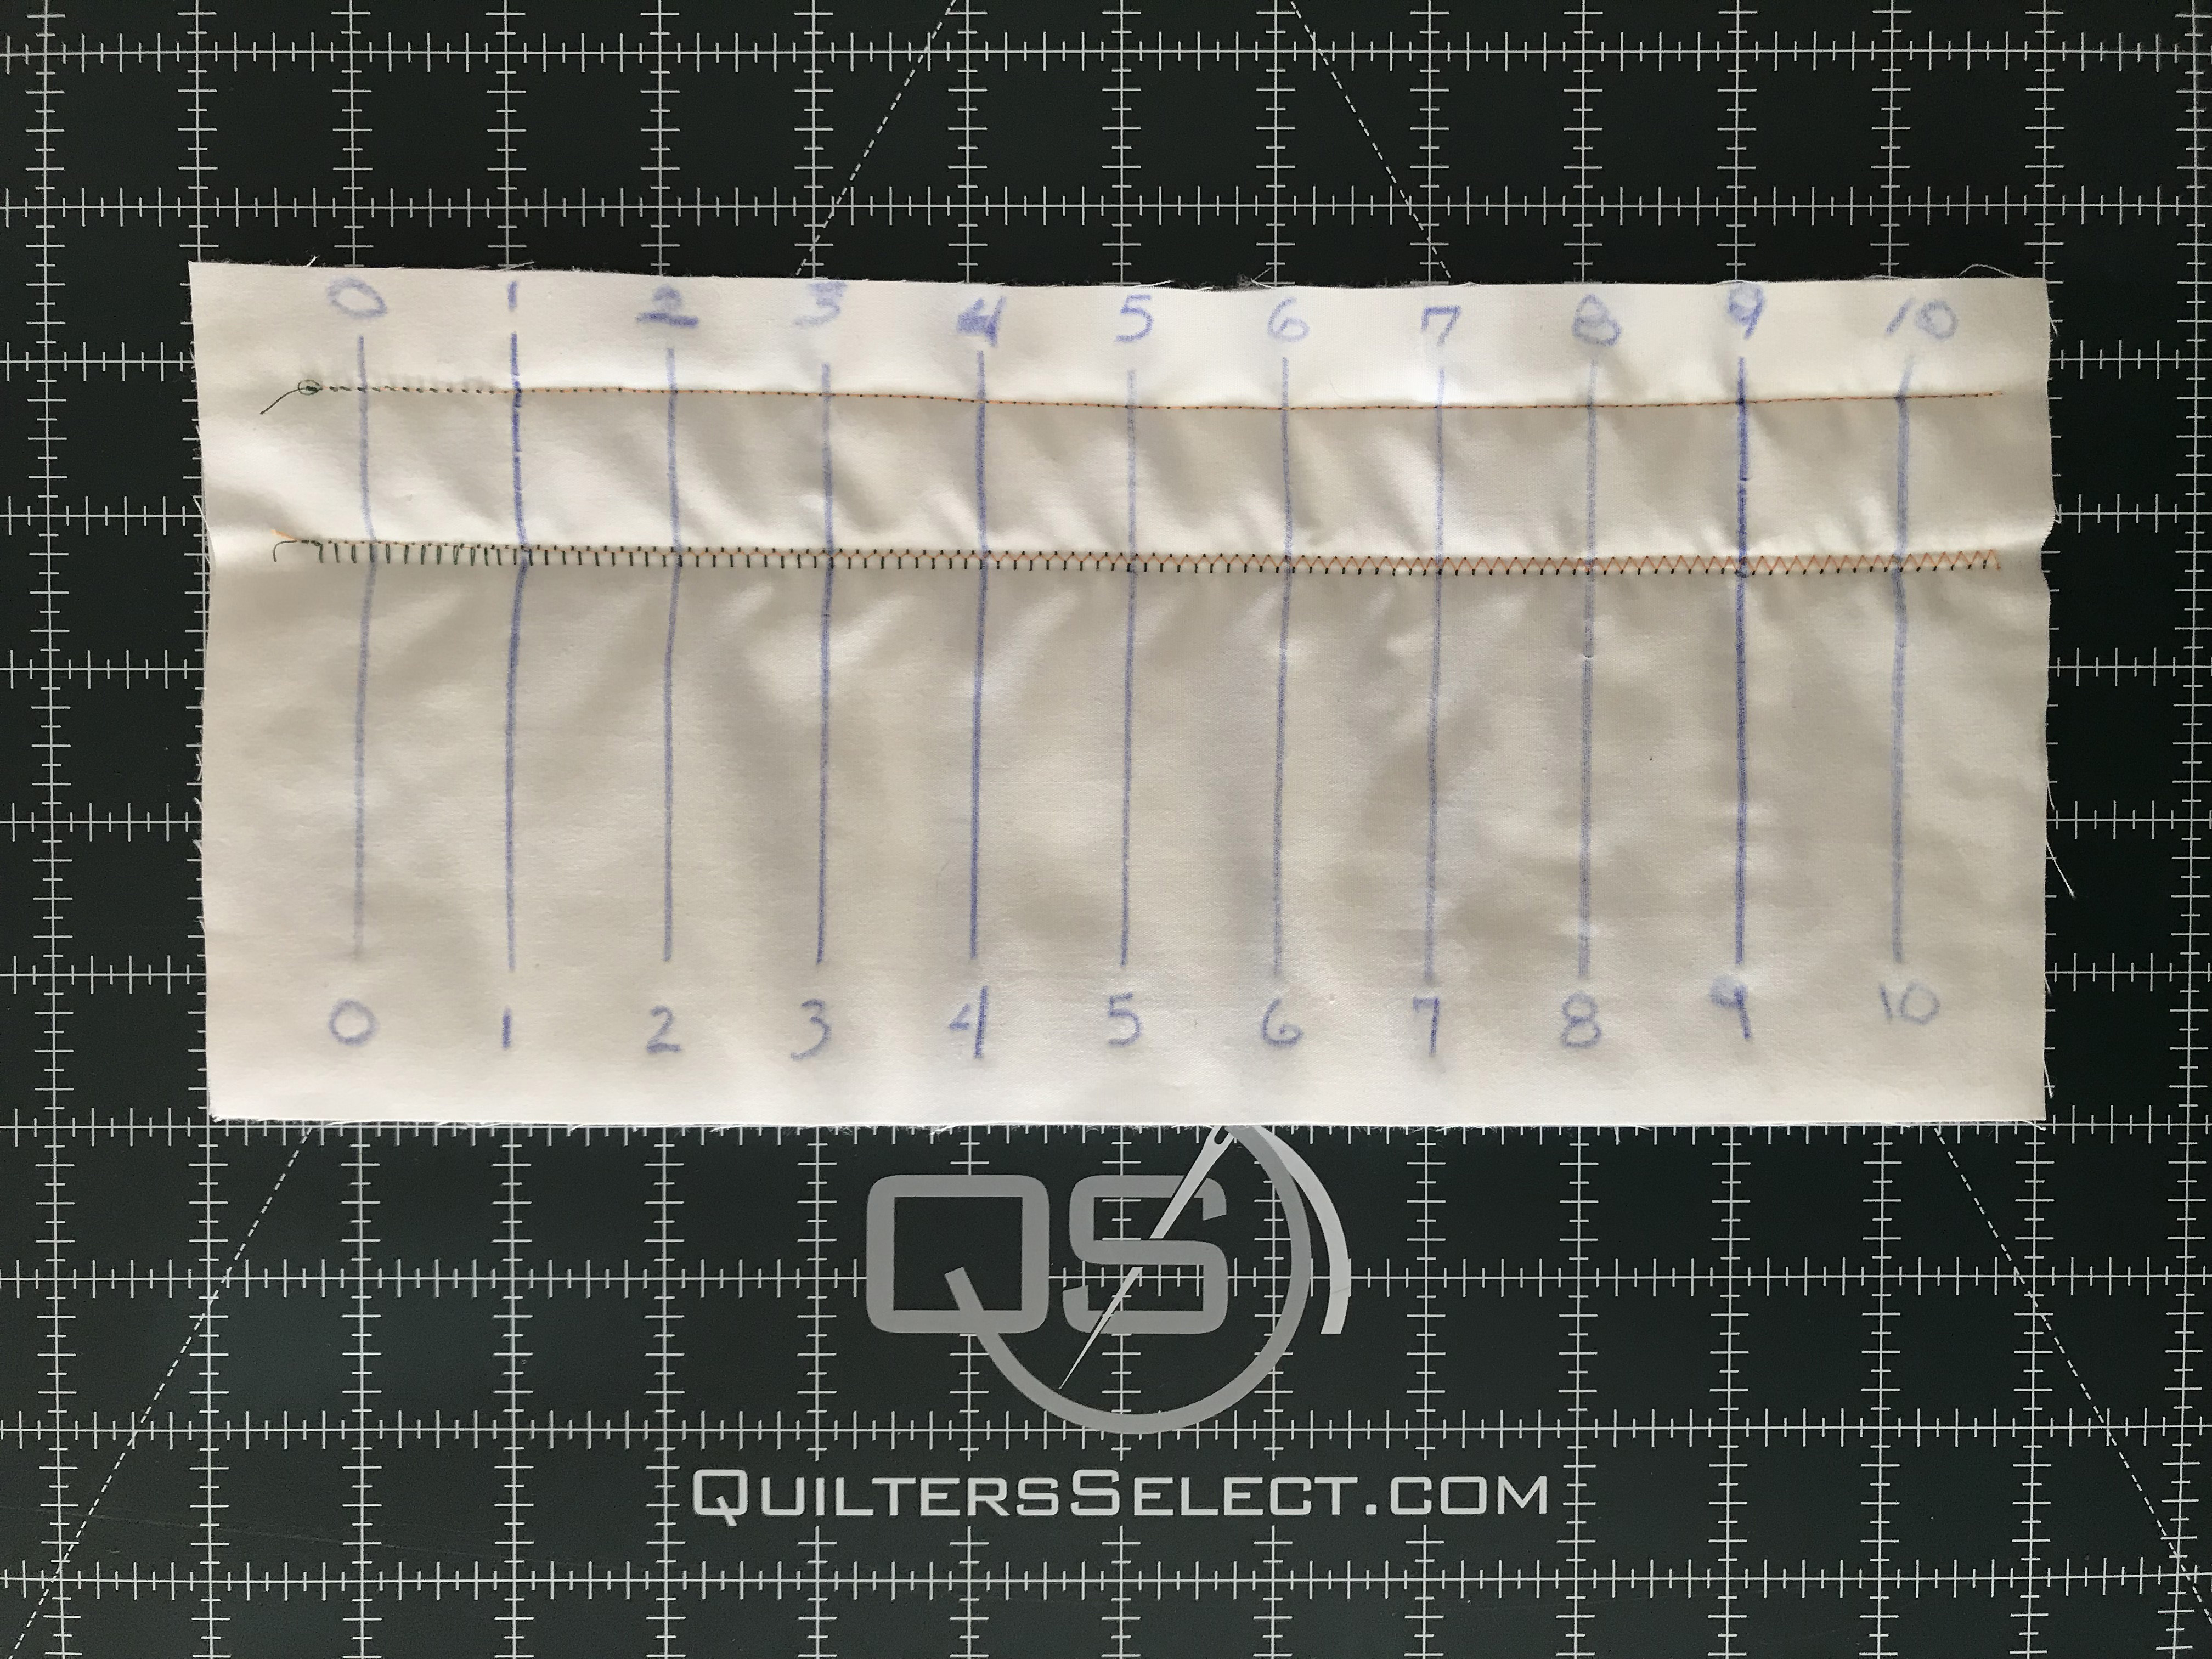
Create an Effective Test Swatch
Cut a 6×6 inch square of your project fabric and fold it in half to mimic actual sewing conditions. Load contrasting thread colors in the needle (say, blue) and bobbin (red) to make tension issues immediately visible. Stitch a straight line at medium speed using your normal presser foot pressure—this isn’t about perfect stitching but consistent tension evaluation.
Read Your Stitch Results Accurately
Perfectly balanced tension shows identical stitch appearance on both fabric sides—no loops, puckers, or visible thread from the opposite side. If you see loops on the fabric underside, your upper tension is too loose. When bobbin thread shows on top, upper tension is too tight. Bobbin tension problems reverse these patterns: loose bobbin tension creates top-side loops, while tight bobbin tension pulls upper thread to the underside.
Document Your Baseline Settings
Before making any changes, record your current tension dial position. Most Brother machines ship with factory settings at 4.5 for general sewing—a reliable starting point. Note any special settings you’ve previously adjusted for specific projects. This documentation becomes invaluable when troubleshooting or returning to familiar settings after experimenting with challenging fabrics.
Adjust Upper Thread Tension Like a Pro
Increase Tension to Fix Underside Loops
When loops appear on the fabric’s underside, gradually increase upper tension by turning the dial one number higher (from 4 to 5). Test-stitch another line on your swatch and examine both sides. Continue making single-number adjustments until stitches balance perfectly. Never jump multiple numbers at once—Brother machines respond best to incremental changes. Avoid exceeding setting 7 unless working with very heavy threads, as higher settings frequently cause thread breakage.
Decrease Tension for Top-Side Bobbin Thread
If bobbin thread shows on the top surface, reduce upper tension by turning the dial one number lower (from 5 to 4). Always make these adjustments while the presser foot is raised, which opens the tension discs for proper adjustment. Test after each change—different threads and fabrics require unique tension levels. What works for quilting cotton will differ dramatically from settings needed for stretch knits.
Reset to Optimal Default Position
Most Brother sewing machines perform best at tension setting 4-5 when using standard 50-weight all-purpose thread. After completing project-specific adjustments, return to this baseline unless you’ve documented a successful alternative setting. This practice prevents confusion on your next sewing session and ensures consistent starting points for future projects.
Balance Bobbin Tension Only When Necessary

Test Bobbin Tension Before Making Changes
Remove the bobbin case and hold it by the thread tail. A properly adjusted bobbin should descend 1-2 inches when gently bounced—not plummeting rapidly (too loose) nor remaining completely stationary (too tight). This simple test determines whether bobbin adjustment is truly needed before you touch that tiny screw.
Make Precise Bobbin Micro-Adjustments
Using a specialized small screwdriver (often included with your Brother machine), turn the bobbin tension screw only 1/8 turn at a time. Clockwise turns tighten tension; counterclockwise loosens it. After each minuscule adjustment, reinsert the bobbin and test-stitch. These screws are incredibly sensitive—what looks like a barely perceptible turn creates significant tension changes.
Know When Bobbin Adjustment Is Actually Required
Reserve bobbin tension changes for persistent issues that upper tension adjustments can’t fix. Common scenarios requiring bobbin adjustment include using specialty threads like metallics or heavy topstitching thread, or when consistently sewing with extremely thick or thin fabrics. For 95% of sewing projects, upper tension adjustments alone will solve your problems.
Troubleshoot Common Tension Problems Quickly
Fix Thread Breakage Issues Effectively
Upper thread breaking typically indicates excessive tension—reduce by 1-2 numbers immediately. If the machine struggles to thread the needle, your tension is likely too tight for the thread weight. Try switching to a larger needle size before making dramatic tension changes. Always verify thread quality first—old or low-quality thread breaks regardless of perfect tension settings.
Eliminate Fabric Puckering Completely
Fabric puckering usually signals overly tight tension. Reduce upper tension gradually while testing on scrap fabric until the fabric lies flat. If puckering persists after tension adjustment, check needle size compatibility—too small a needle creates similar symptoms. For lightweight fabrics like chiffon, reduce both tension and presser foot pressure simultaneously for best results.
Handle Specialty Threads Successfully
Metallic threads require significantly looser tension—start 2 numbers below your normal setting. Heavy topstitching threads need slightly increased tension (about 1 number higher). When using twin needles, balance tension so both needles create identical stitches—adjust individual needle tensions if your Brother model supports this feature. Always test specialty threads on scrap fabric before committing to your project.
Prevent Future Tension Problems Proactively
Clean Tension Discs Monthly for Consistent Results
Thread lint accumulates between tension discs over time, causing mysterious tension fluctuations mid-project. With the presser foot raised (which opens the tension discs), run dental floss or special cleaning thread through the tension mechanism. This simple 2-minute maintenance task prevents most unexplained tension changes and keeps your Brother machine running smoothly.
Check and Replace Needles Regularly
A bent, dull, or wrong-size needle creates tension-like symptoms that lead to unnecessary tension adjustments. Replace needles every 8-10 hours of sewing time, or immediately if you hear popping sounds while stitching. Use appropriate needle types—ballpoint for knits, sharp for wovens, and specialized needles for leather or vinyl—to maintain proper tension relationships.
Store Thread Properly to Maintain Quality
Thread stored in direct sunlight or high humidity loses elasticity and breaks easily regardless of perfect tension settings. Keep thread in sealed containers away from windows and moisture sources. High-quality thread makes tension adjustment much more predictable and successful—don’t blame your machine for problems caused by degraded materials.
Mastering tension on your Brother sewing machine transforms frustrating sewing sessions into satisfying creative experiences. Remember that tension adjustment is as much art as science—what works perfectly for one project will likely need tweaking for the next. Start with small, incremental changes, document successful settings for different fabric-thread combinations, and soon you’ll develop an intuitive sense for the perfect tension. Your beautifully balanced stitches will become the signature of professional craftsmanship in every creation you make, turning your Brother machine from a source of frustration into your most trusted sewing companion.


