Your Singer sewing machine can transform ordinary fabric into stunning decorative pieces with the right satin stitch technique. When properly executed on your Singer machine, this dense zig-zag stitch creates a smooth, satin-like surface that completely covers the fabric beneath. Whether you’re adding elegant borders, securing appliques, or creating personalized monograms, mastering satin stitch unlocks professional results without expensive embroidery machines. This guide reveals exactly how to achieve flawless satin stitches on your Singer model, from selecting the right foot to troubleshooting common problems.
Why Your Singer Machine Needs the Specialized Satin Stitch Foot (250060296.01)
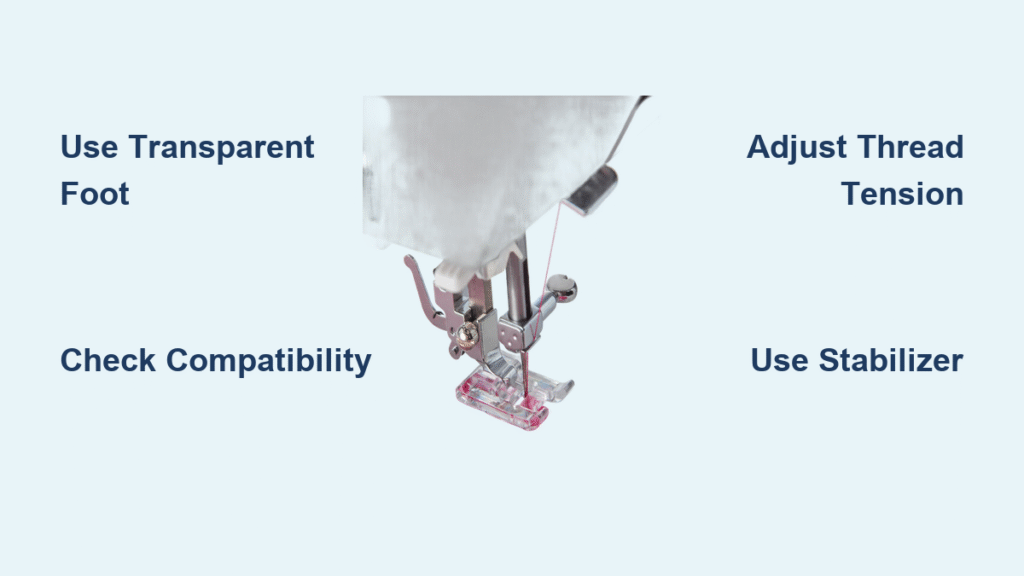
The SINGER® Satin Stitch Foot (model 250060296.01) solves the most frustrating satin stitch problems. Unlike standard presser feet that cause distortion on dense stitching, this transparent foot features a tunnel design that glides smoothly over your work. The crystal-clear construction gives you perfect visibility of each stitch formation, eliminating guesswork when following marked guidelines. This specialized foot accommodates up to 7mm stitch width across all compatible Singer models, allowing for dramatic decorative effects while maintaining consistent quality.
How the Transparent Design Prevents Stitch Distortion
When sewing satin stitch, standard presser feet often drag and distort your fabric as stitches build up. The satin stitch foot’s unique groove creates a smooth glide path that prevents this bunching. Position your fabric so the raw edge aligns with the groove’s center marking for precise satin stitch placement. The transparency lets you watch each stitch form in real-time, so you’ll immediately spot any tension issues before they ruin your project.
How to Verify Satin Stitch Foot Compatibility with Your Singer Model

Before investing in the specialized foot, confirm it works with your specific Singer machine. Many sewists make the mistake of purchasing the foot without checking compatibility, only to discover needle clearance issues during their first satin stitch project.
Quick Compatibility Test Before First Use
Perform this simple verification before attaching the foot to your project fabric:
- Snap the foot onto your Singer machine’s presser foot holder
- Lower the foot completely
- Hand-turn test – Rotate the hand wheel 4-6 times while watching the needle path
- Verify clearance – Ensure the needle moves freely through the foot’s groove without hitting edges
Complete Singer Models That Support Satin Stitch Foot
Computerized Machines:
– Brilliance series: 5400, 5500, 6160, 6180, 6199, 6699
– Confidence series: 7256, 7258, 7285Q, 7462-7469 series
– Quantum series: 9910, 9920, 9940, 9960, 9985
Mechanical Workhorses:
– Heavy Duty: 4411, 4423, 4432, 4452
– Tradition series: 2250, 2259, 2263, 2273, 2277, 2282
– Simple series: 3116, 3221, 3232, 3210, 3223
Advanced Models:
– Futura series: XL-400, XL-420, XL-550, XL-580
– Legacy series: EM200, SE300, SE340, C440Q
Correct Needle and Thread Setup for Flawless Satin Stitching

Your satin stitch quality depends entirely on proper needle and thread selection. Using the wrong combination creates skipped stitches, uneven tension, and fabric damage—common frustrations that make sewists abandon satin stitch projects.
Essential Needle Selection Guidelines
Choose needles based on your thread weight and fabric type. For standard sewing thread, an 80/12 universal needle works perfectly. When using heavier decorative threads, switch to 90/14 or 100/16 needles to prevent shredding. Always replace dull needles before satin stitch projects—this single step prevents most tension problems.
Critical Tension and Stitch Settings
Set your upper thread tension slightly looser than normal—about 3-4 instead of the usual 4-5. This adjustment pulls the upper thread underneath slightly, creating smoother stitches that completely cover the fabric. Set stitch length between 0.2-0.5mm for dense coverage, adjusting width between 2-7mm based on your design needs. For non-reversible projects, use lighter “bobbin” thread to reduce bulk on the wrong side.
Fabric Stabilizer Requirements You Can’t Skip
Always use stabilizer underneath your fabric to prevent puckering and tunneling. Tear-away stabilizers work best for most projects, while cut-away varieties support stretchy fabrics like knits. Test your stabilizer choice on scrap fabric before beginning your actual project—this prevents wasted time and materials when working with expensive fabrics.
Step-by-Step Satin Stitch Technique for Professional Results
Achieving perfect satin stitch requires specific techniques that differ from regular sewing. Following these precise steps transforms your Singer machine into a professional embellishment tool.
Preparation Phase: Marking and Test Swatches
Mark your stitching lines using water-soluble fabric markers. Align the satin stitch foot’s center marking at the front edge with your guidelines for precise placement. Create test swatches using your actual fabric and thread combination to dial in perfect settings—this prevents ruining your main project with incorrect tension or stitch length.
Stitching Technique: Speed and Fabric Control
Start with 3-4 securing stitches, then maintain steady speed while guiding fabric gently. Keep fabric taut but don’t stretch it—this causes puckering when the fabric relaxes. For curves, pivot frequently using the needle-down position. When approaching corners, stop with needle down, lift the presser foot, pivot the fabric, lower the foot, and continue stitching. Maintain consistent speed throughout—too fast causes uneven tension, while too slow creates jerky movement.
3 Creative Applications: Applique, Ribbon, and Elastic with Satin Stitch

The satin stitch foot unlocks creative possibilities beyond basic zig-zag stitching. These professional techniques work flawlessly when using the specialized foot.
Applique Attachment Method That Never Fails
- Apply double-sided fusible web to your applique shape
- Iron it onto your base fabric
- Place tear-away stabilizer underneath
- Stitch around the applique edges using satin stitch
The foot’s groove guides smoothly over the applique edges, creating professional-looking finishes that won’t fray.
Ribbon and Trim Application Made Simple
Mark your ribbon placement lines, then feed the ribbon through the foot’s underside groove. This built-in guide keeps ribbons perfectly aligned while you stitch. Adjust stitch width to cover the ribbon edges completely, creating secure, decorative attachment that stays in place through multiple washes.
Fixing Bobbin Thread Visibility on Satin Stitch Projects
Nothing ruins a satin stitch project like seeing bobbin thread on the right side. This common issue has a simple solution that works on all Singer machines.
The Tension Adjustment That Solves 90% of Problems
If bobbin thread appears on the right side, slightly loosen your upper thread tension—no more than half a number at a time. Test each adjustment on scrap fabric until the upper thread completely covers the bobbin thread. Never adjust bobbin tension first—this should be your last resort after trying upper tension adjustments.
Preventing Fabric Bunching During Satin Stitch Embroidery
Delicate fabrics like silk and satin often bunch during satin stitching, creating unsightly puckers that ruin your project.
Stabilizer Solutions for Problem Fabrics
When working with delicate fabrics, always use appropriate stabilizers. If bunching occurs, increase stabilizer thickness or switch to a lighter tear-away variety. Check that your stitch length isn’t set too short—this prevents proper fabric feed and causes tunneling. The ideal stitch length for most satin stitches is 0.3-0.4mm on Singer machines.
Daily Maintenance for Your Singer Satin Stitch Foot
Proper care extends your satin stitch foot’s life and maintains perfect stitch quality. Neglecting maintenance causes subtle performance issues that gradually degrade your results.
Essential Cleaning Routine After Each Use
After each satin stitch project, brush lint from the foot’s groove using a soft brush or compressed air. This prevents thread buildup that affects stitch quality. Store the foot in its protective case to prevent scratches on the transparent surface—scratches reduce visibility and make precise stitching difficult.
Advanced Satin Stitch Techniques for Experienced Sewists
Once you’ve mastered the basics, these professional techniques take your satin stitch to the next level.
Thread Experimentation for Dramatic Effects
Try heavy metallic threads with larger needles (100/16) for dramatic surface texture. Experiment with variegated threads for unique color effects—always test new thread combinations on scrap fabric first. Create textured effects by varying stitch width within the same design for professional-looking dimensional results.
Speed Control Strategies for Complex Designs
Use your Singer machine’s speed control slider to find your optimal rhythm, then maintain it consistently across your entire design. For intricate patterns, slow your speed to 30-40% to maintain perfect control. Practice on scrap fabric until you develop muscle memory for consistent speed—this separates amateur from professional results.
Mastering satin stitch on your Singer sewing machine transforms ordinary projects into heirloom-quality pieces. By using the specialized satin stitch foot correctly, selecting appropriate needles and threads, and following these precise techniques, you’ll achieve professional results that impress even experienced sewists. Remember to always test settings on scrap fabric first, use appropriate stabilizers, and maintain steady speed—these three practices prevent 95% of satin stitch problems. Your Singer machine has the capability to create stunning decorative stitching when you apply these proven techniques.


