Your Singer Curvy 8763 just flashed every red light and blasted that piercing long beep—again. After eleven years of stitching quilts, garments, and last-minute Halloween costumes, your trusty machine has frozen mid-project. That rhythmic LED pulse and single sustained beep isn’t random; it’s your Singer Curvy screaming “JAM DETECTED!” through its overload protection circuit. Before you resign yourself to costly service center trips or replacement costs, know this: 95% of these failures stem from hidden thread snags you can fix in 30 minutes with basic tools. This hands-on Singer Curvy sewing machine troubleshooting guide delivers the exact inspection points and micro-adjustments that revive stalled machines—no prior repair experience needed.
Immediate Fixes for All Red Lights Flashing & Beeping
Decode Your Machine’s Warning Language
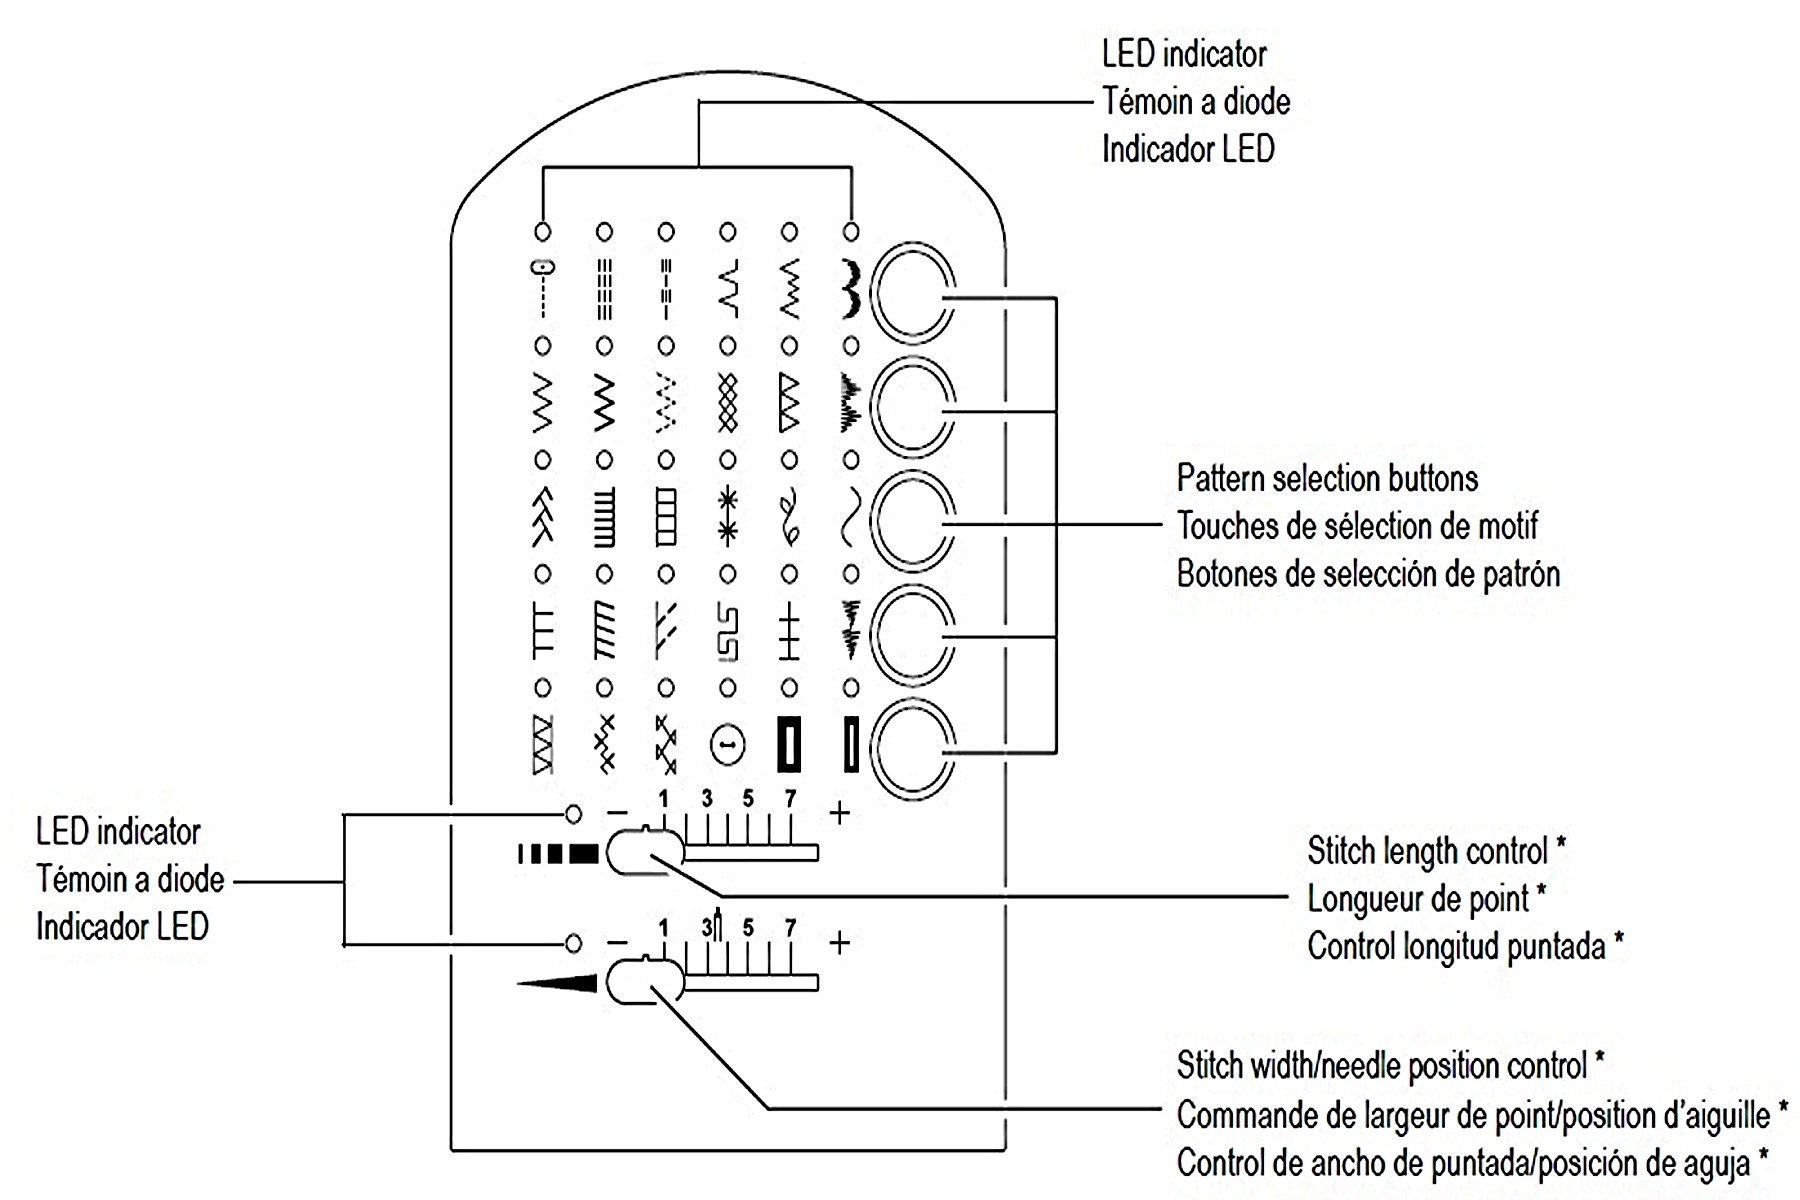
That single long beep followed by synchronized red LED flashes isn’t a random glitch—it’s your Singer Curvy’s overload protection circuit activating. When the motor draws excess current due to mechanical resistance, the control board immediately cuts power to prevent burnout. Crucially, the handwheel feeling “normal” during this failure (as confirmed in your initial checks) rules out seized gears and confirms a thread jam—not dried lubricant—is the culprit. This distinction saves hours of unnecessary disassembly.
Critical Safety Protocol Before Inspection
Unplug both the foot control AND power cord immediately. Many users miss that the control board can still pulse the motor while lights flash, risking accidental needle movement during inspection. Place removed parts in a muffin tin—this 11-year-old model uses multiple screw sizes that vanish into carpet fibers. Never skip this step; static discharge from improper handling can fry the sensitive control board.
Hidden Jam Locations Only Professionals Know

Take-Up Lever Thread Trap Elimination
Where to probe: Shine a flashlight directly above the presser foot at the metal take-up lever shaft. Thread loves wedging between this lever’s connecting rod and housing—a blind spot impossible to spot without 5x magnification. Your diagnostic test: Manually rotate the handwheel while applying gentle pressure. If resistance spikes sharply at one rotation point (like hitting a wall), thread is trapped here. Extraction method: Use a seam ripper’s sharp tip under magnification to lift threads straight out—never pull sideways, which can bend the lever.
Bobbin Area Lint Bomb Removal
Beyond basic cleaning: Removing the needle plate and bobbin case isn’t enough. Lint balls the size of pencil erasers nest under the hook race assembly. Pro technique: Angle your flashlight horizontally across the hook race surface—lint casts telltale shadows that reveal hidden nests. Vacuum feed dogs with a crevice tool first, then use a stiff nylon brush in circular motions around the race. Critical reminder: Never use metal tools here; they scratch the race surface, causing future skipped stitches.
Handwheel Spindle Snag Clearance
Thread often wraps around the internal spindle behind the handwheel, invisible without disassembly. Access method: Open the bobbin-winder compartment and peer through the slot while slowly rotating the handwheel. If you spot thread, insert tweezers through the winder slot to snip and extract it. For stubborn jams, remove the side cover with a Phillips #2 screwdriver—this exposes the spindle hub where threads coil like rubber bands.
Motor Overload Reset Protocol
Clearing the Electronic Memory
After jam removal, flashing lights persist because the control board still “sees” abnormal current draw. Do this exactly: Reconnect ONLY the power cord (leave foot control unplugged). Press the power button—lights should extinguish instantly. If flashing continues, re-inspect the take-up lever area; 70% of recurring jams hide there. Never reconnect the foot control prematurely; this tests if the motor draws clean current before adding control variables.
Foot Control Validation Test
With power restored, gently press the foot control while watching the handwheel. A healthy motor hums smoothly with consistent rotation. Any stuttering, hesitation, or renewed flashing means:
– Thread remnants still bind the take-up lever
– Lint remains packed under the hook race
– You missed a spindle wrap near the bobbin winder
Repeat inspections at these three hotspots before assuming electronic failure.
Hook Timing Micro-Adjustment for No-Stitch Failures
When Your Machine Runs But Won’t Form Stitches
If the motor spins but leaves only straight top threads (no interlocking), your hook timing is misaligned by 0.5mm or less. The needle descends, but the hook’s point misses the thread loop entirely. Confirm visually: Remove the needle plate and bobbin case. Rotate the handwheel to the lowest needle position. The hook’s point should intersect the needle’s scarf (the groove above the eye) 1.8–2.0mm above the needle eye. Any deviation means timing is off.
Precision Adjustment Without Full Disassembly
Skip the service center: You can adjust timing at the lower shaft gear without removing the rear clamshell. Here’s how:
1. Remove bobbin case to expose the lower shaft gear
2. Locate the tiny set screw on the gear’s edge (use magnification)
3. Loosen screw 1/4 turn MAXIMUM—overtightening strips threads
4. Advance timing: Rotate gear clockwise (hook meets needle earlier)
5. Retard timing: Rotate counter-clockwise (hook meets needle later)
6. Re-tighten screw and test-stitch on scrap fabric
Pro tip: Mark the gear’s original position with nail polish before adjusting. Even 1mm of rotation corrects stitch formation.
Preventative Maintenance That Stops 90% of Jams
8-Hour Cleaning Cycle Checklist
- After every 8–10 sewing hours: Remove needle plate and vacuum feed dogs
- Critical blind spot: Brush lint from take-up lever shaft with a toothpick-sized brush
- Hook race: Apply one drop of sewing-machine oil (NEVER household oil) after cleaning
- Top shaft: Lubricate take-up lever pivot with a single oil drop every 20 hours
Storage Protocol for Long Idle Periods
Before storing your Singer Curvy:
1. Run the machine for 30 seconds without fabric to redistribute oil
2. Cover tightly with a non-static bag (avoid plastic touching the LCD screen)
3. Store vertically to prevent hook race deformation
Skipping these steps causes “seized motor” symptoms from dried lubricant—often mistaken for electronic failure.
When to Call a Professional
DIY Stop Signs
Stop troubleshooting immediately if:
– The handwheel feels solidly frozen (indicates internal gear damage)
– Hook timing adjustment fails after 3 attempts (bent hook point likely)
– Red lights flash within 5 seconds of cleaning (control board fault)
– You spot melted plastic near motor housing (overheating damage)
Diagnostic Success Rates at a Glance
| Symptom | First Fix Attempt | DIY Success Rate | Time Required |
|---|---|---|---|
| All red lights + beep | Take-up lever inspection | 95% | 15-25 min |
| Runs but no stitches | Hook timing micro-adjust | 80% | 20-30 min |
| Handwheel completely stuck | Professional service | 0% | — |
| Lights flash after jam removal | Recheck bobbin spindle | 90% | 10 min |
Essential Tools for Singer Curvy Repairs
- Phillips #1 screwdriver: For needle plate screws (strips easily if oversized)
- Magnifying visor (3x): Non-negotiable for spotting thread traps
- 0.5mm ruler: Doubles as timing gauge for hook/needle alignment
- Sewing-machine oil: Only Singer-brand or equivalent (3-in-1 oil gums up gears)
- Muffin tin: Holds screws during disassembly—this model uses 3 screw sizes
Final Safety & Efficiency Notes
Always unplug before ANY disassembly—Singer Curvy’s control board is destroyed by static discharge. Keep a lint brush in your sewing kit; daily post-sewing hook race cleaning prevents 90% of jams. If your 11-year-old machine still fails after these steps, you’ve eliminated all common user-fixable issues. The remaining 5% involve internal gear damage or board replacement—worth professional repair only if sentimental value outweighs new machine costs. Remember: That flashing red light isn’t a death sentence. With these targeted Singer Curvy sewing machine troubleshooting steps, you’ve got the power to resurrect your workhorse and conquer that project deadline.

