
Your Singer sewing machine suddenly starts snapping needles like twigs or leaving messy thread nests under fabric. Before you call a repair shop, the culprit is likely out-of-time hook-and-needle synchronization—a fix you can handle yourself. When your Singer’s timing drifts by just 0.5mm, the hook misses the thread loop, causing skipped stitches or needle strikes. The good news? Most vintage and modern Singers follow the same universal 2.2mm needle-lift rule. With basic tools and this guide, you’ll restore perfect stitches in under an hour—no technician needed.
Timing determines exactly when the rotating hook grabs the top thread to form a stitch. If the hook arrives too early or late relative to the needle’s position, thread loops collapse. This commonly happens after hitting a thick seam or pin, but wear over time also shifts alignment. Ignoring it risks broken needles, damaged hooks, and ruined projects. Below, you’ll learn the precise measurement method used by Singer factory technicians since the 1930s—and why your Featherweight and industrial 42-5 share the same critical timing spec.
Spot Timing Failure Before You Adjust
Skipped stitches often stem from simple issues—don’t jump straight to timing adjustments. Rule out these common culprits first with a 90-second checklist:
- Install a brand-new size 90 needle with the flat side facing backward and fully seated in the clamp.
- Re-thread meticulously following your manual’s path—top thread must click into every guide.
- Confirm bobbin orientation: Horizontal-hook models (like 15s or 221s) require bobbins inserted clockwise; vertical-hook models (like 16Ks) need counterclockwise placement.
- Test for bent needles by rolling the shaft on glass—any wobble means replace it.
If thread loops still appear under fabric or you hear metallic clunks during sewing, your Singer’s timing is off. Proceed only after clearing these checks—many “timing issues” are actually thread tension errors.
Why Needle Strikes Demand Immediate Timing Repair
When the hook physically hits the needle, it’s a race against damage. Each strike:
– Wears microscopic grooves in the hook tip, worsening thread skips
– Bends the needle bar, causing permanent misalignment
– Cracks plastic gear teeth in modern machines (like 416s)
Stop sewing immediately. Continuing risks $150+ repairs for a $0 fix.
Grab These 5 Non-Negotiable Tools

| Tool | Critical Purpose | Model-Specific Tip |
|---|---|---|
| New size 90/14 needle | Eliminates faulty-needle variables | Industrial 42-5: Use 16×63 needles |
| Metric ruler or caliper | Measures exact 2.2mm needle lift | Featherweights: 1/32″ = 0.79mm—avoid imperial! |
| 2mm/4mm Allen keys | Loosens hook-drive screws without stripping | Class 15: Use 2mm; 16K: 4mm + 8mm wrench |
| Bright LED flashlight | Illuminates hook-needle gap in dark cavities | Shine through bobbin window at 45° angle |
| Singer-branded oil | Lubricates only after reassembly | Never use WD-40—it dissolves hook race grease |
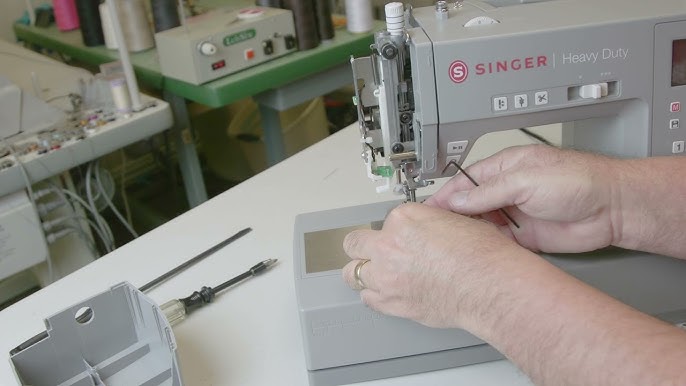
Pro Safety Move: Unplug your machine and photograph each disassembly step. Singer models hide screws under decals (like 201s) or inside the bed (like 16-188s). Sorting screws by location prevents misalignment during reassembly.
Position the Needle at 2.2mm Lift Point
This universal Singer spec—measured from bottom dead center (BDC)—is the heartbeat of timing. Get it wrong, and stitches fail. Here’s how to nail it:
- Rotate hand-wheel counterclockwise until the needle hits its lowest point (BDC). Mark this position with tape on the flywheel.
- Slowly raise the needle while measuring from the needle plate. Stop exactly at 2.2mm (0.093 inches). Use calipers for precision—most rulers lack 0.1mm graduations.
- Lock the hand-wheel with a rubber band to prevent movement.
Expert Note: On zig-zag machines (like 500-series), set to center straight stitch first. The needle must be perfectly vertical at this height—any tilt means replace the needle bar bushing.
Why 2.2mm Is Non-Negotiable
Singer engineers discovered this specific lift height creates the optimal thread loop size. At 2.0mm, the hook snags thread too early, causing breaks. At 2.5mm, the loop collapses before the hook arrives. This spec works identically for a 1933 221 Featherweight and a 1980s 42-5 industrial—proof of Singer’s legendary consistency.
Inspect Hook Position Through Bobbin Window

With the needle locked at 2.2mm lift, peer through the bobbin opening using your flashlight. Three visual cues confirm correct alignment:
- Hook tip must graze the needle’s scarf (the flat indentation above the eye) without touching it.
- The entire needle eye should be visible just above the hook point—like a keyhole above a key.
- Hook point centers directly behind the needle shaft—no left/right offset.
If the hook sits above the needle eye, it’s arriving too early. If it’s below, it’s late. Both cause skipped stitches but require opposite fixes.
Horizontal vs. Vertical Hook Models: Spot the Difference
- Horizontal hooks (Class 15, 66, 99, 201, 221): Hook rotates parallel to needle plate. Adjustment screws are visible after removing needle plate.
- Vertical hooks (16K, 16-188, 42-5): Hook spins perpendicularly. Access screws under the bed—requires turning machine on its side.
Adjust Hook Rotation Without Moving Needle
For horizontal-hook models (90% of home Singers):
1. Remove needle plate and loosen two set screws 90° apart on the hook drive gear (use 2mm Allen key).
2. Hold needle bar stationary with one hand—rotate only the hook until tip aligns with needle scarf.
3. Tighten screws in alternating 1/4-turn increments while checking alignment.
For vertical-hook models (industrial Singers):
1. Flip machine sideways and locate screws under bed (4mm Allen key + 8mm wrench).
2. Rotate hook drive shaft while monitoring through bobbin window—same alignment rules apply.
3. Re-tighten to 8 in-lb torque (snug but not forced).
Critical Warning: Never force the hook—it’s hardened steel. If stuck, apply one drop of penetrating oil and wait 10 minutes.
Fine-Tune Needle Bar Height for Vertical Misalignment
If the hook meets the needle but sits too high/low (e.g., hook tip aligns with needle shaft instead of eye), adjust needle bar height:
1. Loosen needle bar clamp screw at front of machine.
2. Slide bar up 0.5mm if hook is below needle eye; down 0.5mm if above.
3. Re-tighten clamp and re-check at 2.2mm lift.
Zig-zag machine pro tip: After setting straight-stitch timing, test at widest zig-zag width. If hook misses right needle position, lower bar 0.2mm—never adjust hook rotation here.
Verify Timing With Zero-Strike Test
Before reassembling, confirm your Singer won’t self-destruct:
1. Hand-wheel clockwise through two full rotations while watching hook-needle clearance.
2. Listen for clicks—any sound means contact. Backtrack to Step 4.
3. Thread machine and sew on denim scrap. Perfect stitches on both sides = success.
If loops reappear:
– Top-side loops: Hook too late—rotate hook slightly counterclockwise.
– Underside loops: Hook too early—rotate clockwise.
Make micro-adjustments (1-2° at a time).
Model-Specific Timing Shortcuts
Featherweight 221:
– Access hook screws through open-bed design—no disassembly needed.
– Use 1.6mm Allen key; screws are tiny but follow standard 2.2mm rule.
Industrial 42-5:
– Timing screw hides behind head-casting hole near needle bar.
– Confirm 16×63 needle compatibility—135×17 needles require 0.3mm bar height increase.
Singer 16-188 (Vertical Hook):
– Lubricate hook race with Singer oil before reassembly—dry races cause timing drift.
– Check pin through hub; some models have locking pins that must be removed first.
Reassemble and Prevent Future Timing Drift
Critical post-adjustment steps:
1. Replace feed dogs and needle plate—lint trapped here shifts timing.
2. Apply one drop of Singer oil to hook race and drive gears (never on timing screws).
3. Run machine slowly for 60 seconds to distribute oil.
Maintenance that prevents 90% of timing issues:
– After every needle strike: Check timing immediately—delayed fixes cause cascading damage.
– Weekly: Clean under bobbin case with soft brush to remove lint pushing parts out of sync.
– Industrial machines: Inspect hook clearance every 500,000 stitches (≈3 months heavy use).
Keep a 2.2mm gauge taped inside your accessory box—next timing drift becomes a 15-minute fix. Your Singer’s precision engineering deserves this simple care; master this skill, and you’ll keep generations of machines stitching perfectly.


