
Your Singer sewing machine grinds to a halt when the bobbin winder stops spinning, jams, or winds thread unevenly. That sudden silence mid-project leaves you stranded with tangled thread and unfinished seams. Whether you’re a hobbyist or professional, a malfunctioning bobbin winder derails your entire workflow. This guide delivers proven, step-by-step fixes for every common Singer bobbin winder issue—no guesswork or costly service calls needed. You’ll learn exactly how to diagnose the problem, apply immediate solutions, and prevent future breakdowns in under 15 minutes.
Why Your Singer Bobbin Winder Won’t Spin at All
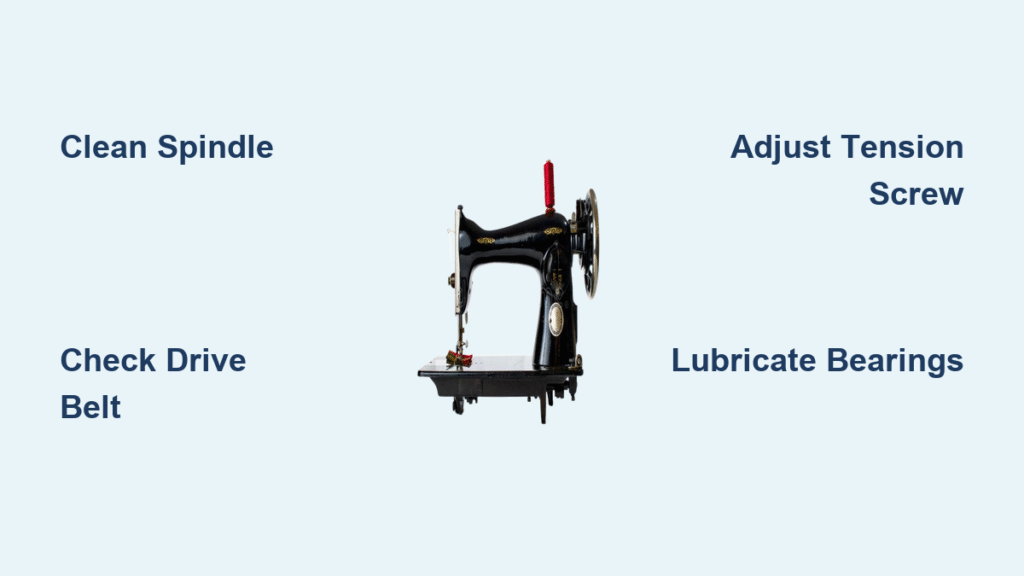
When the winder spindle refuses to budge, mechanical obstruction is almost always the culprit. Start with the spindle test: Power off your machine and gently try rotating the winder spindle by hand. If it feels stiff or frozen solid, dried oil, packed lint, or worn components are blocking movement. Forcing it risks damaging internal gears—never use excessive pressure.
Immediate Fix for Stuck Spindles
Apply one precise drop of sewing machine oil directly to the spindle base where it meets the housing. Rotate the spindle clockwise slowly for 30 seconds to work lubrication into the bearing. Wait 5 minutes for penetration, then test without thread. If resistance remains, lint buildup is likely jamming the mechanism. Use tweezers to remove visible thread fragments, then repeat the oil-and-rotate process. Critical mistake to avoid: Never use household oils—they attract lint and gum up precision parts.
Drive Belt Failure Signs
Listen closely when engaging the winder: a strained motor sound with zero spindle movement indicates belt issues. On most Singer models, the drive belt connects the main motor to the winder shaft behind the side panel. Check for these red flags:
– Visible belt slippage off pulleys
– Cracks or glazing on the rubber surface
– Excessive slack preventing tension
If you spot belt damage, stop immediately. Replacing it requires disassembly expertise—attempting this without proper tools often causes more damage. Schedule professional service unless you’ve repaired Singer internals before.
Stop Uneven Bobbin Winding in 3 Steps

Uneven thread distribution causes skipped stitches and tension nightmares mid-seam. Your first action must be verifying the thread path—Singer models vary significantly in bobbin winding threading sequences. Missing just one guide creates loose inner layers and tight outer coils. Consult your manual, but common pitfalls include:
- Skipping the thread guide above the winder
- Incorrect tension disc routing
- Forgetting the pre-tension spring
Master Speed Control for Perfect Wind
Run your Singer at medium speed consistently—no sudden acceleration or braking. Here’s the pro technique: Place your foot lightly on the pedal to maintain 40-50% speed (or turn the hand wheel steadily). Watch the thread feed onto the bobbin; it should move side-to-side smoothly. If thread piles up in one spot, your speed is too fast. If winding takes over 30 seconds per bobbin, you’re going too slow. Time-saving tip: Wind bobbins while cutting fabric pieces to maximize efficiency.
Guide Thread Like a Seasoned Seamstress
Hold the thread tail between thumb and forefinger with gentle tension—not pulling, just guiding. Move your hand slowly side-to-side to distribute thread evenly across the bobbin width. Visual cue: You should see a slight “V” shape forming on the bobbin as it winds. If thread stacks vertically, your hand guidance is too rigid. Practice this motion empty before threading your next bobbin.
Eliminate Chronic Thread Jams for Good
Long thread tails are the #1 cause of bobbin winder tangles. Always clip tails to 2-3 inches before starting. Longer strands wrap around the spindle base, creating impossible knots. Shorter tails won’t engage properly, causing slippage. Use sharp thread snips for clean cuts—frayed ends snag on guides.
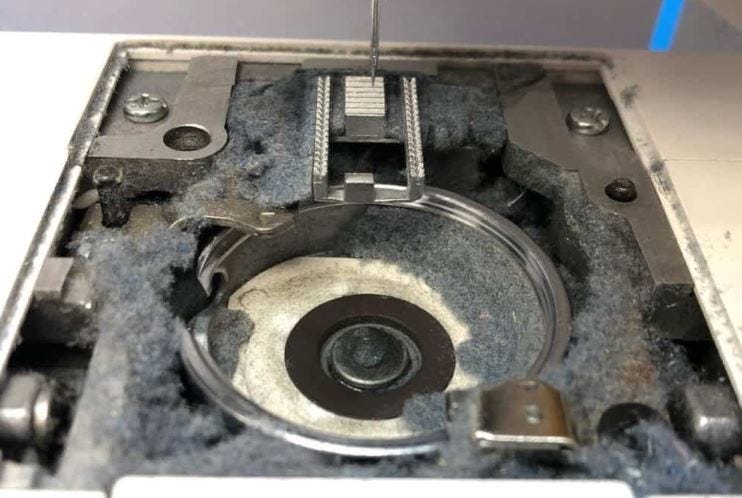
Weekly Cleaning Protocol to Prevent Jams
Lint buildup under the winder mechanism causes 70% of recurring jams. During heavy use, clean this area weekly:
1. Power off and unplug your Singer
2. Remove the needle and presser foot
3. Use compressed air or a small brush to clear:
– Spindle base crevices
– Thread guide grooves
– Tension disc slots
4. Wipe with a dry microfiber cloth
Pro tip: Keep a dedicated “bobbin brush” in your sewing kit—old toothbrushes work perfectly for this.
Engagement Technique That Prevents Slippage
Rushing winder engagement causes partial contact and slippage. Feel for the positive click by moving the winder lever slowly toward the wheel. On most Singer models, you’ll hear a distinct snap when fully engaged. If resistance feels mushy, disengage and retry—forcing it damages gears. Warning: Never engage while the machine is running; this can shear drive teeth.
Adjust Bobbin Case Tension Like a Pro

Uneven winding often stems from incorrect bobbin case tension. Perform the drop test: Hold the bobbin case by its latch with thread extended. The bobbin should descend slowly—unwinding 1-2 inches before stopping. If it plummets, tension is too loose; if it won’t budge, it’s too tight.
Micro-Adjustment Method That Works
Use a precision screwdriver on the small tension screw (usually marked with a “-” sign). Make quarter-turn adjustments only:
– Clockwise = tighter tension (use for loose thread nests)
– Counter-clockwise = looser tension (for thread breaks during sewing)
– Test after each turn by repeating the drop test
Critical rule: Never adjust tension while thread is wound on the bobbin. Always retest with a freshly wound bobbin using your project thread.
Deep Clean Stuck Winders Safely
When oiling fails, internal gunk demands disassembly. Power off and unplug completely—safety first. Remove the needle and presser foot. Consult your manual for side cover removal (typically 2-4 screws). Never force stuck panels.
Targeted Cleaning Checklist
Focus on these high-impact zones:
– Rubber winder tire: Check for cracks or glaze; clean with rubbing alcohol on cotton swab
– Drive gear teeth: Remove packed lint with tweezers (no metal tools!)
– Spindle bearings: Wipe with dry cloth until smooth
– Thread guides: Ensure no burrs snag thread
Avoid this mistake: Don’t submerge any parts in cleaner—it strips factory lubrication. Use only compressed air or a dry brush.
Precision Lubrication Steps
After cleaning, apply one microscopic drop of sewing machine oil to:
– Spindle bearing point
– Winder pivot joints
– Gear contact points
Run the machine empty for 1 minute to distribute oil, then wipe excess with microfiber cloth. Excess oil becomes a lint magnet within hours.
When to Call a Singer Repair Pro
Some issues require professional expertise. Seek immediate service if you notice:
– Grinding or clicking sounds during winding
– Visible cracks in the rubber winder tire
– Electrical sparks near the winder mechanism
– Repeated failures after 2 cleaning attempts
DIY vs. Service Decision Table
| Problem | Safe DIY Fix | Professional Required |
|---|---|---|
| First-time jam after months of use | Clean and oil | No |
| Weekly recurring jams | Deep clean winder | Yes if persists |
| Grinding noise during operation | Stop immediately | Always |
| Electrical smell | Unplug and discontinue use | Urgent |
Prevent Future Breakdowns With 5-Minute Habits
Clean the bobbin area after every project—not just when problems appear. Lint hardens into concrete-like blockages overnight. Keep a small brush beside your machine for 30-second daily cleanups. Monthly ritual: Remove all covers and clear lint traps using compressed air.
Storage Secrets for Longevity
Always cover your Singer when not in use—dust is the silent killer of precision mechanisms. Store wound bobbins in airtight containers to prevent humidity from affecting thread tension. Critical tip: Never store your machine in attics or garages where temperature swings crack rubber components.
Your Singer bobbin winder will deliver flawless performance for years when you follow these targeted fixes. Remember: uneven winding usually means threading errors, complete lockups need lubrication, and chronic jams demand weekly cleaning. Bookmark this guide—you’ll refer to it every time thread tangles threaten your next masterpiece. When in doubt, pause and clean before forcing mechanisms. Now go finish that project with confidence.


